

D365 Business Central: OAuth2 Setup and Automation – Part 4
Yo, After setting up token automation in Part 3, I realized the next bottleneck was the Entra app registration itself. I had to manually click through the Azure Portal, register the app, assign permissions, grant admin consent, and generate a secret. And if I wanted to poke around with their actual data, I had to do all that just to get started.
Before we dive in, if you’re reading this, thank you for being here. I appreciate you dropping by. So why am I continuing this blog series, and why are we now at Part 4? Simple: we couldn’t cover everything in one go. I still remember one of the earlier parts clocked in at 20 minutes HAHAHAHAHA.
But yo, you’ve got to admit, reading Parts 1 to 3 probably deepened your understanding of OAuth2, Azure, and Postman. If you had fun with those, you’re going to love what’s coming in Part 4 and beyond.
I’d love to hear your thoughts, by dropping a comment below the blog. And if you somehow skipped Parts 1 to 3, no worries. Here’s your chance to catch up:
- Part 1: Register Your Entra App, Assign Business Central Permissions, and Prepare for OAuth2 Token Testing
- Part 2: Configure Entra, Set Up Postman, and Validate OAuth2 Token Flow
- Part 3: Automate Token Retrieval and Variable Assignment Using Postman Scripts
Now, jumping into Part 4, imagine this: you just want to get started with API work, right? But instead, you’re stuck doing manual Azure registration. It’s time consuming, clerical, and soooooooooo boooooooooooooooooring. So many steps. Click here, assign that, grant this, generate that. It’s slow, error prone, and hard to document.
So I said nope. We’re not doing this the hard way anymore. I found a better path. One of the cleanest ways to automate this mess is through Azure CLI (that’s command line interface, for the curious). Now I just run a single script and bam bam boom, we’re done!
This guide walks through that exact setup, step by step, with real commands and expected outputs.
So what do you say—
Let’s grab our snorkel, suit up, and dive back in. This isn’t just scripting. It’s deep exploration. Let's freakin goooooooooooooooooo!
Overview:
There are plenty of docs and blogs out there explaining how to set up OAuth2 and consume it in Business Central. But this blog? It’s all about making our life easier.
I’ll only make a couple of assumptions before we get started:
- You have admin access to the target tenant
- You already know how to set up OAuth2, configure it in BC, and test it via Postman or any API tool out there (If not, grab a coffee and scroll up, those links will deepen your understanding of how this thing works)
- You can copy and paste a few commands into the command line
- You’ve got more than 5 minutes to spare. Let’s enjoy and have fun diving in.
What We’re Learning Today
To make things interesting, here’s what you’ll walk away with after reading this blog. If any of this sounds useful (or fun), stick around:
- Installing and authenticating Azure CLI
- Registering an Entra app using az ad app create
- Assigning Business Central API permissions
- Granting admin consent
- Generating a client secret
- Outputting client_id, client_secret, and tenant_id for Postman
Strategic Fit
Here’s where this setup really shines:
- Onboarding new tenants or sandboxes
- Resetting credentials for expired secrets
- Preparing Postman collections for token testing
- Automating setup for CI/CD pipelines
Install Azure CLI using Using WinGet (Windows Package Manager)
Before we begin, I’ll walk you through installing Azure CLI. There are a number of options to choose from, but for now, let’s go with the easiest one.
WinGet in a Nutshell
In case you’re wondering what exactly WinGet is: it’s short for Windows Package Manager. It’s Microsoft’s command line tool for managing software on Windows. You can install, update, search, and uninstall apps with simple commands. No more installers, no more clicking through setup wizards. Perfect for anyone who wants automation.
Now that you’ve got a quick background, let’s dive deep further.
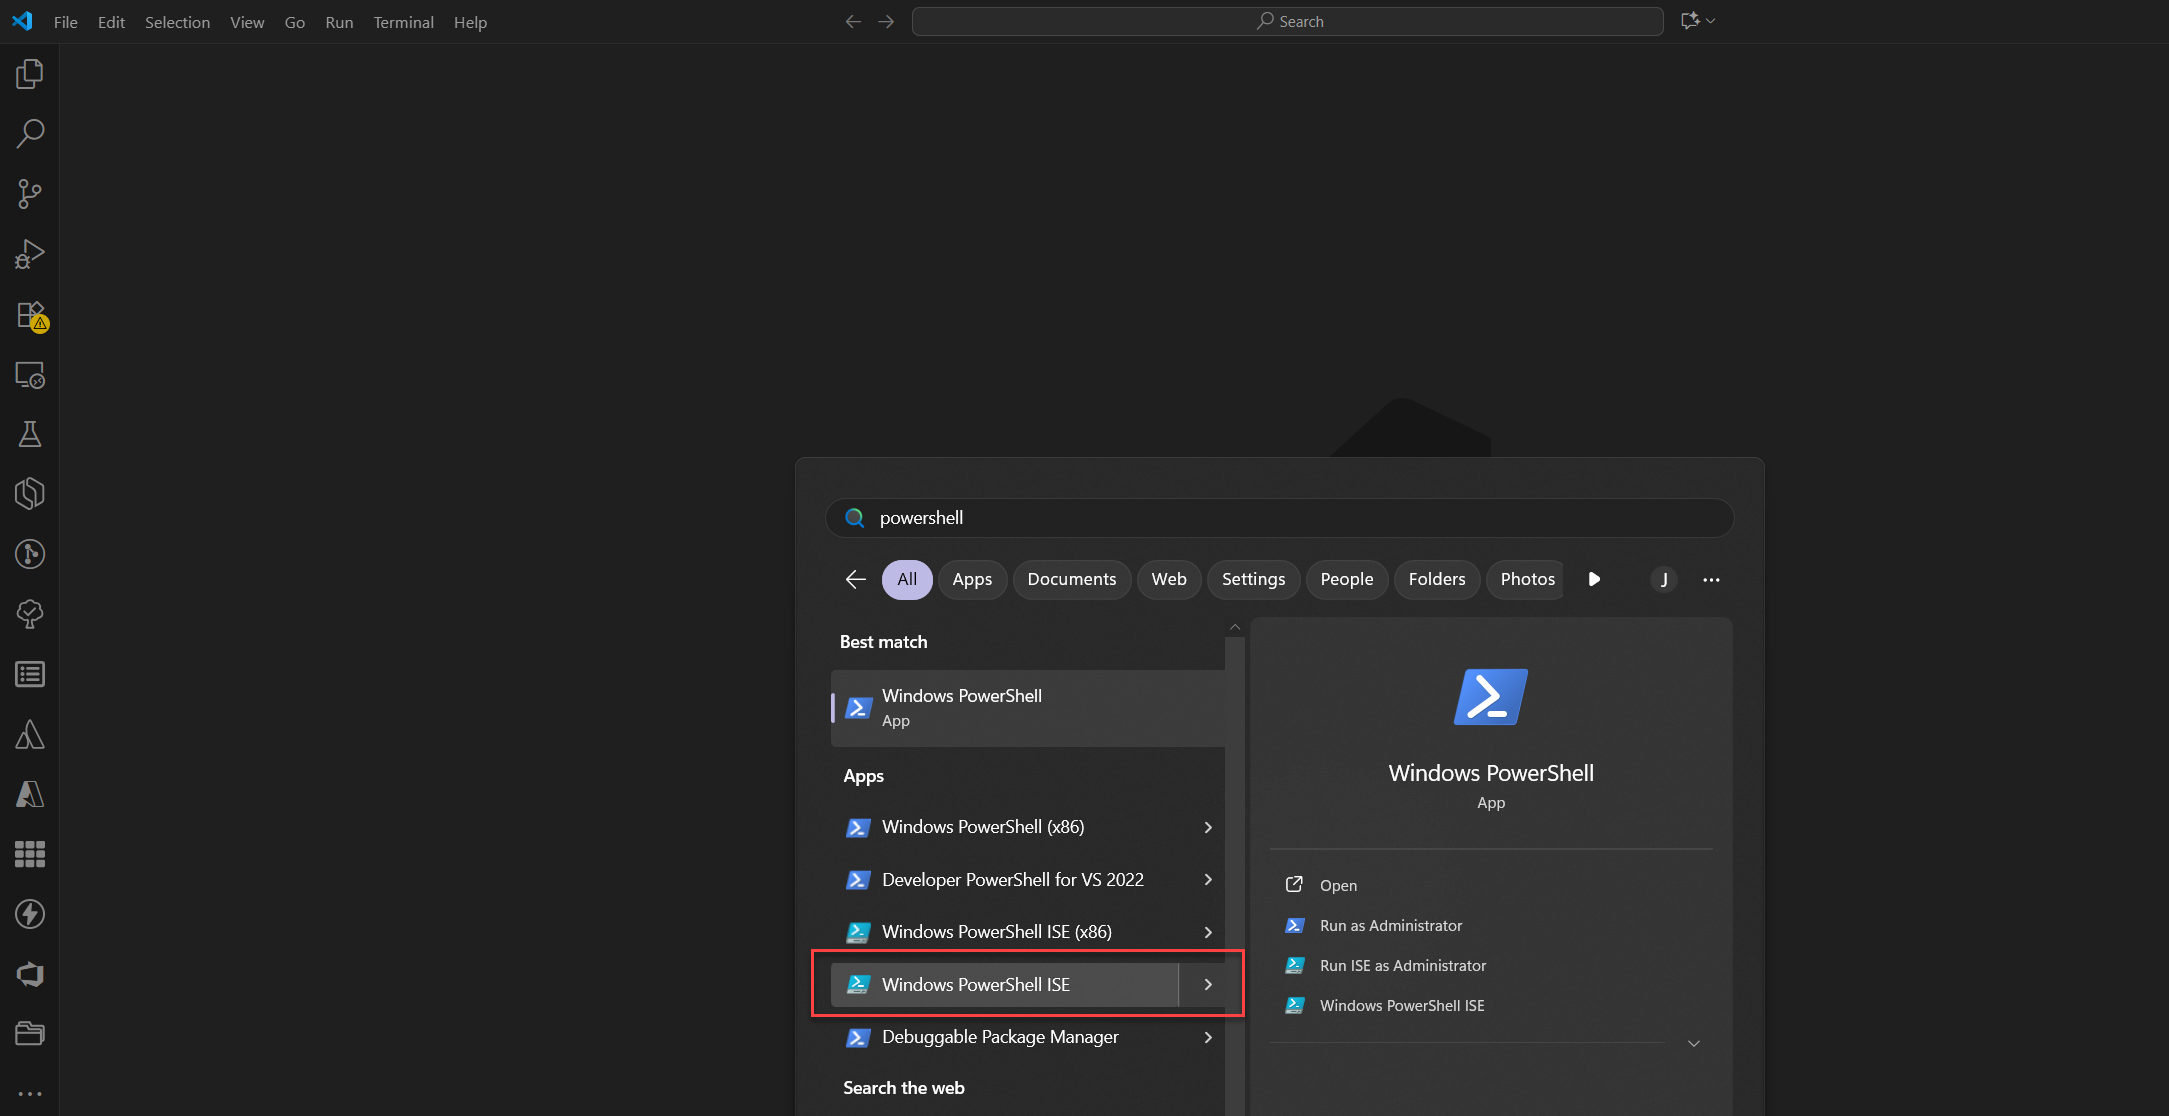
Open up Windows PowerShell ISE by clicking the Windows icon on your keyboard (assuming you’re on Windows), then type PowerShell.
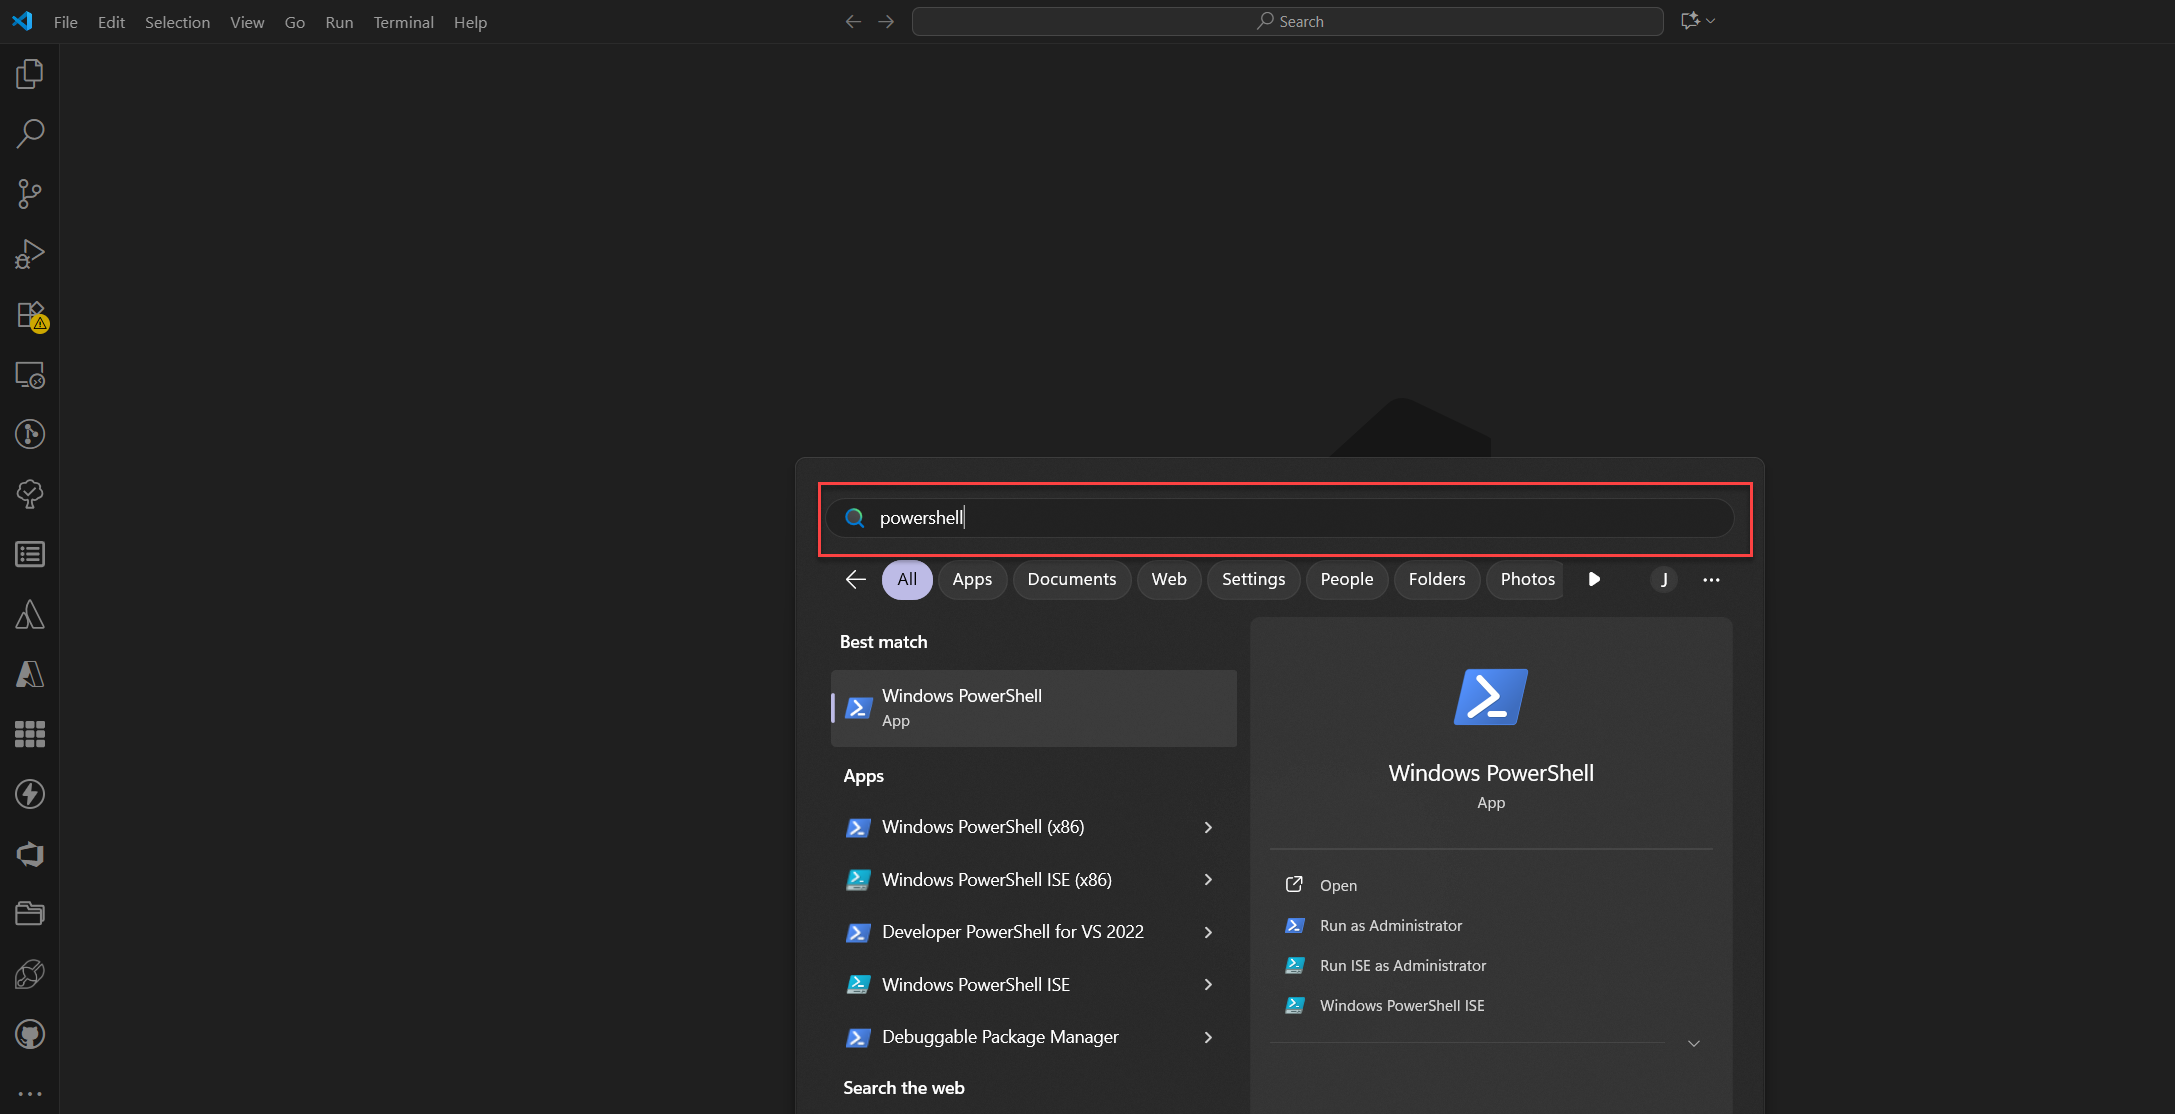
You’ll see both Windows PowerShell and Windows PowerShell ISE appear. For now, we’ll use the ISE version, not the terminal, since we’ll be pasting multiple lines of code.
Install Azure CLI via PowerShell
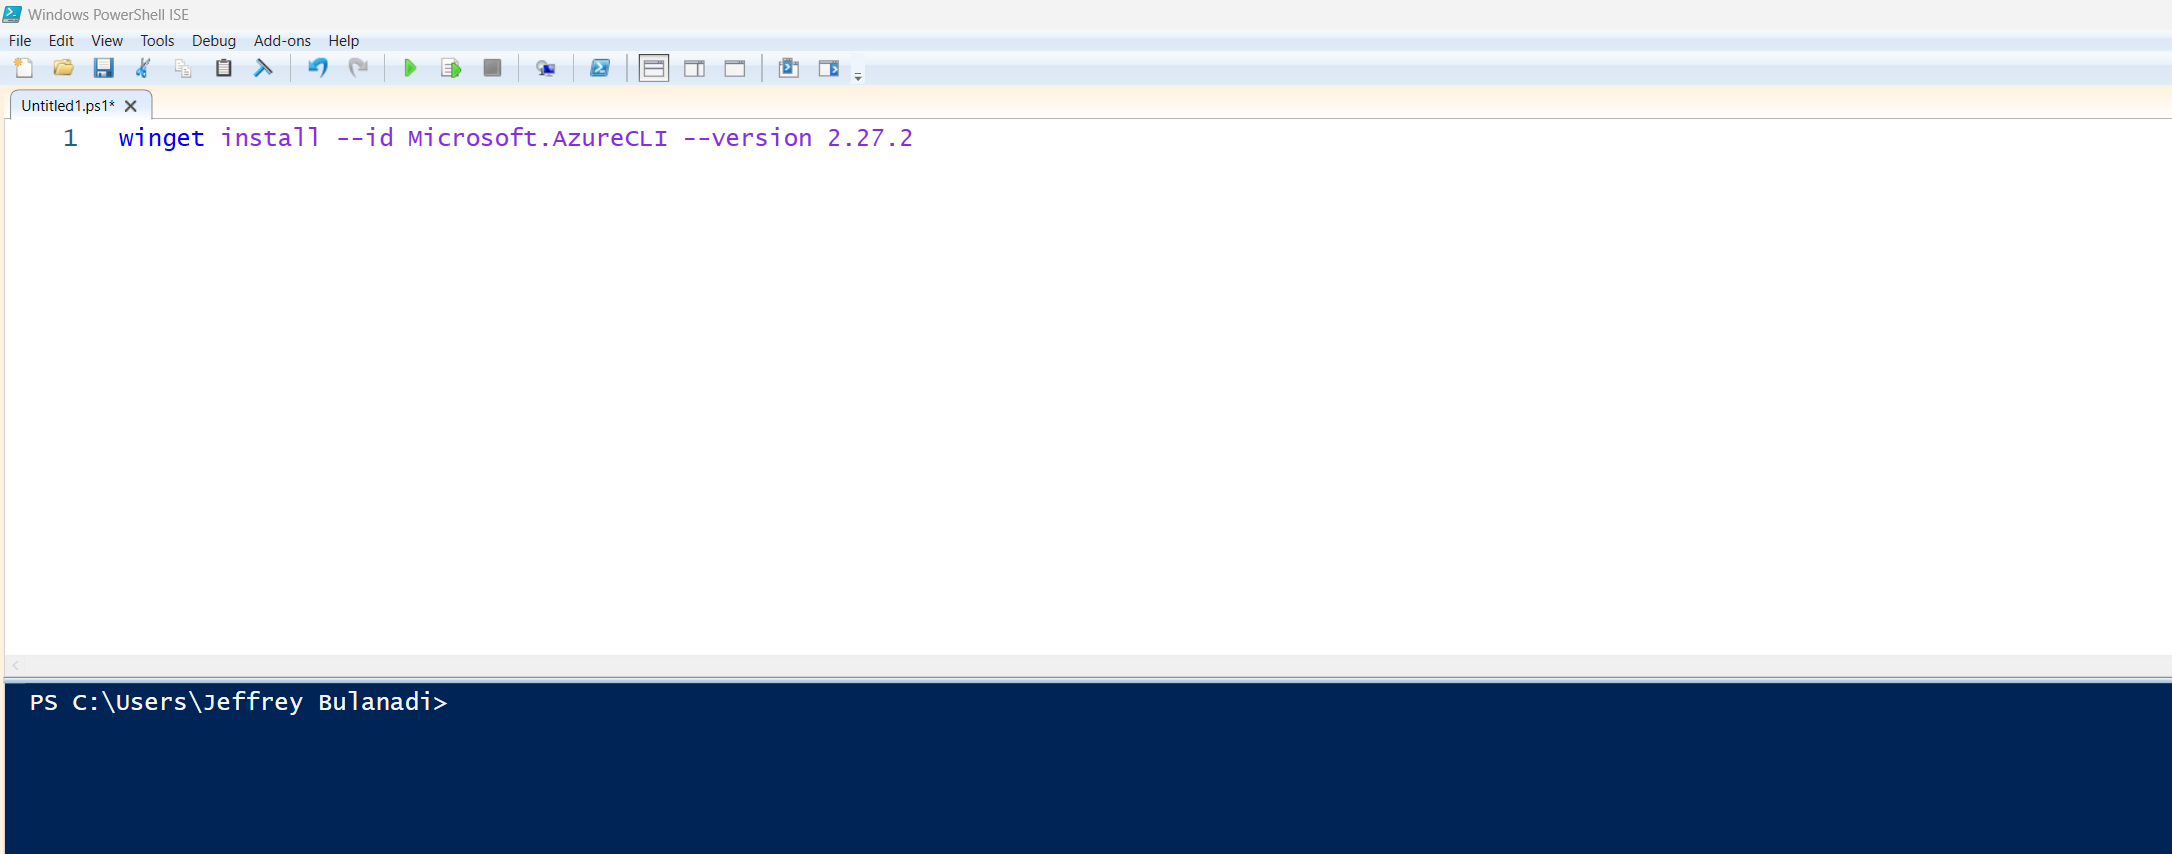
Copy and paste the code below into your PowerShell terminal:
winget install --id Microsoft.AzureCLI --version 2.27.2
Take note of that specific version. The command lines we’ll use in this guide are supported up to version 2.37.0. Why am I telling you this?
Because the latest version of Azure CLI won’t let us run these commands anymore. Microsoft has migrated to a new method of doing this.
(Spoiler alert: HAHAHAHA. Don’t worry, I’ll walk you through that in the next installment of our #BCSaturdayCodeHacks API Series. Baby steps for now.)
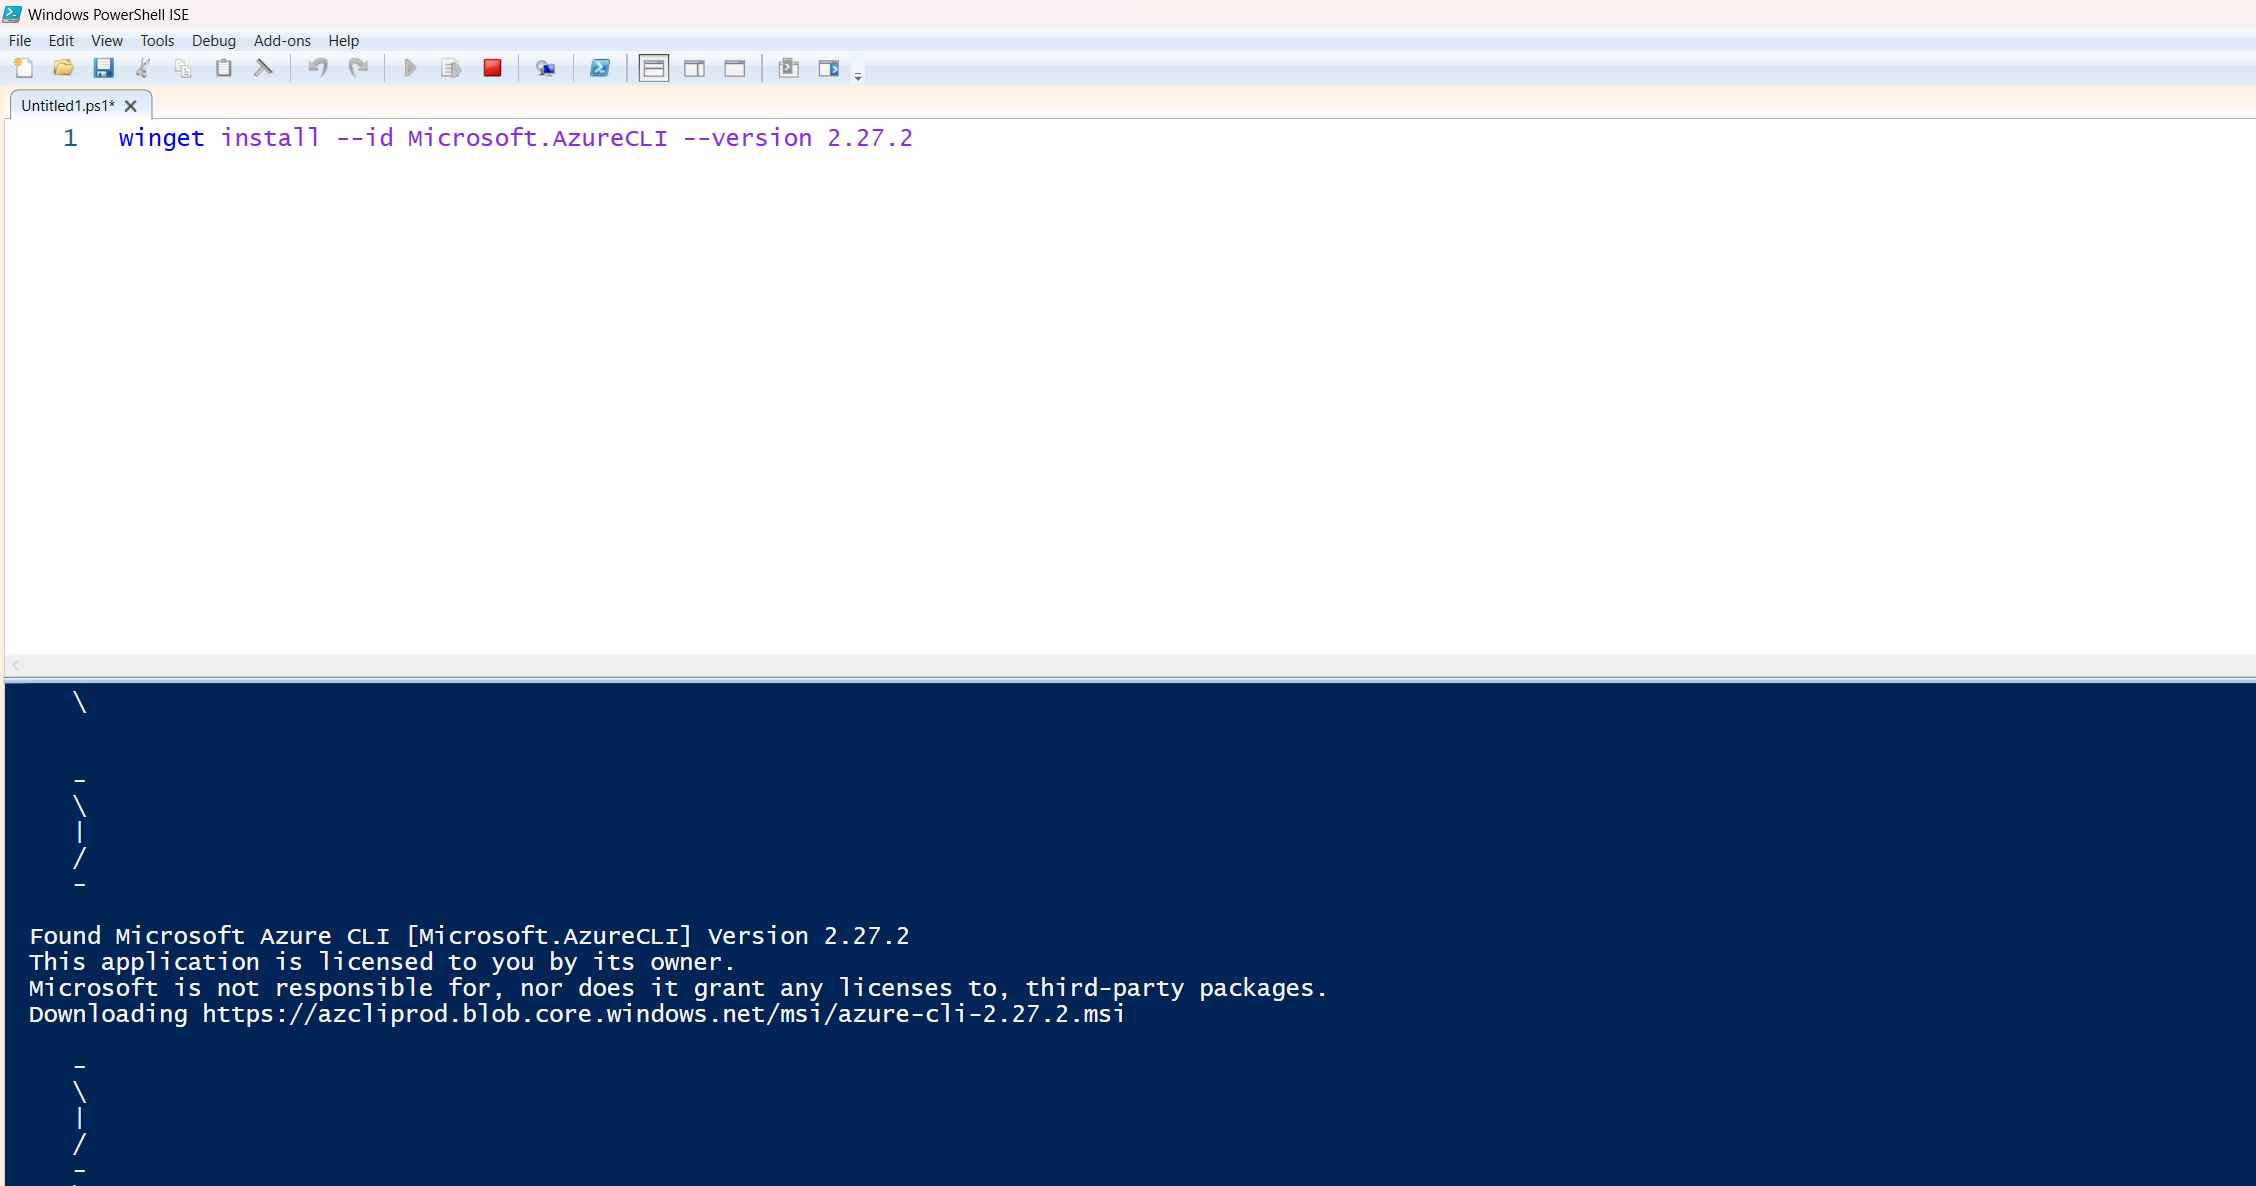
Behind the scenes, Windows Package Manager (winget) will install Azure CLI version 2.27.2 from its repository. Which, in this case, is an Azure Blob Storage, straight to your local machine.
What It Installs
Using the Azure CLI tool lets us manage Azure resources straight from the command line. It adds the az command to your system, so you can do things like:
az login
az ad app list
az ad app create
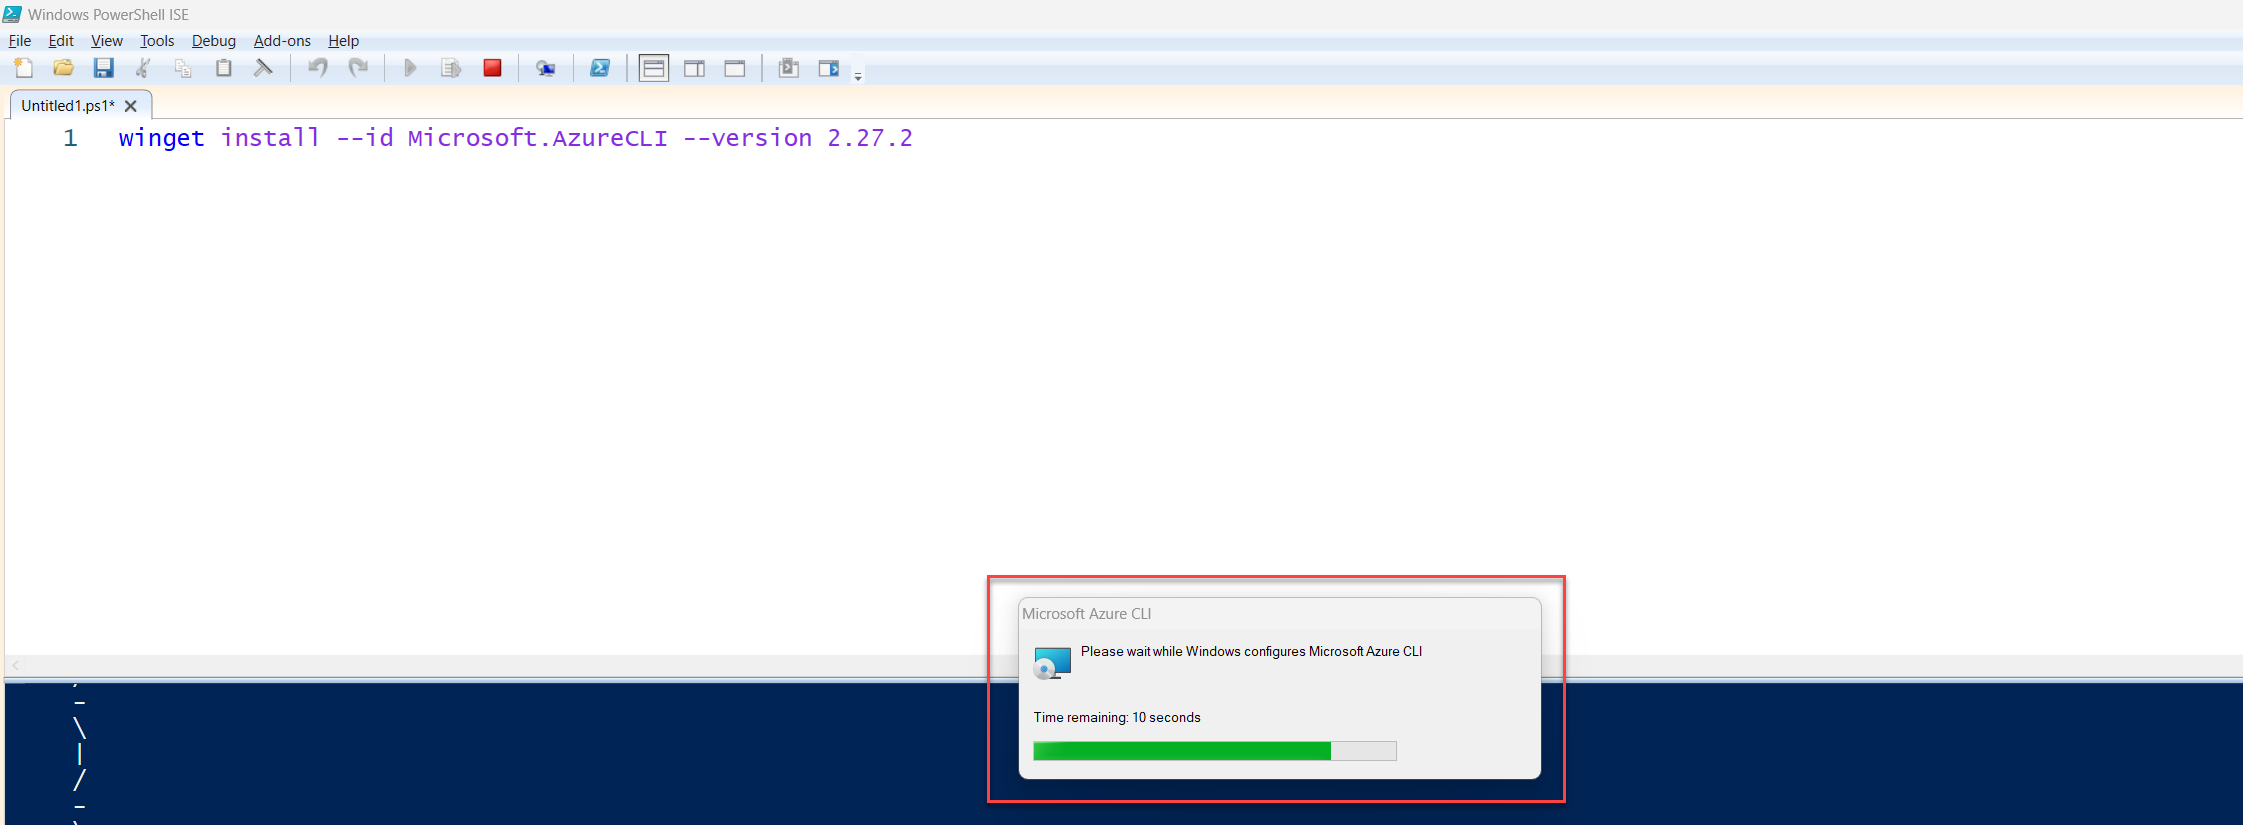
You’ll see a progress bar while it’s downloading.
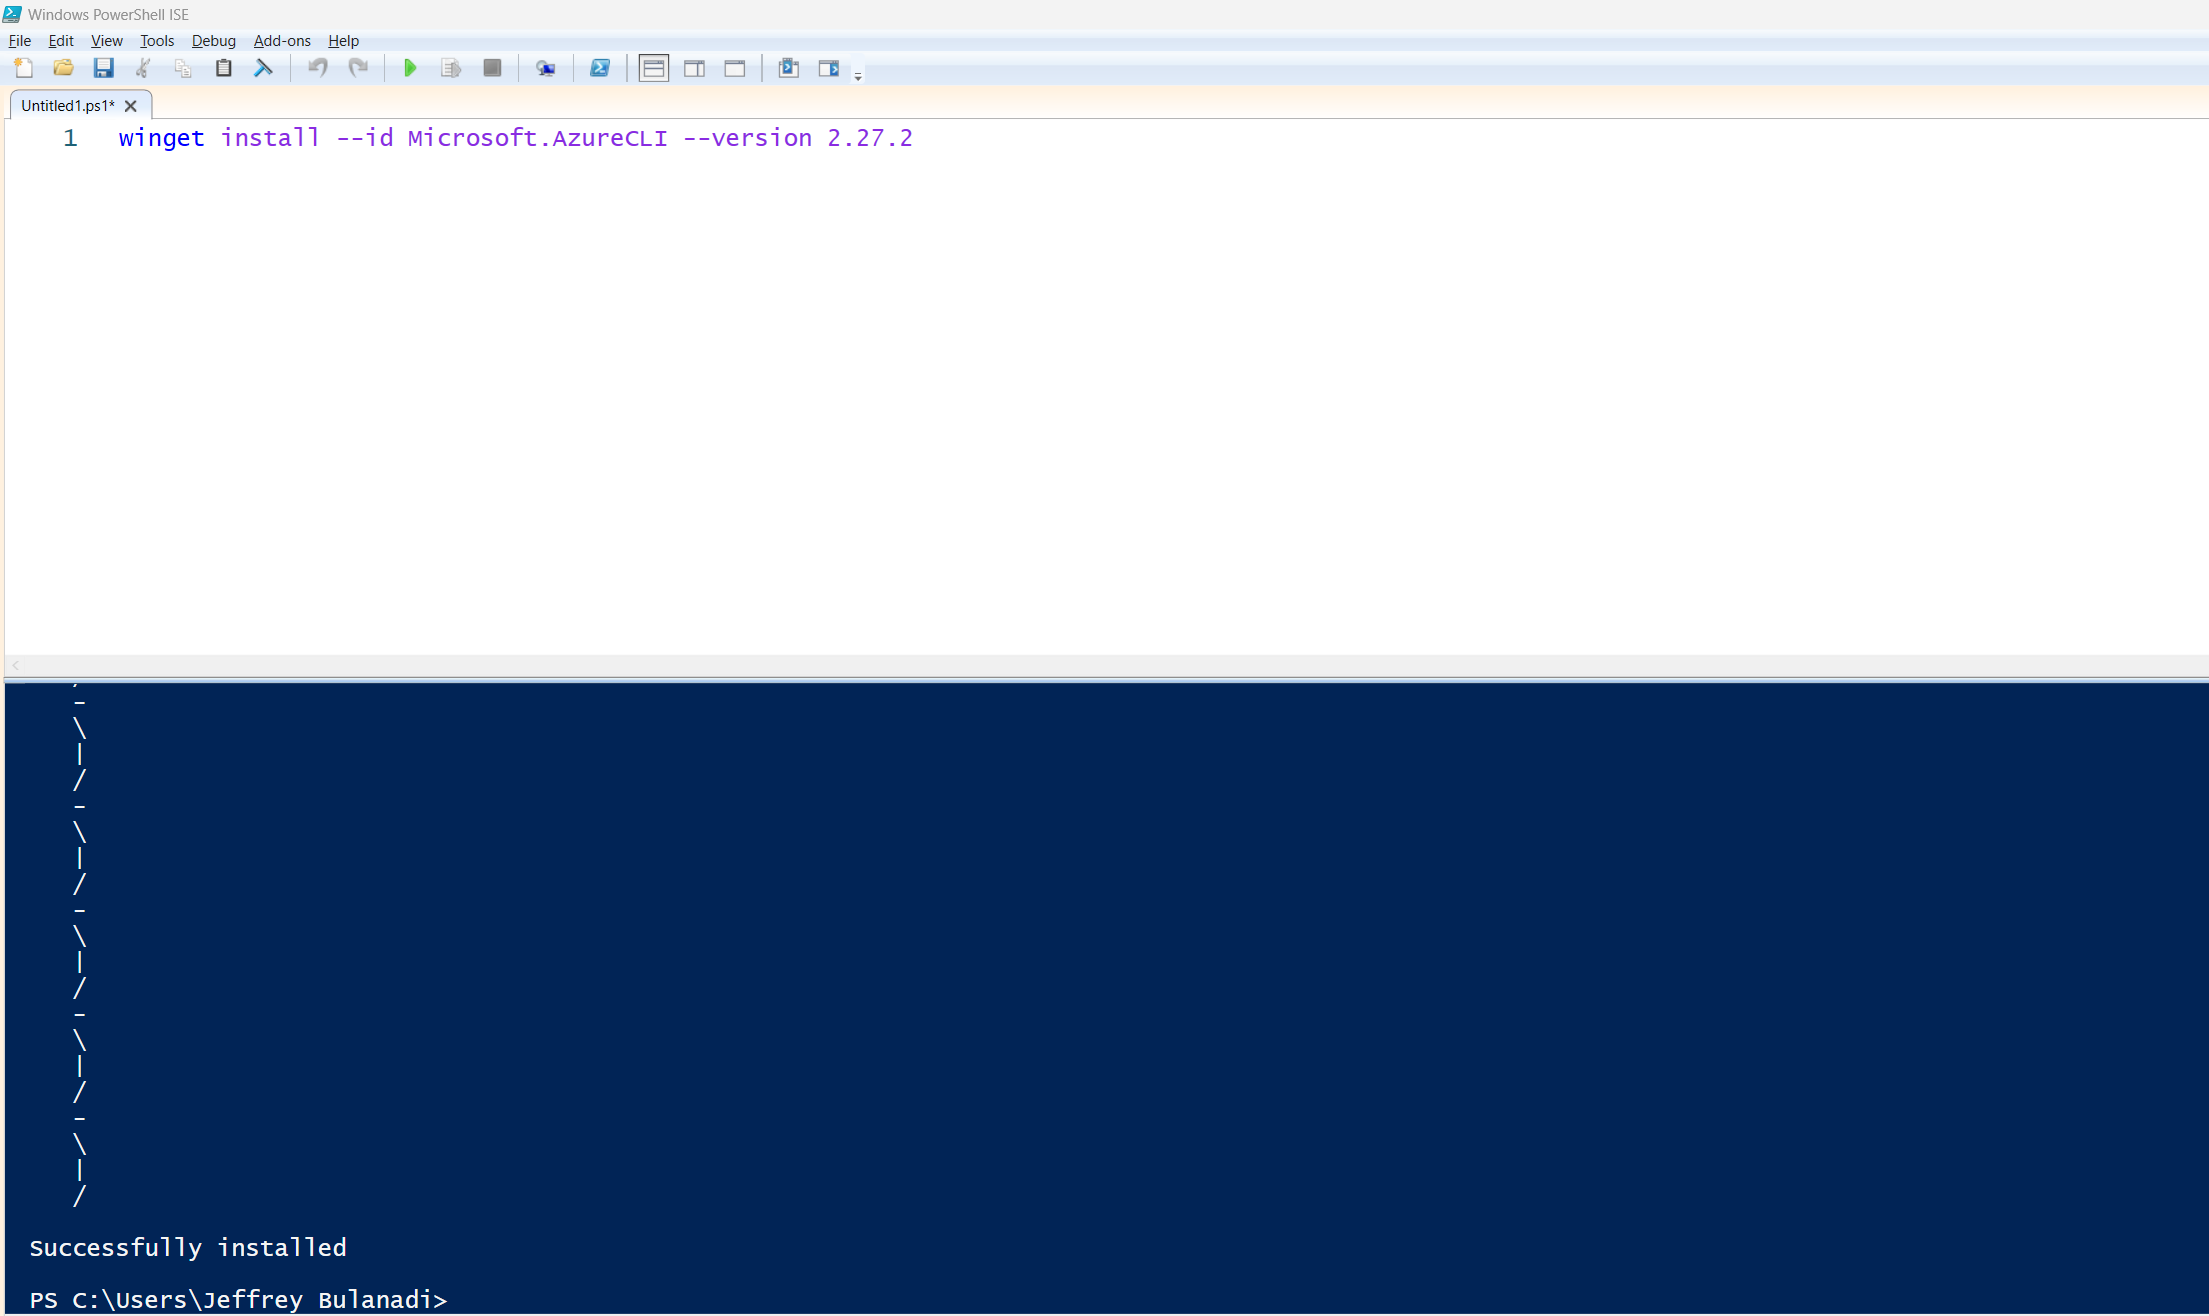
After Installation
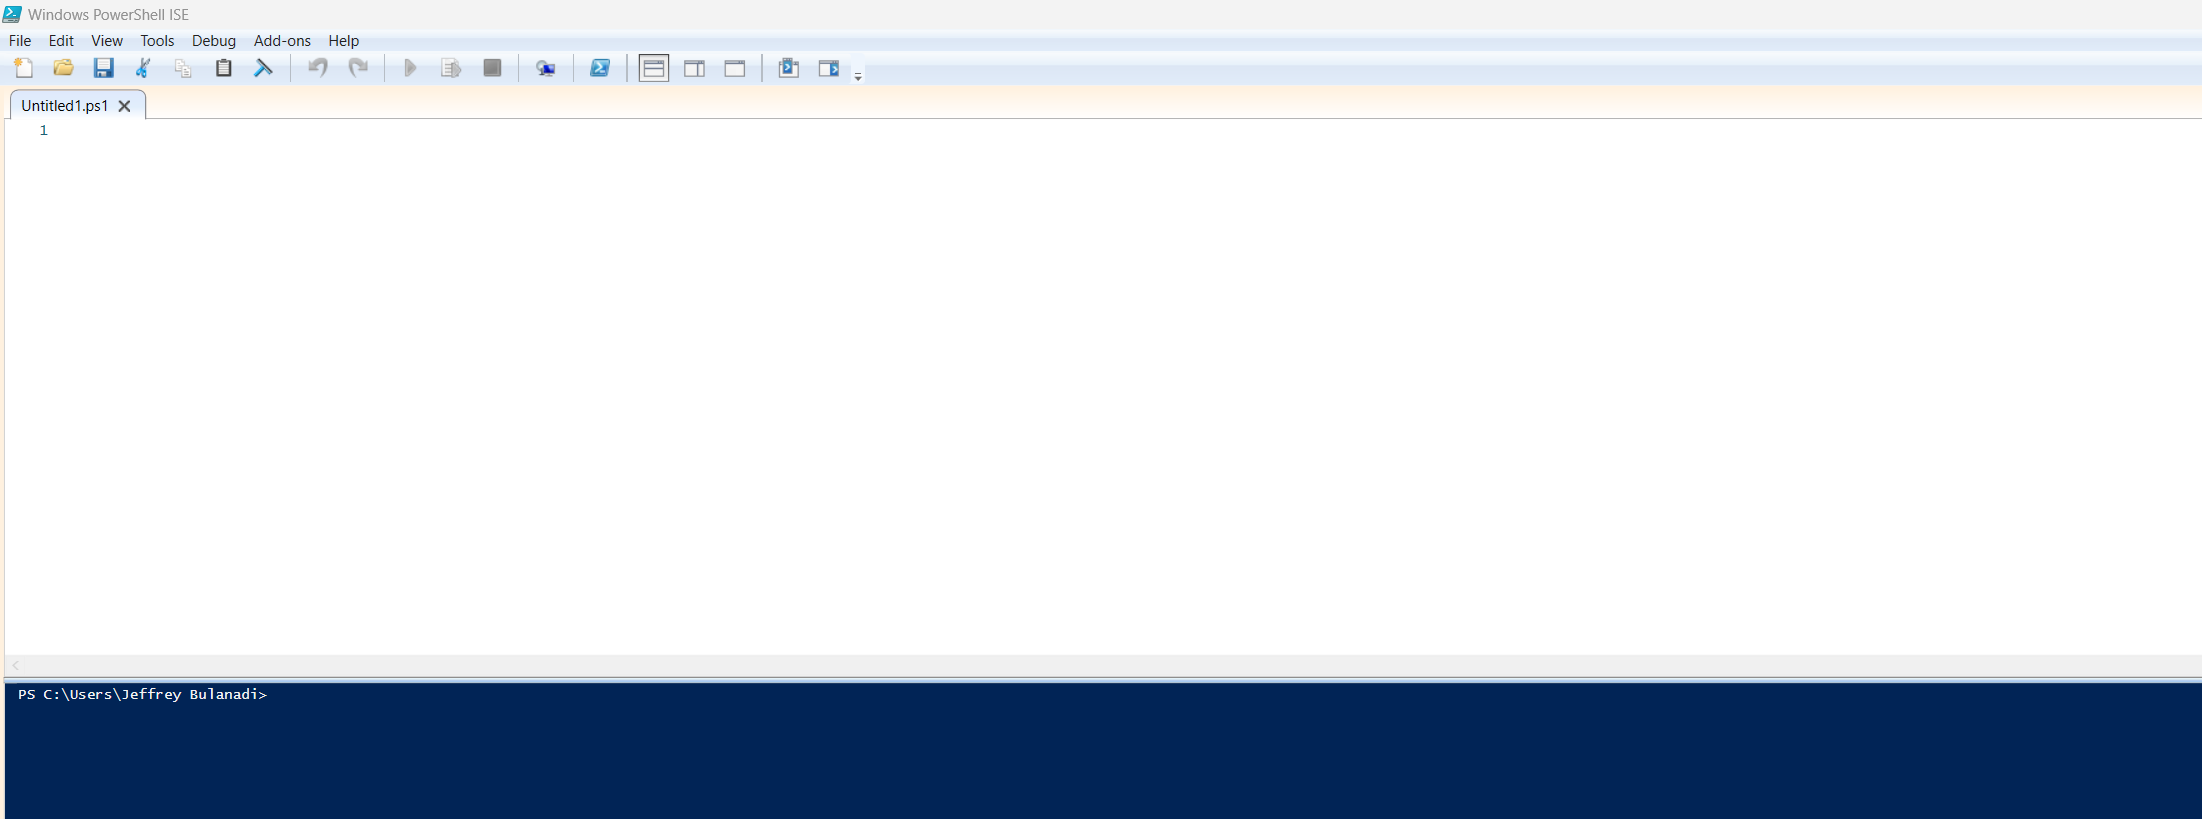
Once the installation is complete, you’ll need to close your current PowerShell ISE and re-open it. That refreshes the environment so it can pick up the latest command line tools.
Let’s do a quick check to verify it’s installed. Run the command below to check the version:
az version
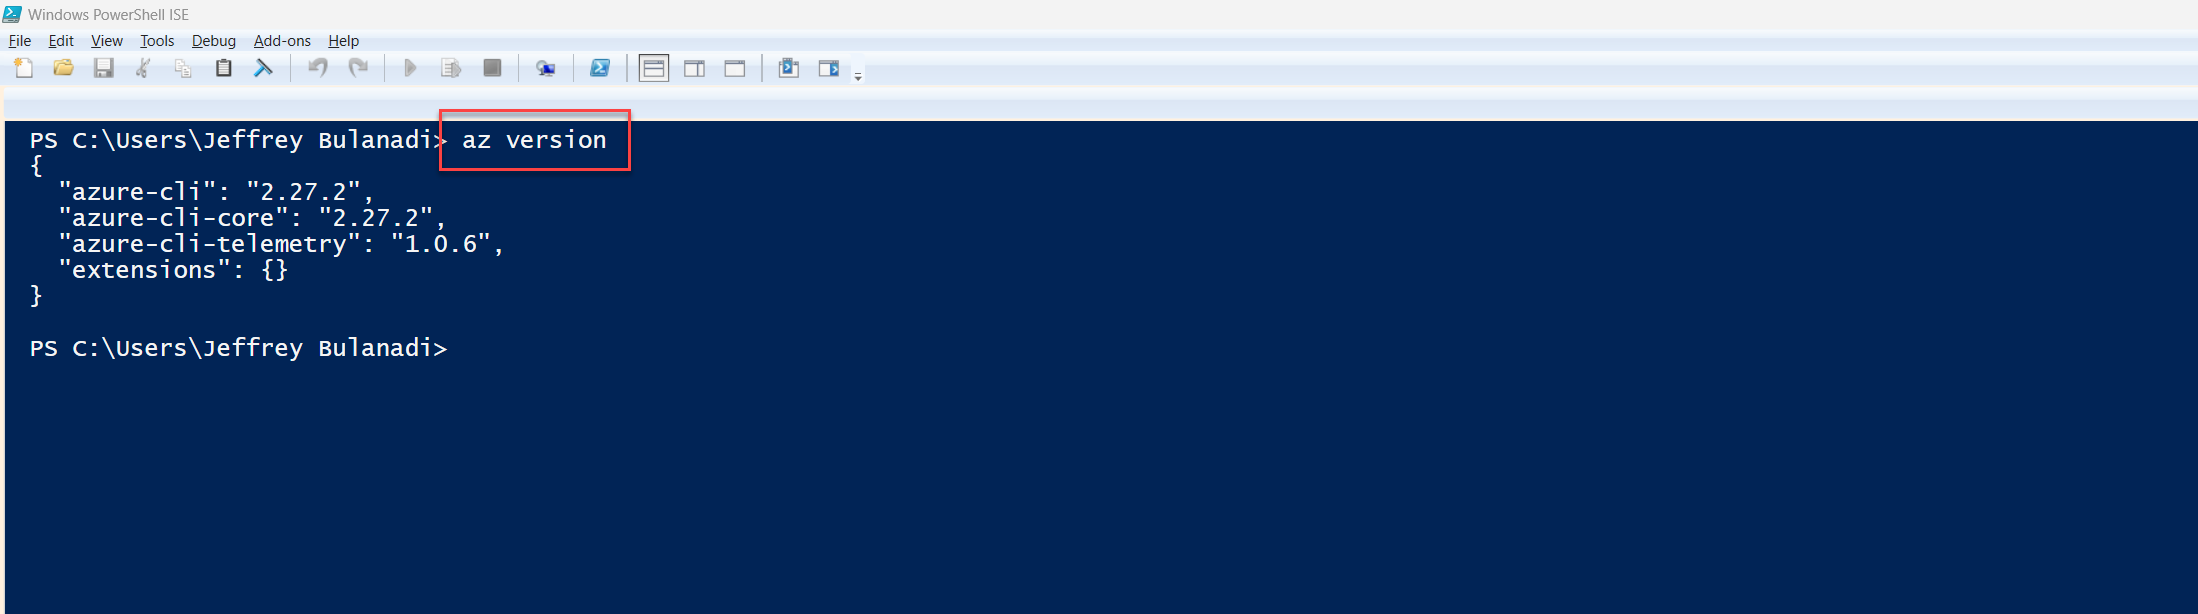
Now that we’re all geared up, let’s light up the torch and explore this hidden cave of Azure CLI together.
Step-by-Step: Automate Entra App Registration
Now that we’ve verified Azure CLI is installed on your local machine, the next step is connecting to your Azure resources.
Authenticate with Azure CLI
In theory, if you have a domain account like kupsy@workdomain.com.au, you can just run:
az login
But since I’m using a CDX environment (CDX stands for Customer Digital Experience, which lets Microsoft Partners spin up a Business Central instance and poke around), I’ll need to add an extra parameter:
az login --allow-no-subscriptions
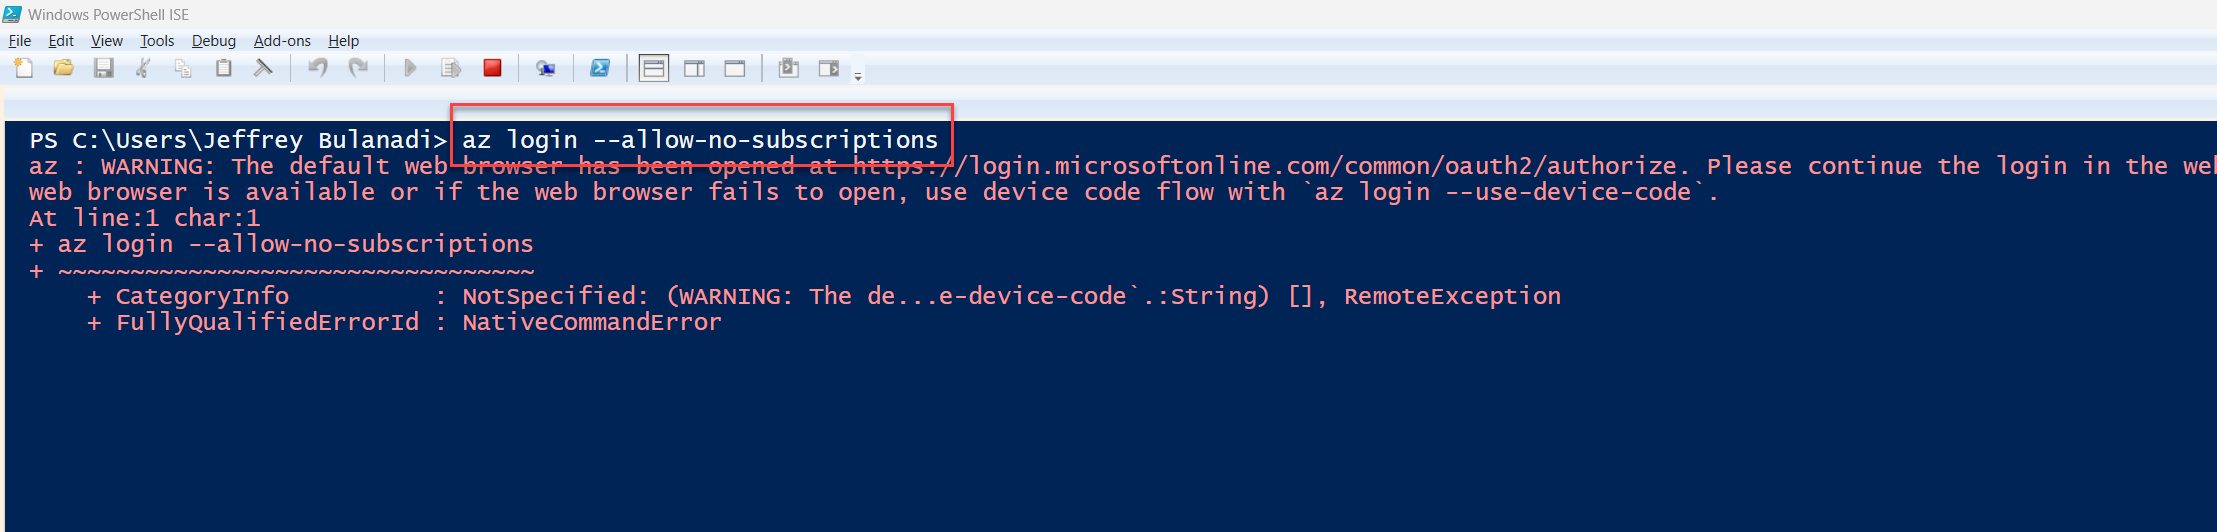

CDX has now been renamed to Microsoft Demo eXperiences (MDX), but the idea is the same demo tenants without active subscriptions.
So here’s the deal. If you run az login without that extra parameter, Microsoft will block you from proceeding since you don’t have a valid subscription. Let’s save ourselves the headache.
By default, az login expects the user to have access to at least one Azure subscription. But there are valid cases where you might want to:
- Register apps in Azure AD
- Manage users, groups, or app permissions
- Operate in a partner or delegated admin context
- Work in a tenant that only uses Microsoft 365 or Entra ID, not Azure resources
In those cases, --allow-no-subscriptions helps you bypass the subscription check and still authenticate to the directory layer.
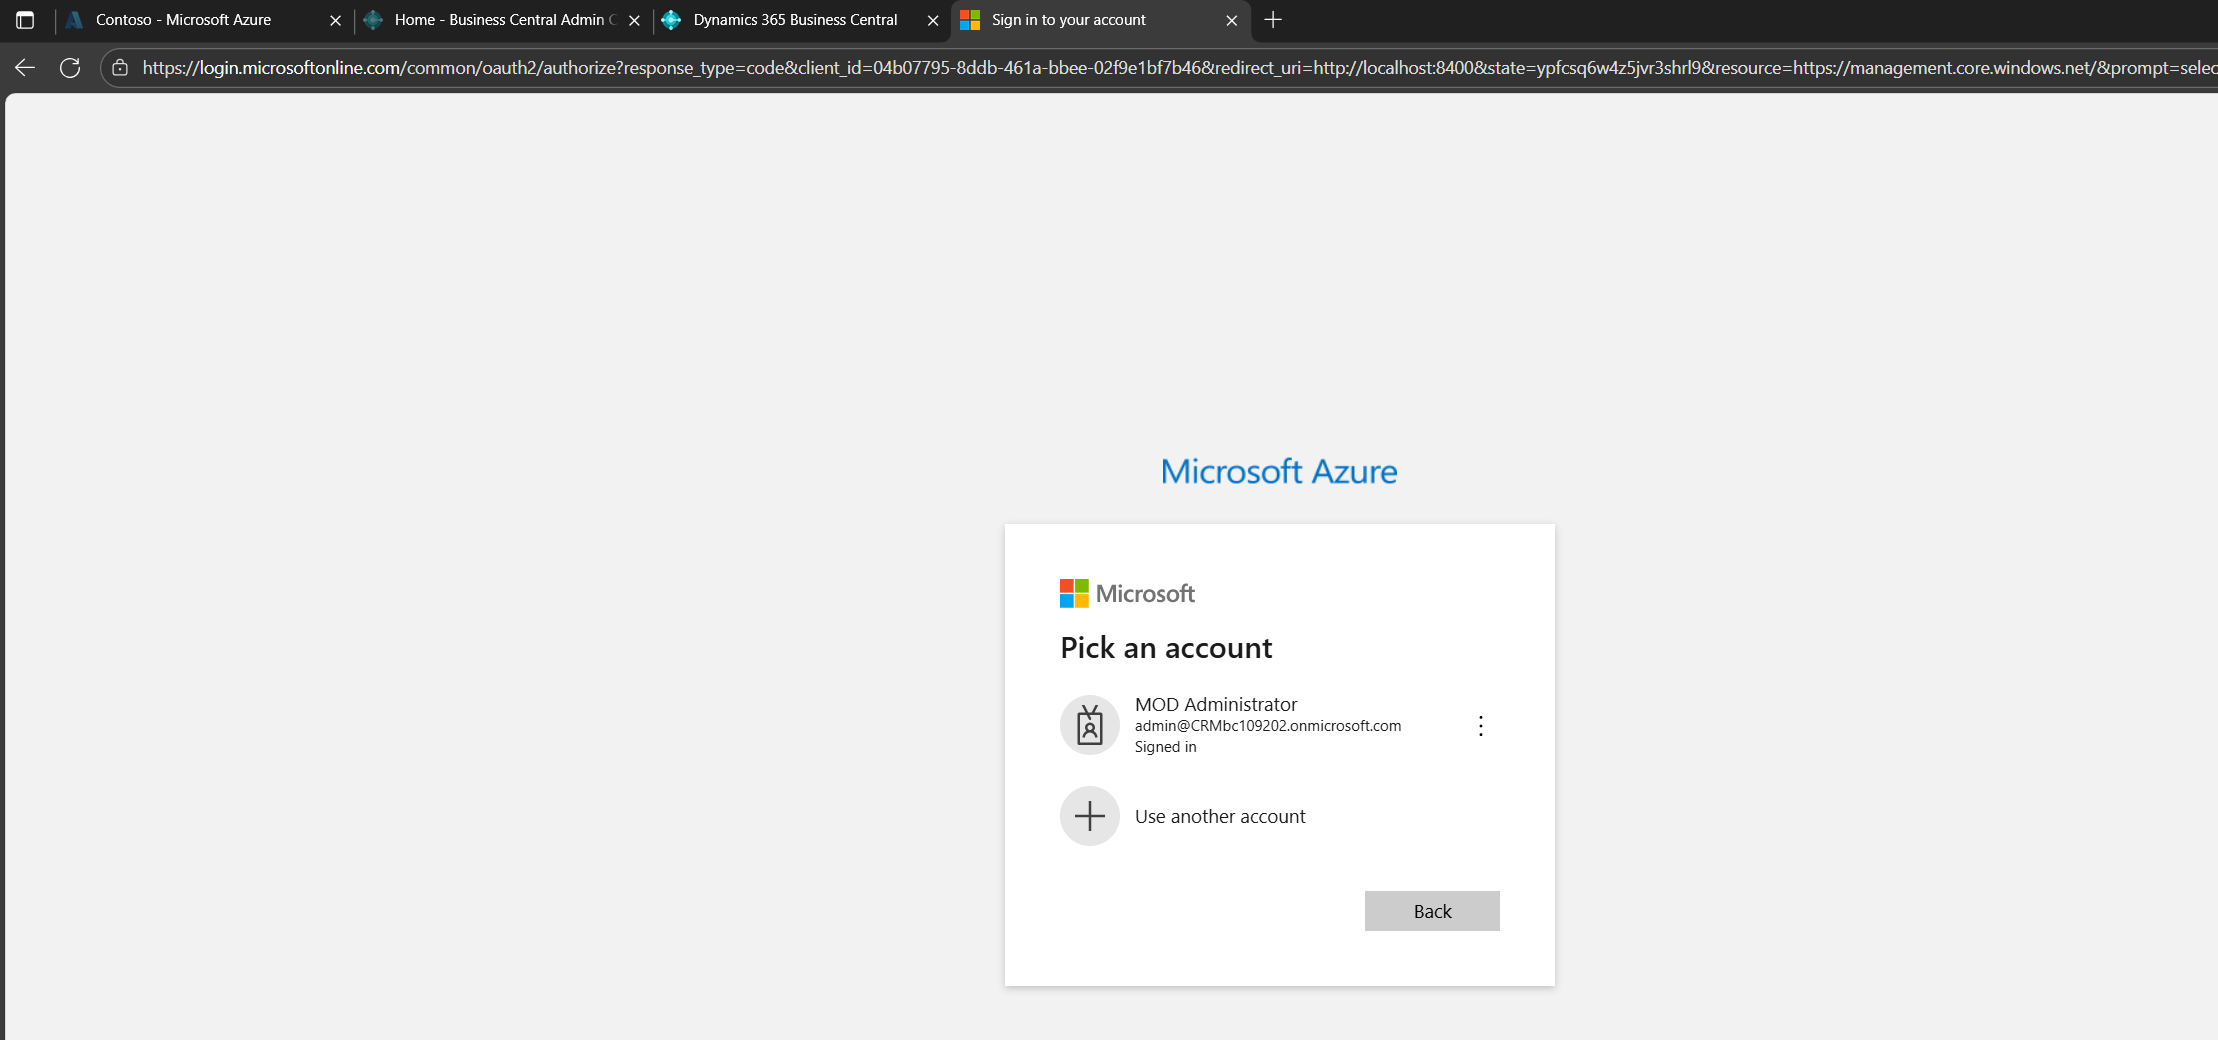
This command opens a browser window. Log in with your admin account. Once authenticated, Azure CLI will cache your session.
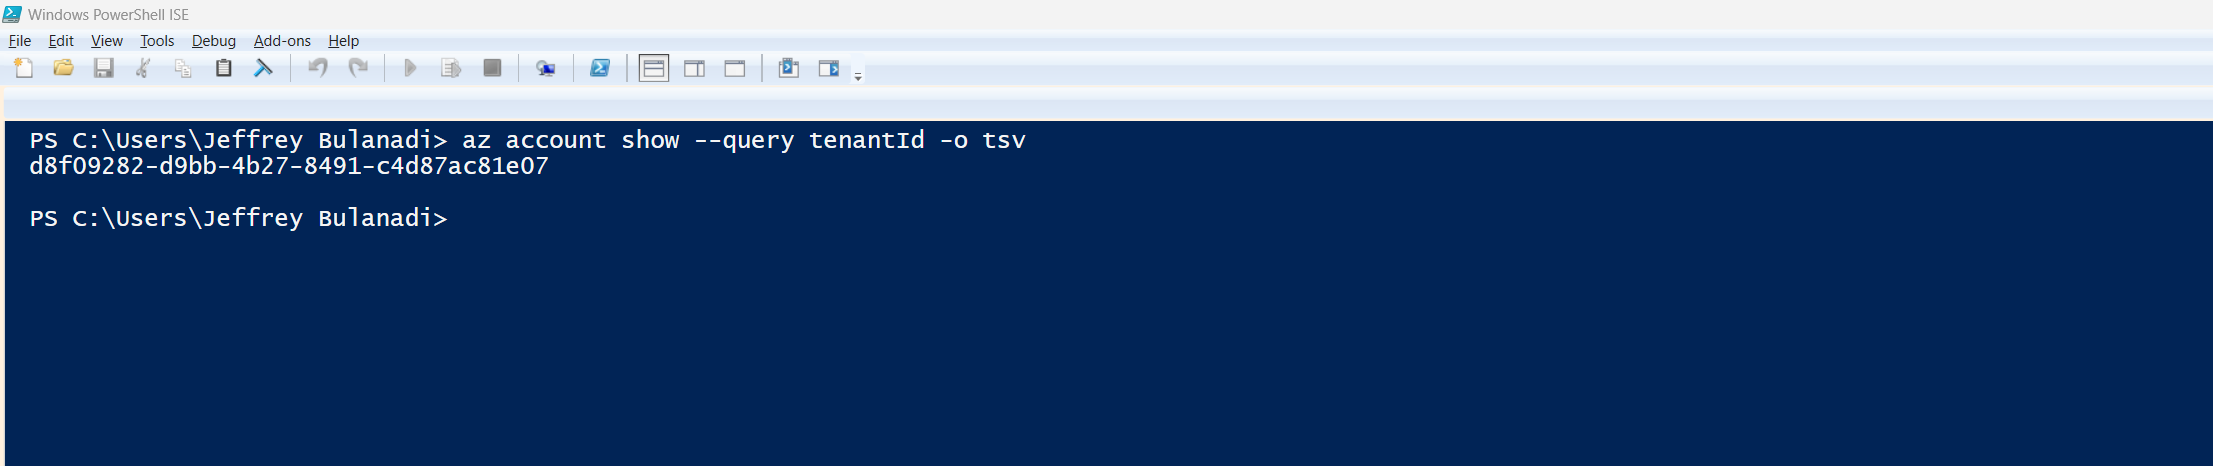
To confirm your tenant ID, run:
az account show --query tenantId -o tsv
Create a Working Directory
You can create a folder manually or via script. Just pick your preferred working directory. In this example, I’m using the local C drive and creating a folder called demo.
Copy and paste the commands below into PowerShell:
cd \
mkdir demo
This takes you back to the root directory and creates a folder named demo. Or if you prefer, just create the folder manually using Windows Explorer. Either way works.

List Business Central OAuth2 Permissions via Azure CLI
When registering an OAuth2 app for Business Central, we need to attach the correct application and delegated permissions, especially if you're scripting app creation or prepping for automated consent flows.
Here’s a quick way to list all available permissions exposed by the BC API using Azure CLI:
az ad sp show --id 996def3d-b36c-4153-8607-a6fd3c01b89f --query "appRoles[].{Type:'Application', Value:value, ID:id}" --output table
az ad sp show --id 996def3d-b36c-4153-8607-a6fd3c01b89f --query "oauth2Permissions[].{Type:'Delegated', Value:value, ID:id}" --output table
This targets the resourceAppId for Business Central: 996def3d-b36c-4153-8607-a6fd3c01b89f.
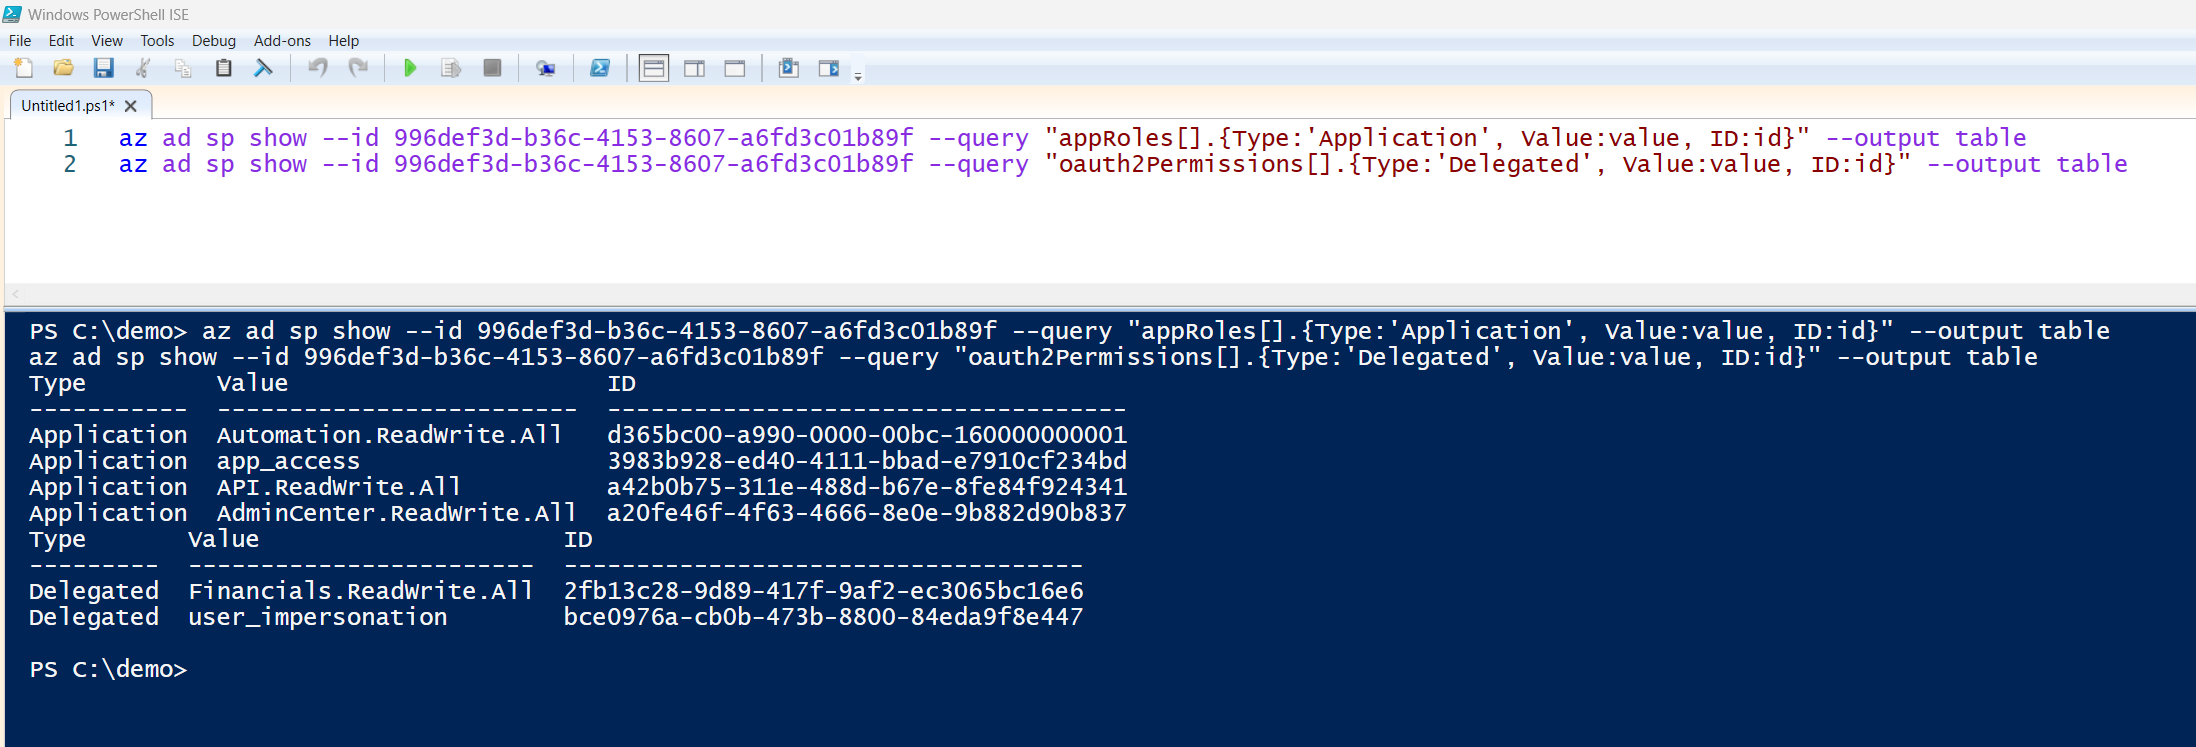
Sample Output
Here’s what you’ll get, a clean list of permission names and their GUIDs, ready for your permissions.json
Application Permissions
Delegated Permissions
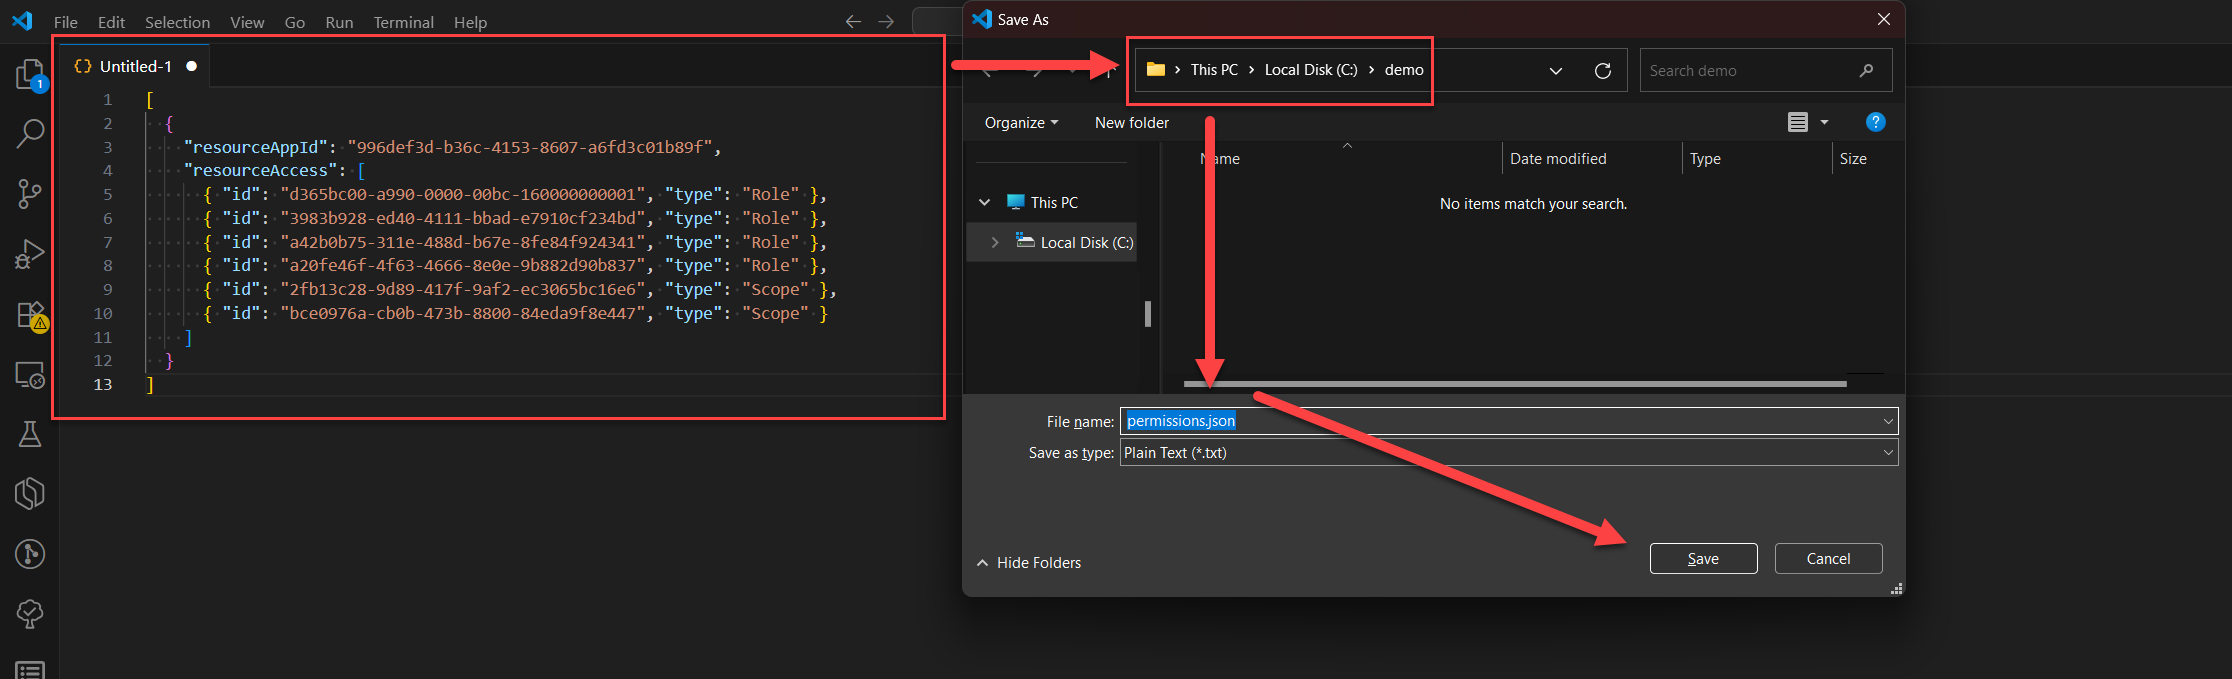
Prepare permissions.json
Now let’s prep the permissions.json file. This is basically a structured version of the permission list we pulled earlier, formatted in a way that Azure CLI expects when assigning access.
Create a file named permissions.json and save it to your working directory (yep, that demo folder we created earlier). Paste the following content:
[
  {
    "resourceAppId": "996def3d-b36c-4153-8607-a6fd3c01b89f",
    "resourceAccess": [
      { "id": "d365bc00-a990-0000-00bc-160000000001", "type": "Role" },
      { "id": "3983b928-ed40-4111-bbad-e7910cf234bd", "type": "Role" },
      { "id": "a42b0b75-311e-488d-b67e-8fe84f924341", "type": "Role" },
      { "id": "a20fe46f-4f63-4666-8e0e-9b882d90b837", "type": "Role" },
      { "id": "2fb13c28-9d89-417f-9af2-ec3065bc16e6", "type": "Scope" },
      { "id": "bce0976a-cb0b-473b-8800-84eda9f8e447", "type": "Scope" }
    ]
  }
]
These permissions cover both application level and delegated access to Business Central. The resourceAppId is a global ID used by Microsoft across all tenants: 996def3d-b36c-4153-8607-a6fd3c01b89f. And those permission IDs (the GUIDs) represent the scopes and roles we want to assign.
If you want to double check, you can go to your Azure Portal → App registrations → API permissions, select Dynamics 365 Business Central, and inspect the App ID and permission list yourself.
Register the Entra App
Now let’s register the app.
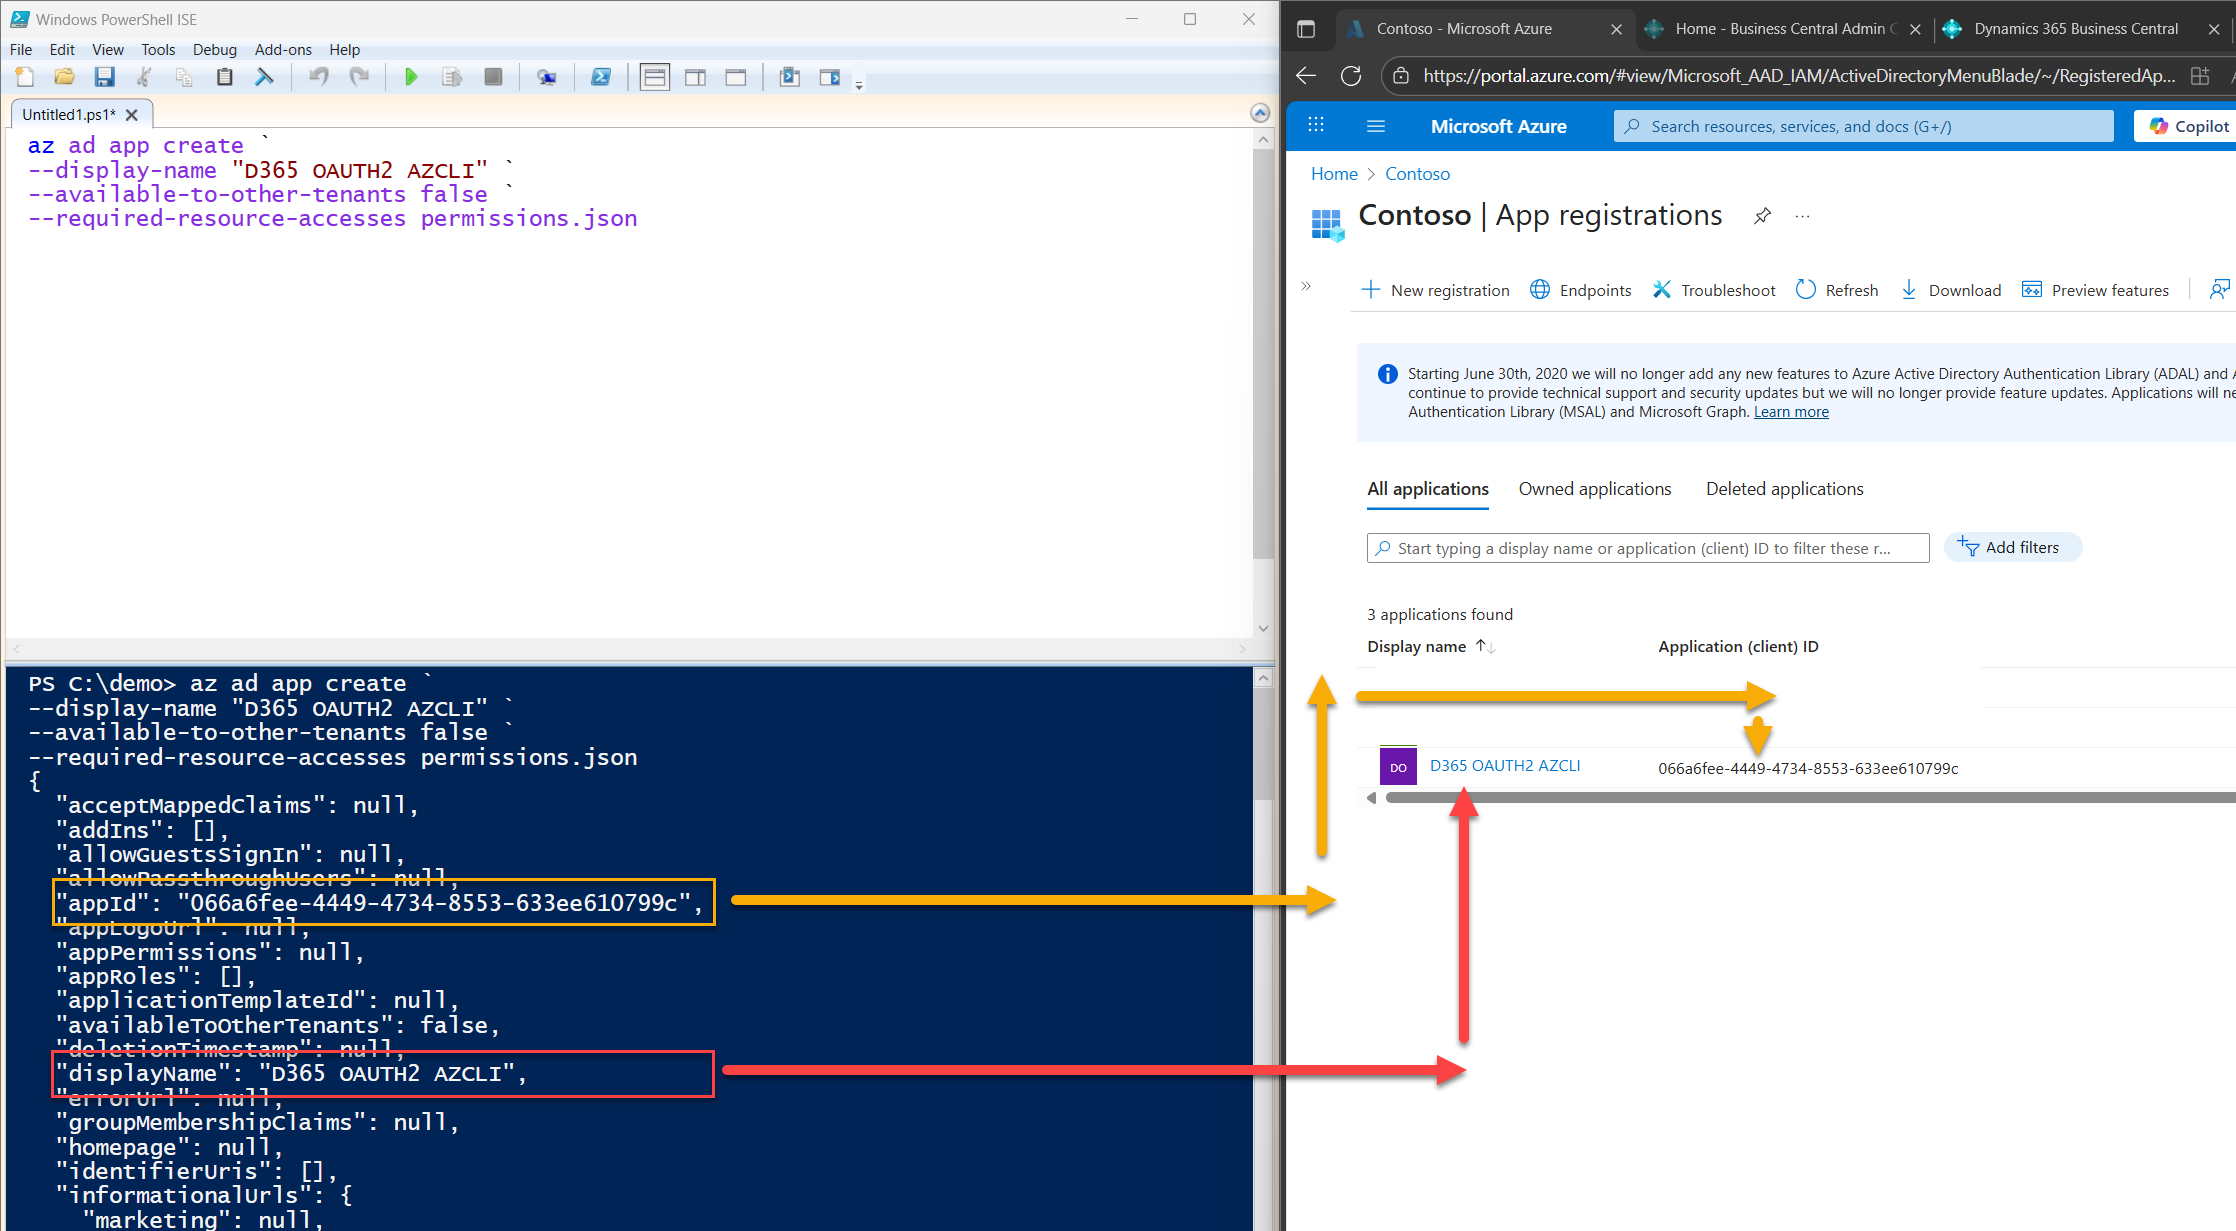
Go to the directory where you saved permissions.json earlier (yep, that demo folder), and run the following command in PowerShell:
az ad app create --display-name "D365 OAUTH2 AZCLI" --available-to-other-tenants false --required-resource-accesses permissions.json
This command creates a new Azure AD application registration named D365 OAUTH2 AZCLI, with pre-assigned API permissions pulled from your permissions.json file.
Here’s a quick breakdown of what each flag does:
Once the registration is successful, Azure CLI will return a bunch of values. The one you want to take note of is the appId, this is your clientId.
Example output:
"appId": "066a6fee-4449-4734-8553-633ee610799c"
Save that somewhere. We’ll need it for the next steps.

Generate a Client Secret
Now that we’ve created the app, it’s time to generate a client secret.
Same drill, copy, save, and run the command below in your working directory:
az ad app credential reset --id "066a6fee-4449-4734-8553-633ee610799c" --append --years 1
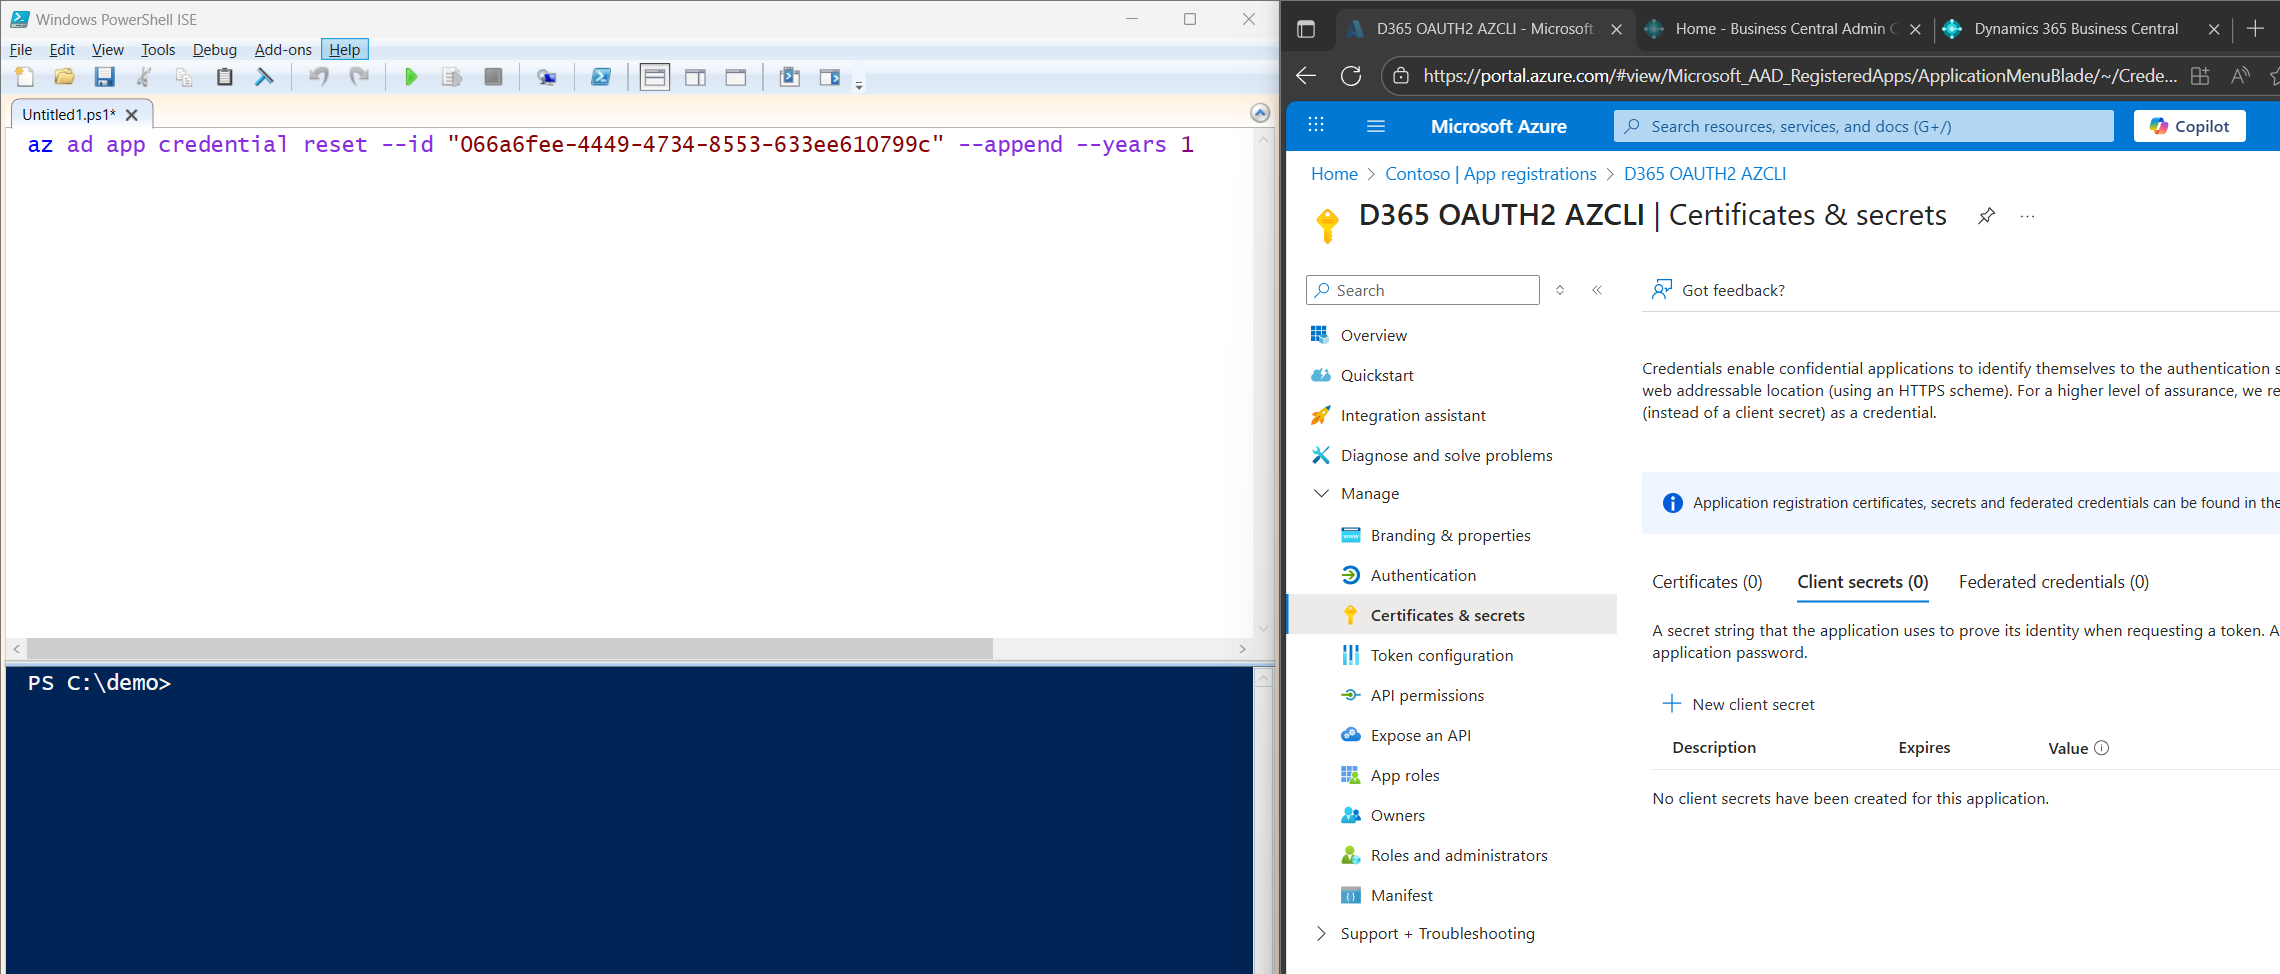
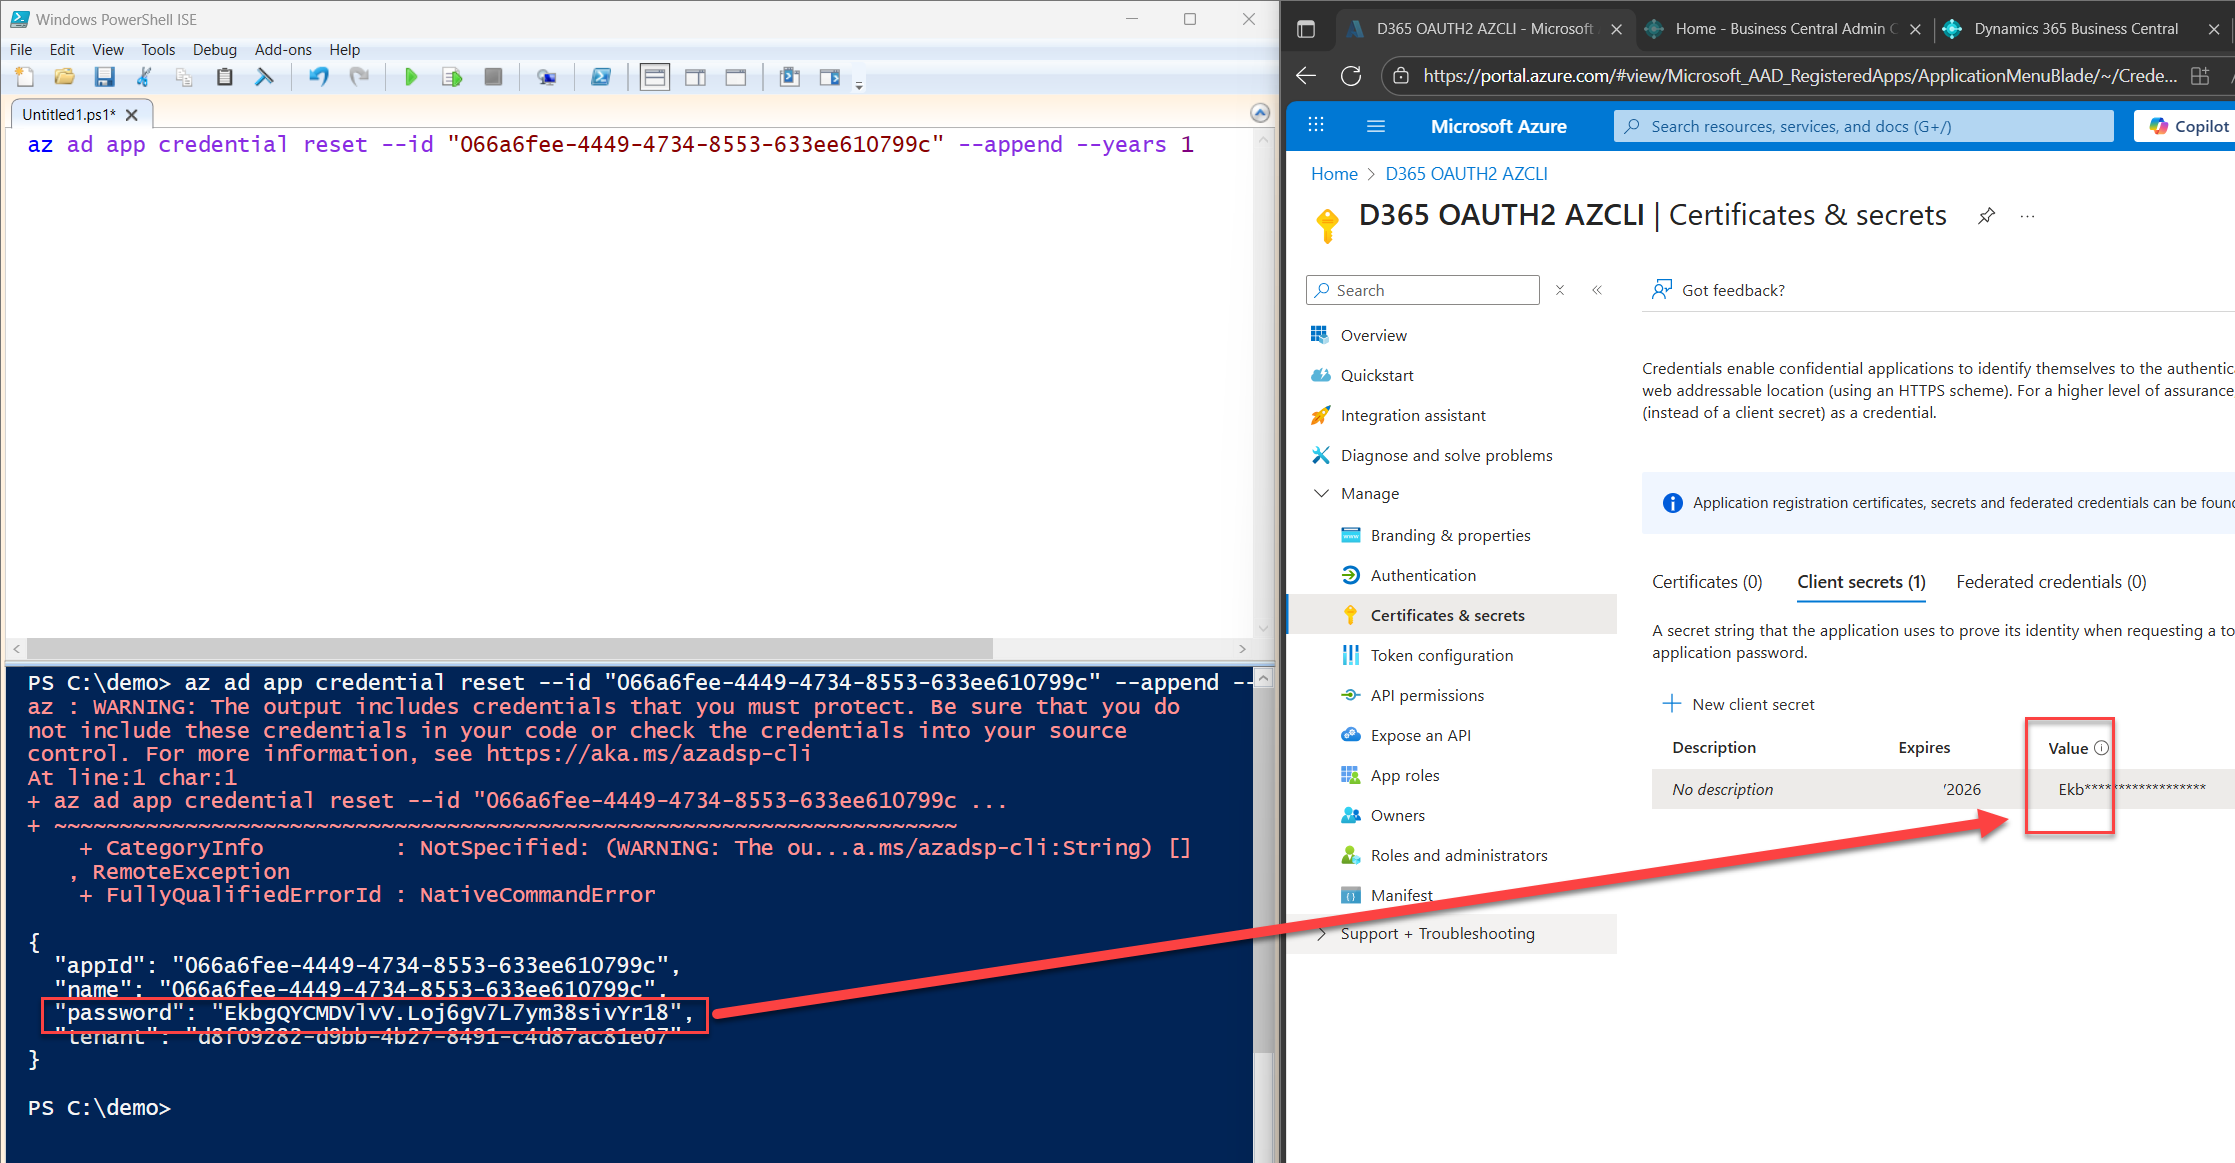
This adds a new client secret to the app registration with ID 066a6fee-4449-4734-8553-633ee610799c, valid for 1 year. The --append flag makes sure it doesn’t overwrite any existing secrets.
Now you might be wondering, where’s the description?
Good catch. The --credential-description flag, like this:
--credential-description "D365 OAuth2 Demo Sandbox"
currently this throws an error: applicationKeyIdentifierValue can’t be empty and must be under 32 bytes. It’s a known bug, and until the CLI team patches it, the workaround is to skip the description entirely.
Here’s the actual GitHub issue if you want to track it:
Error in az ad app create --credential-description: When present, application key identifier cannot be empty and can be at most 32 bytes. · Issue #10720 · Azure/azure-cli · GitHub
Running the command will return four values:
- appId
- name
- password (this is your client secret)
- tenant
Save the secret securely. This is your client_secret.
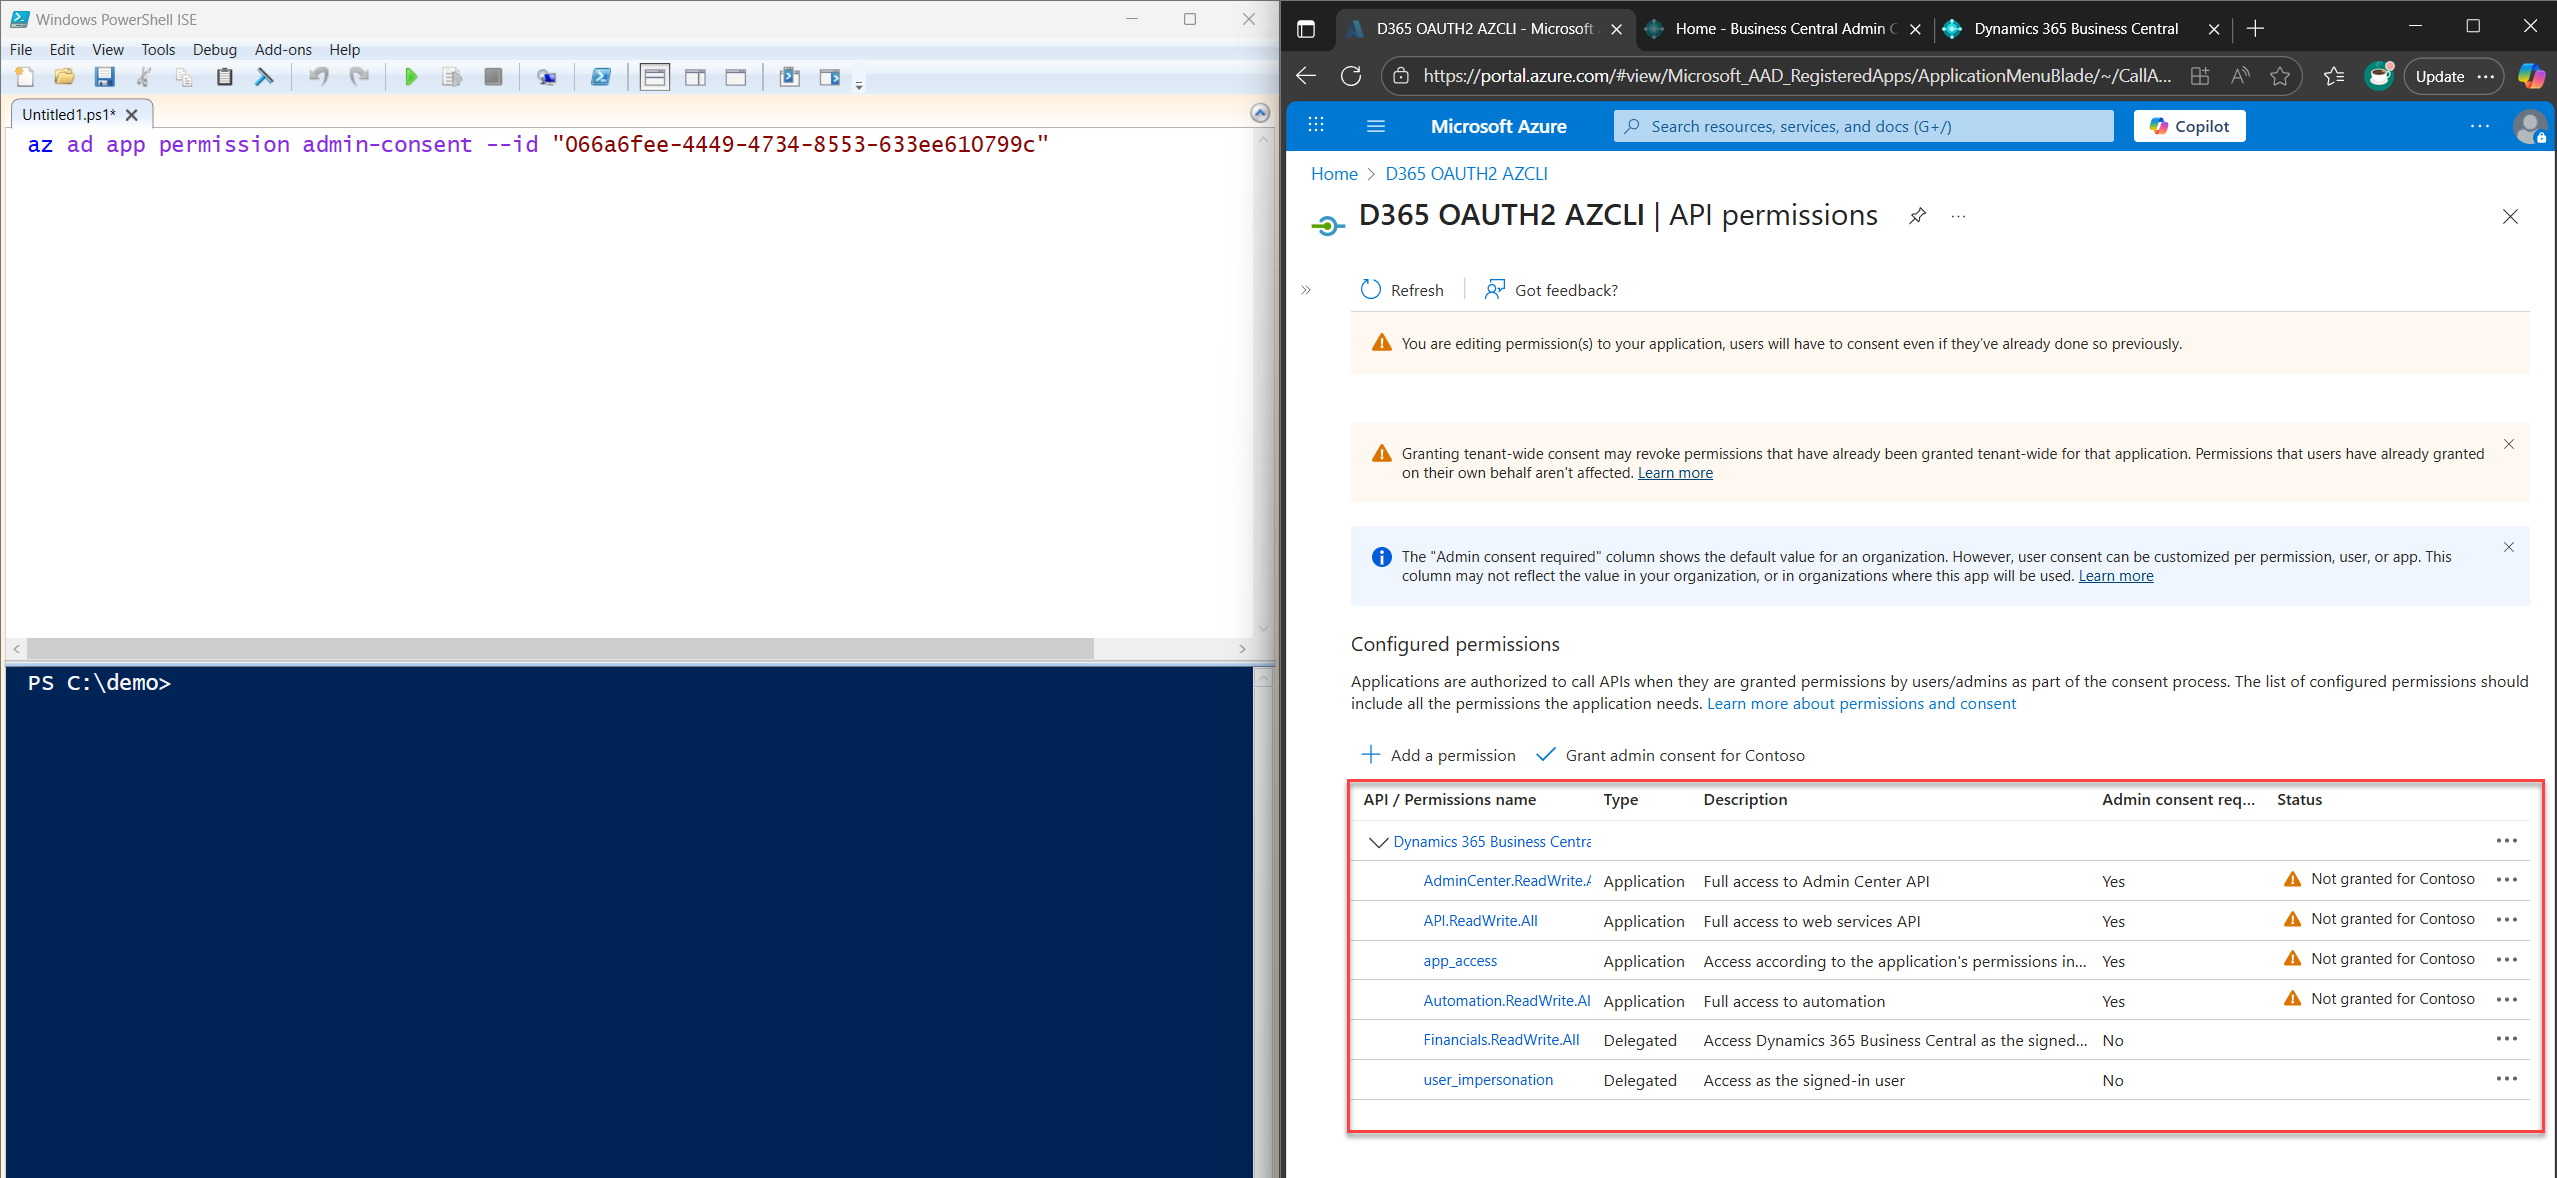
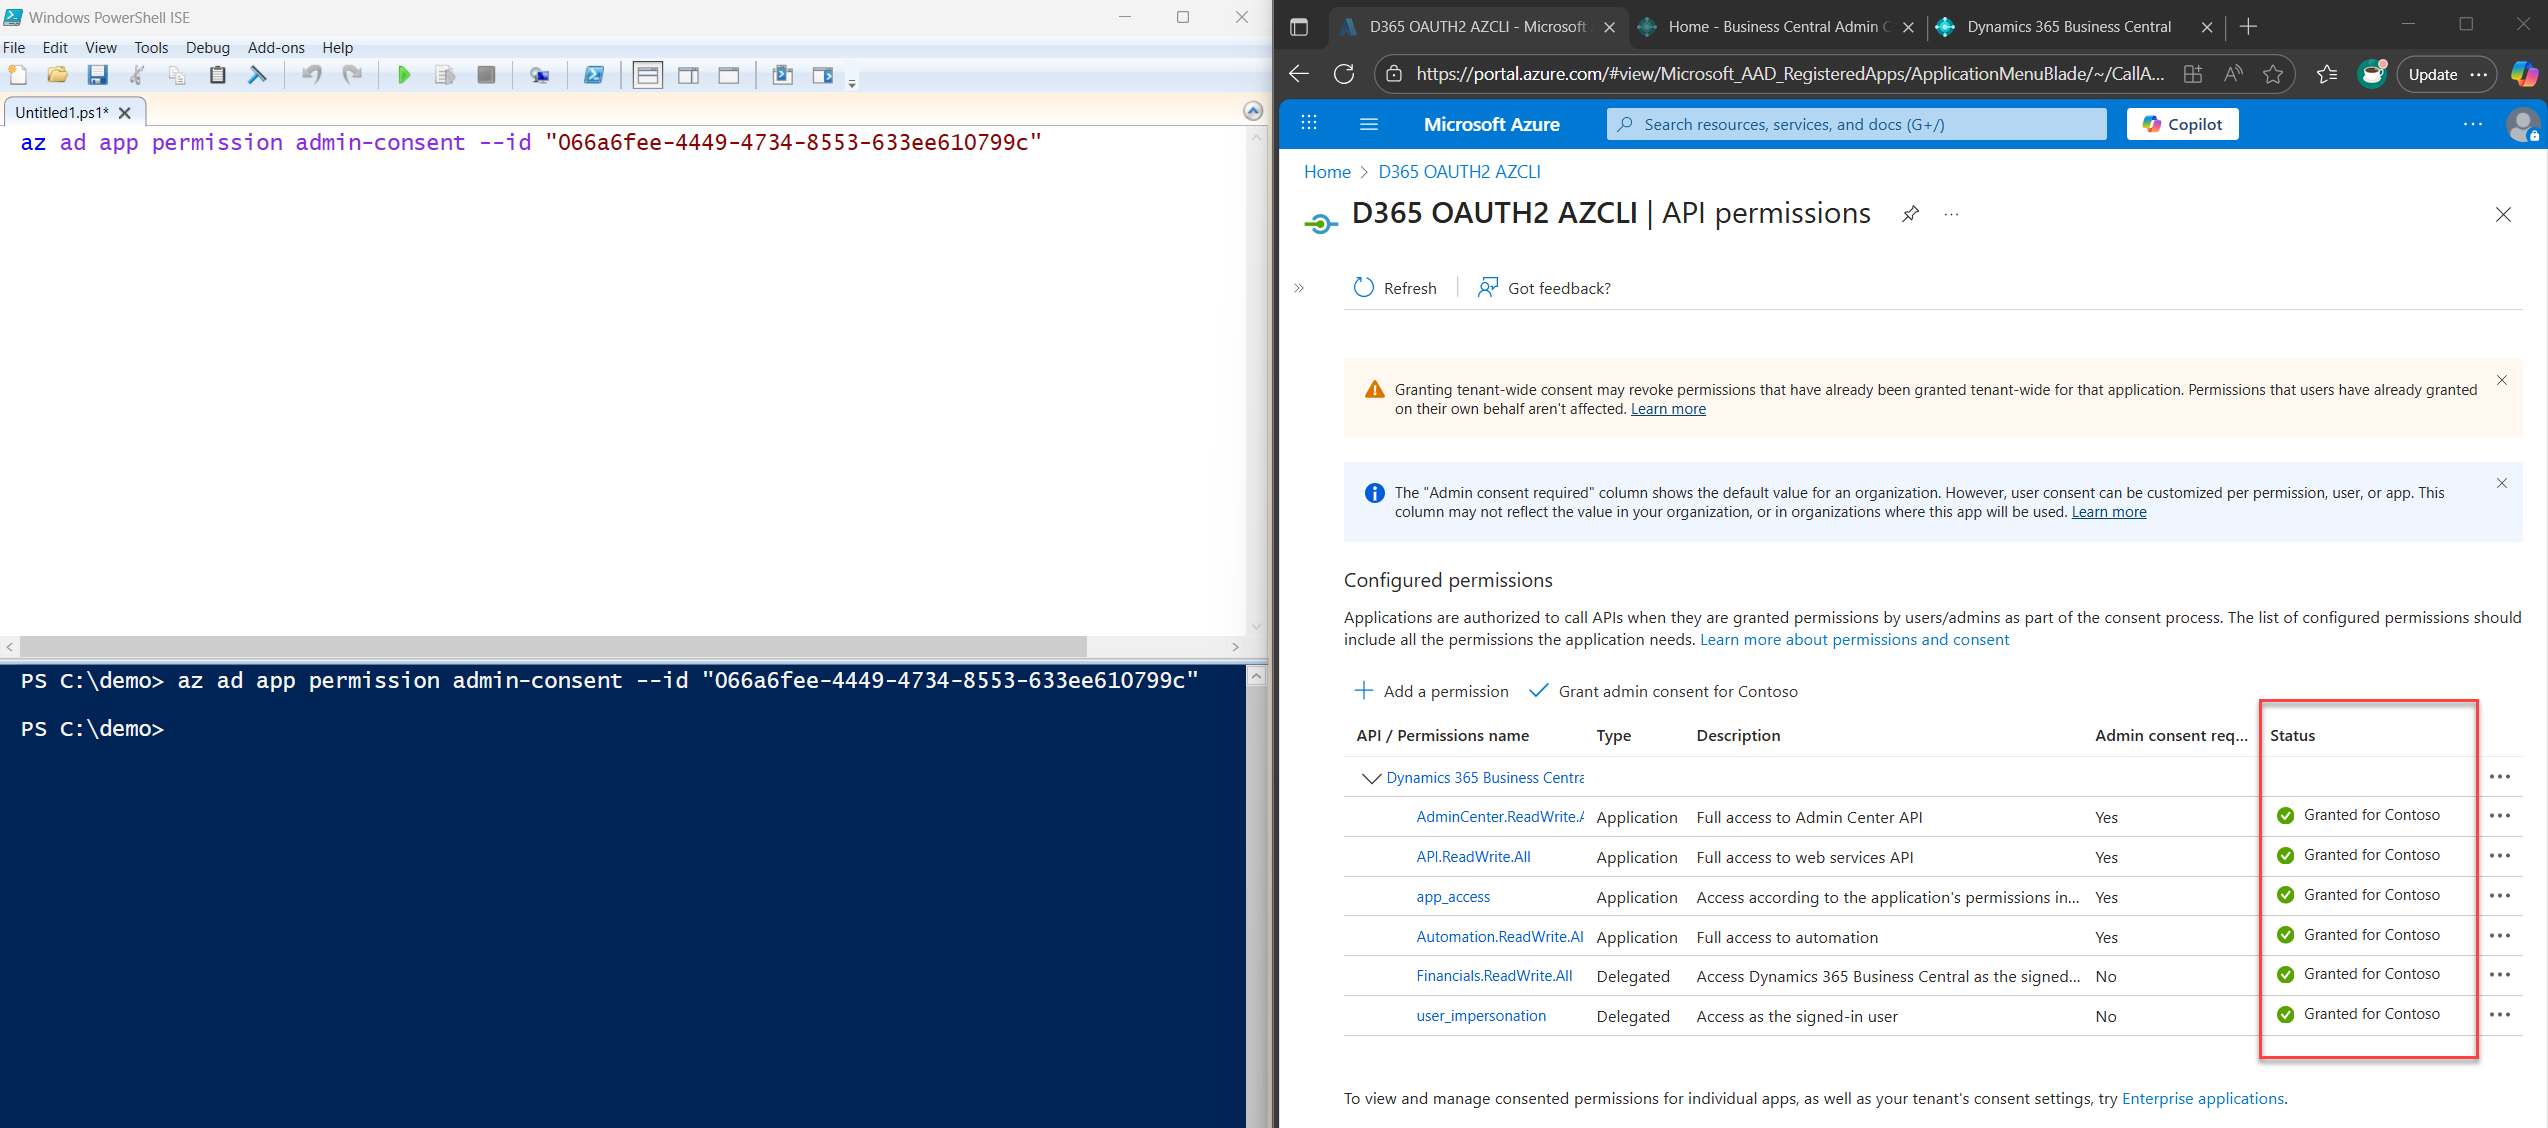
Grant Admin Consent
We’re nearly at the finish line.
Copy, save, and run the command below to grant admin consent for the app we just registered:
az ad app permission admin-consent --id <appId>
Just change <appId> to the actual appId or clientId we noted earlier.
This command grants consent for all the permissions we defined in permissions.json.
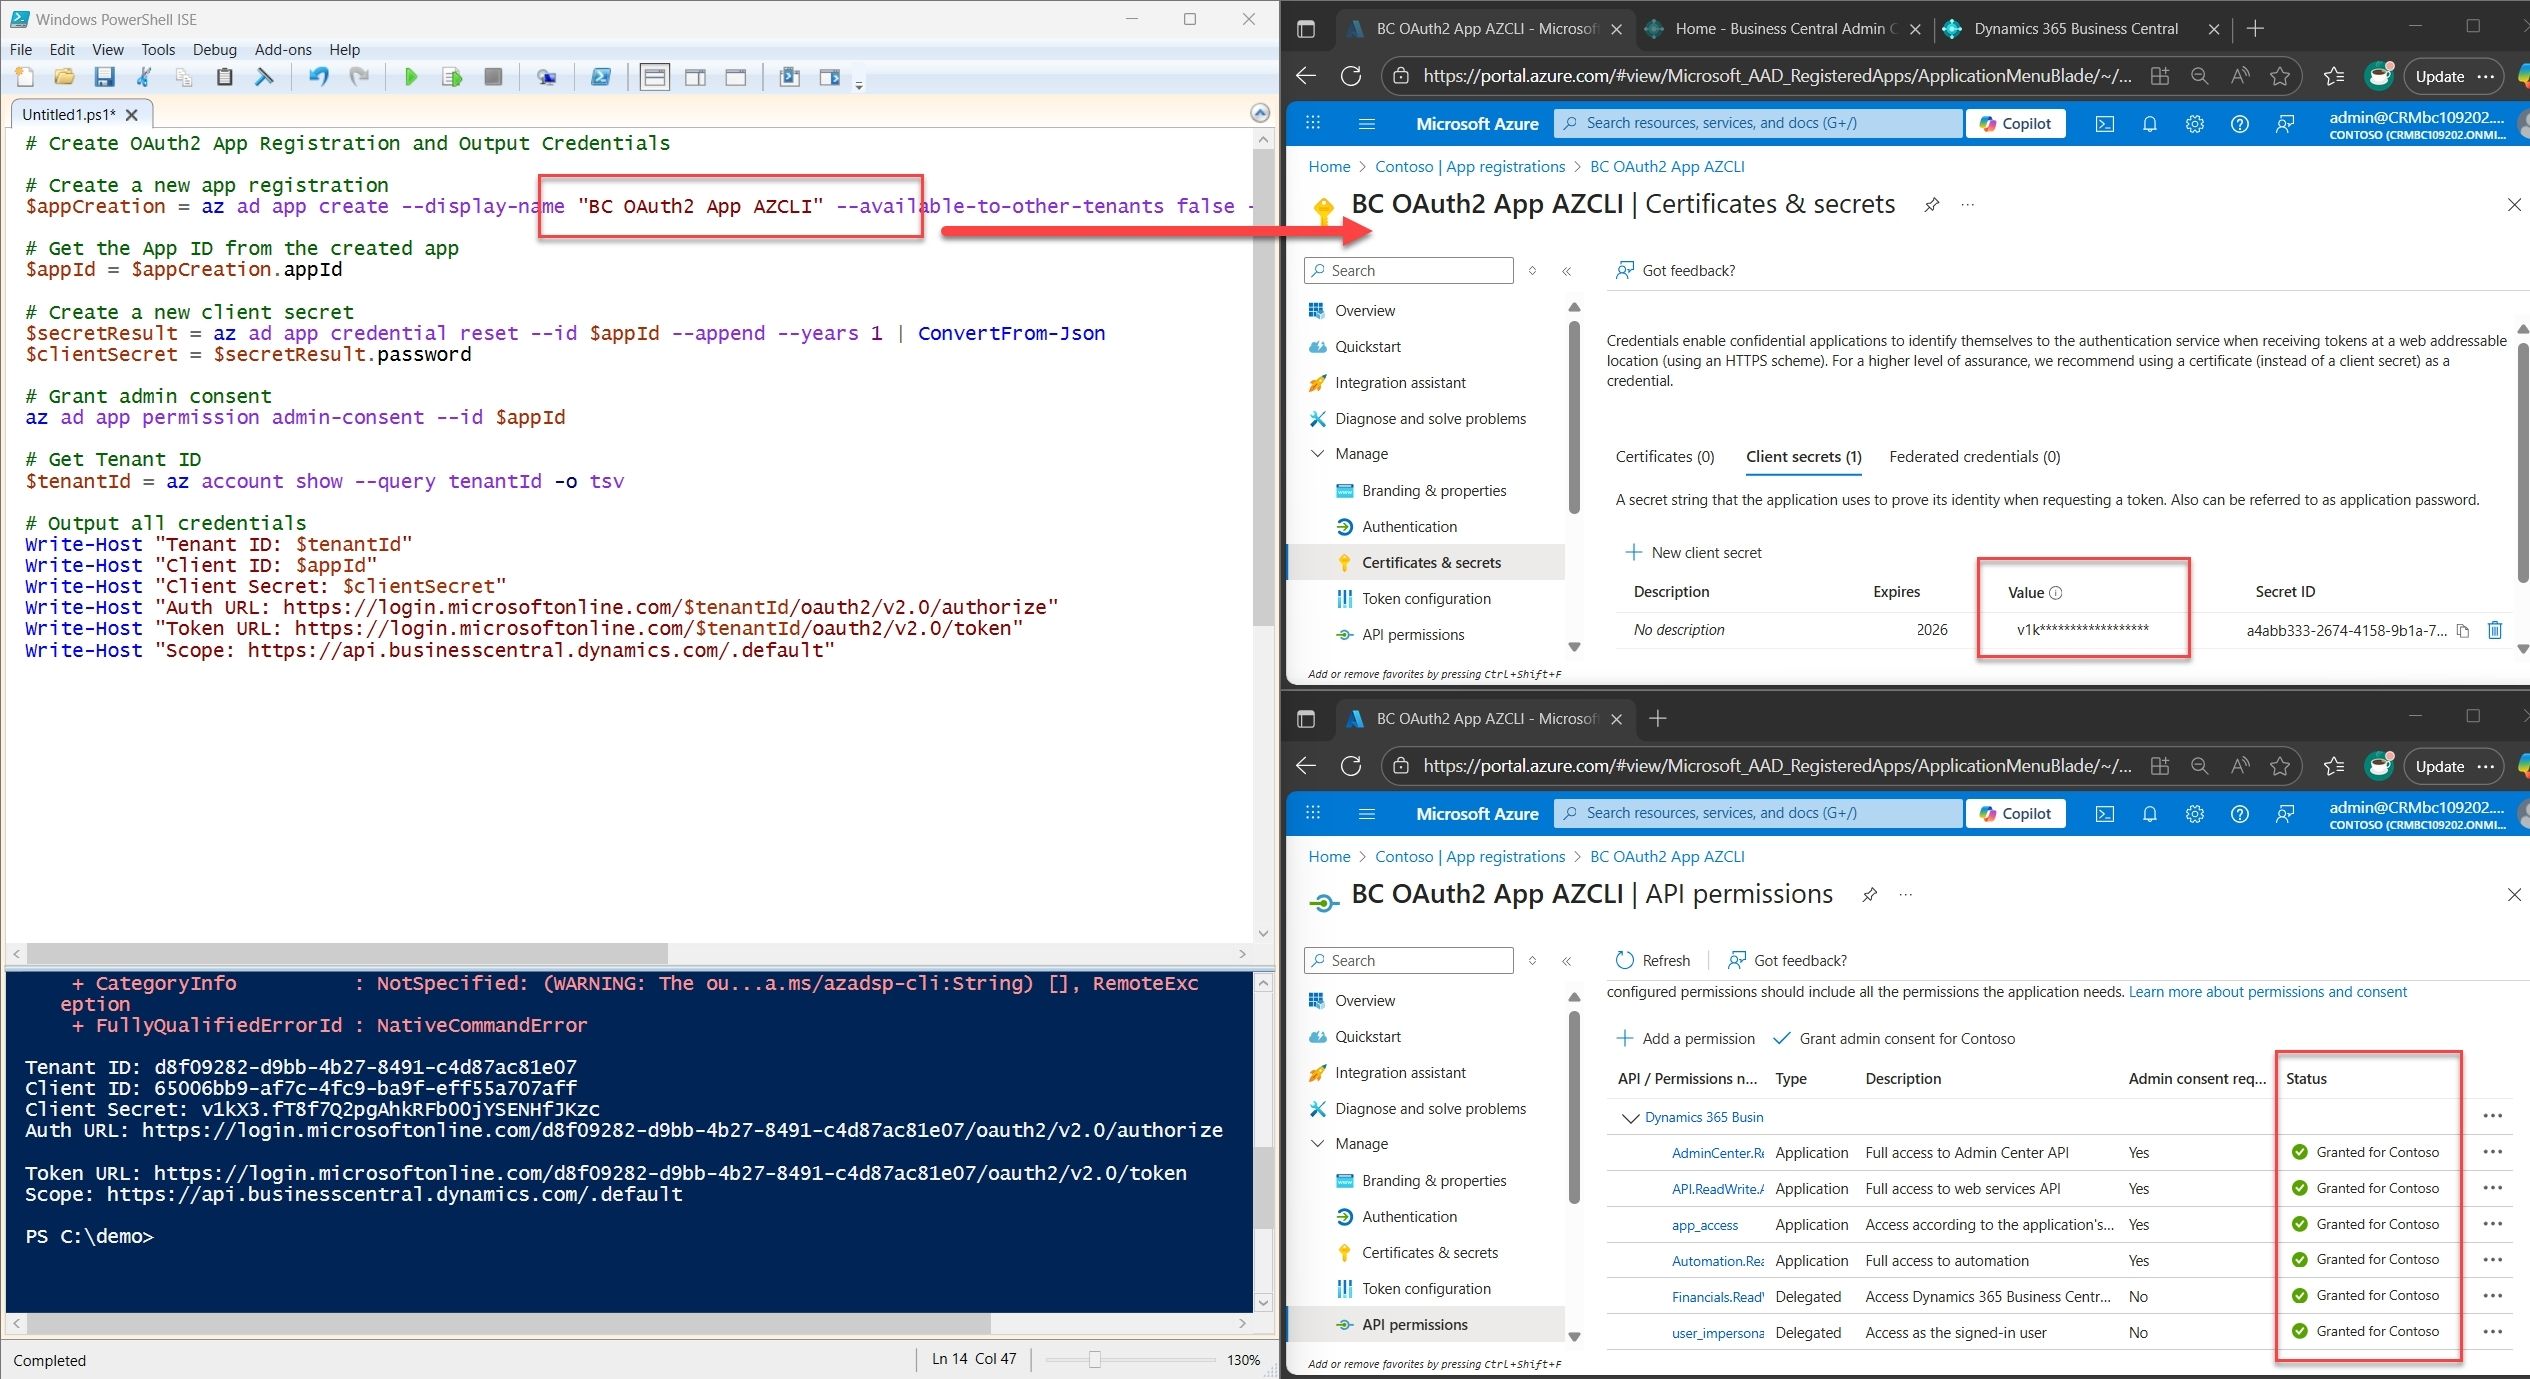
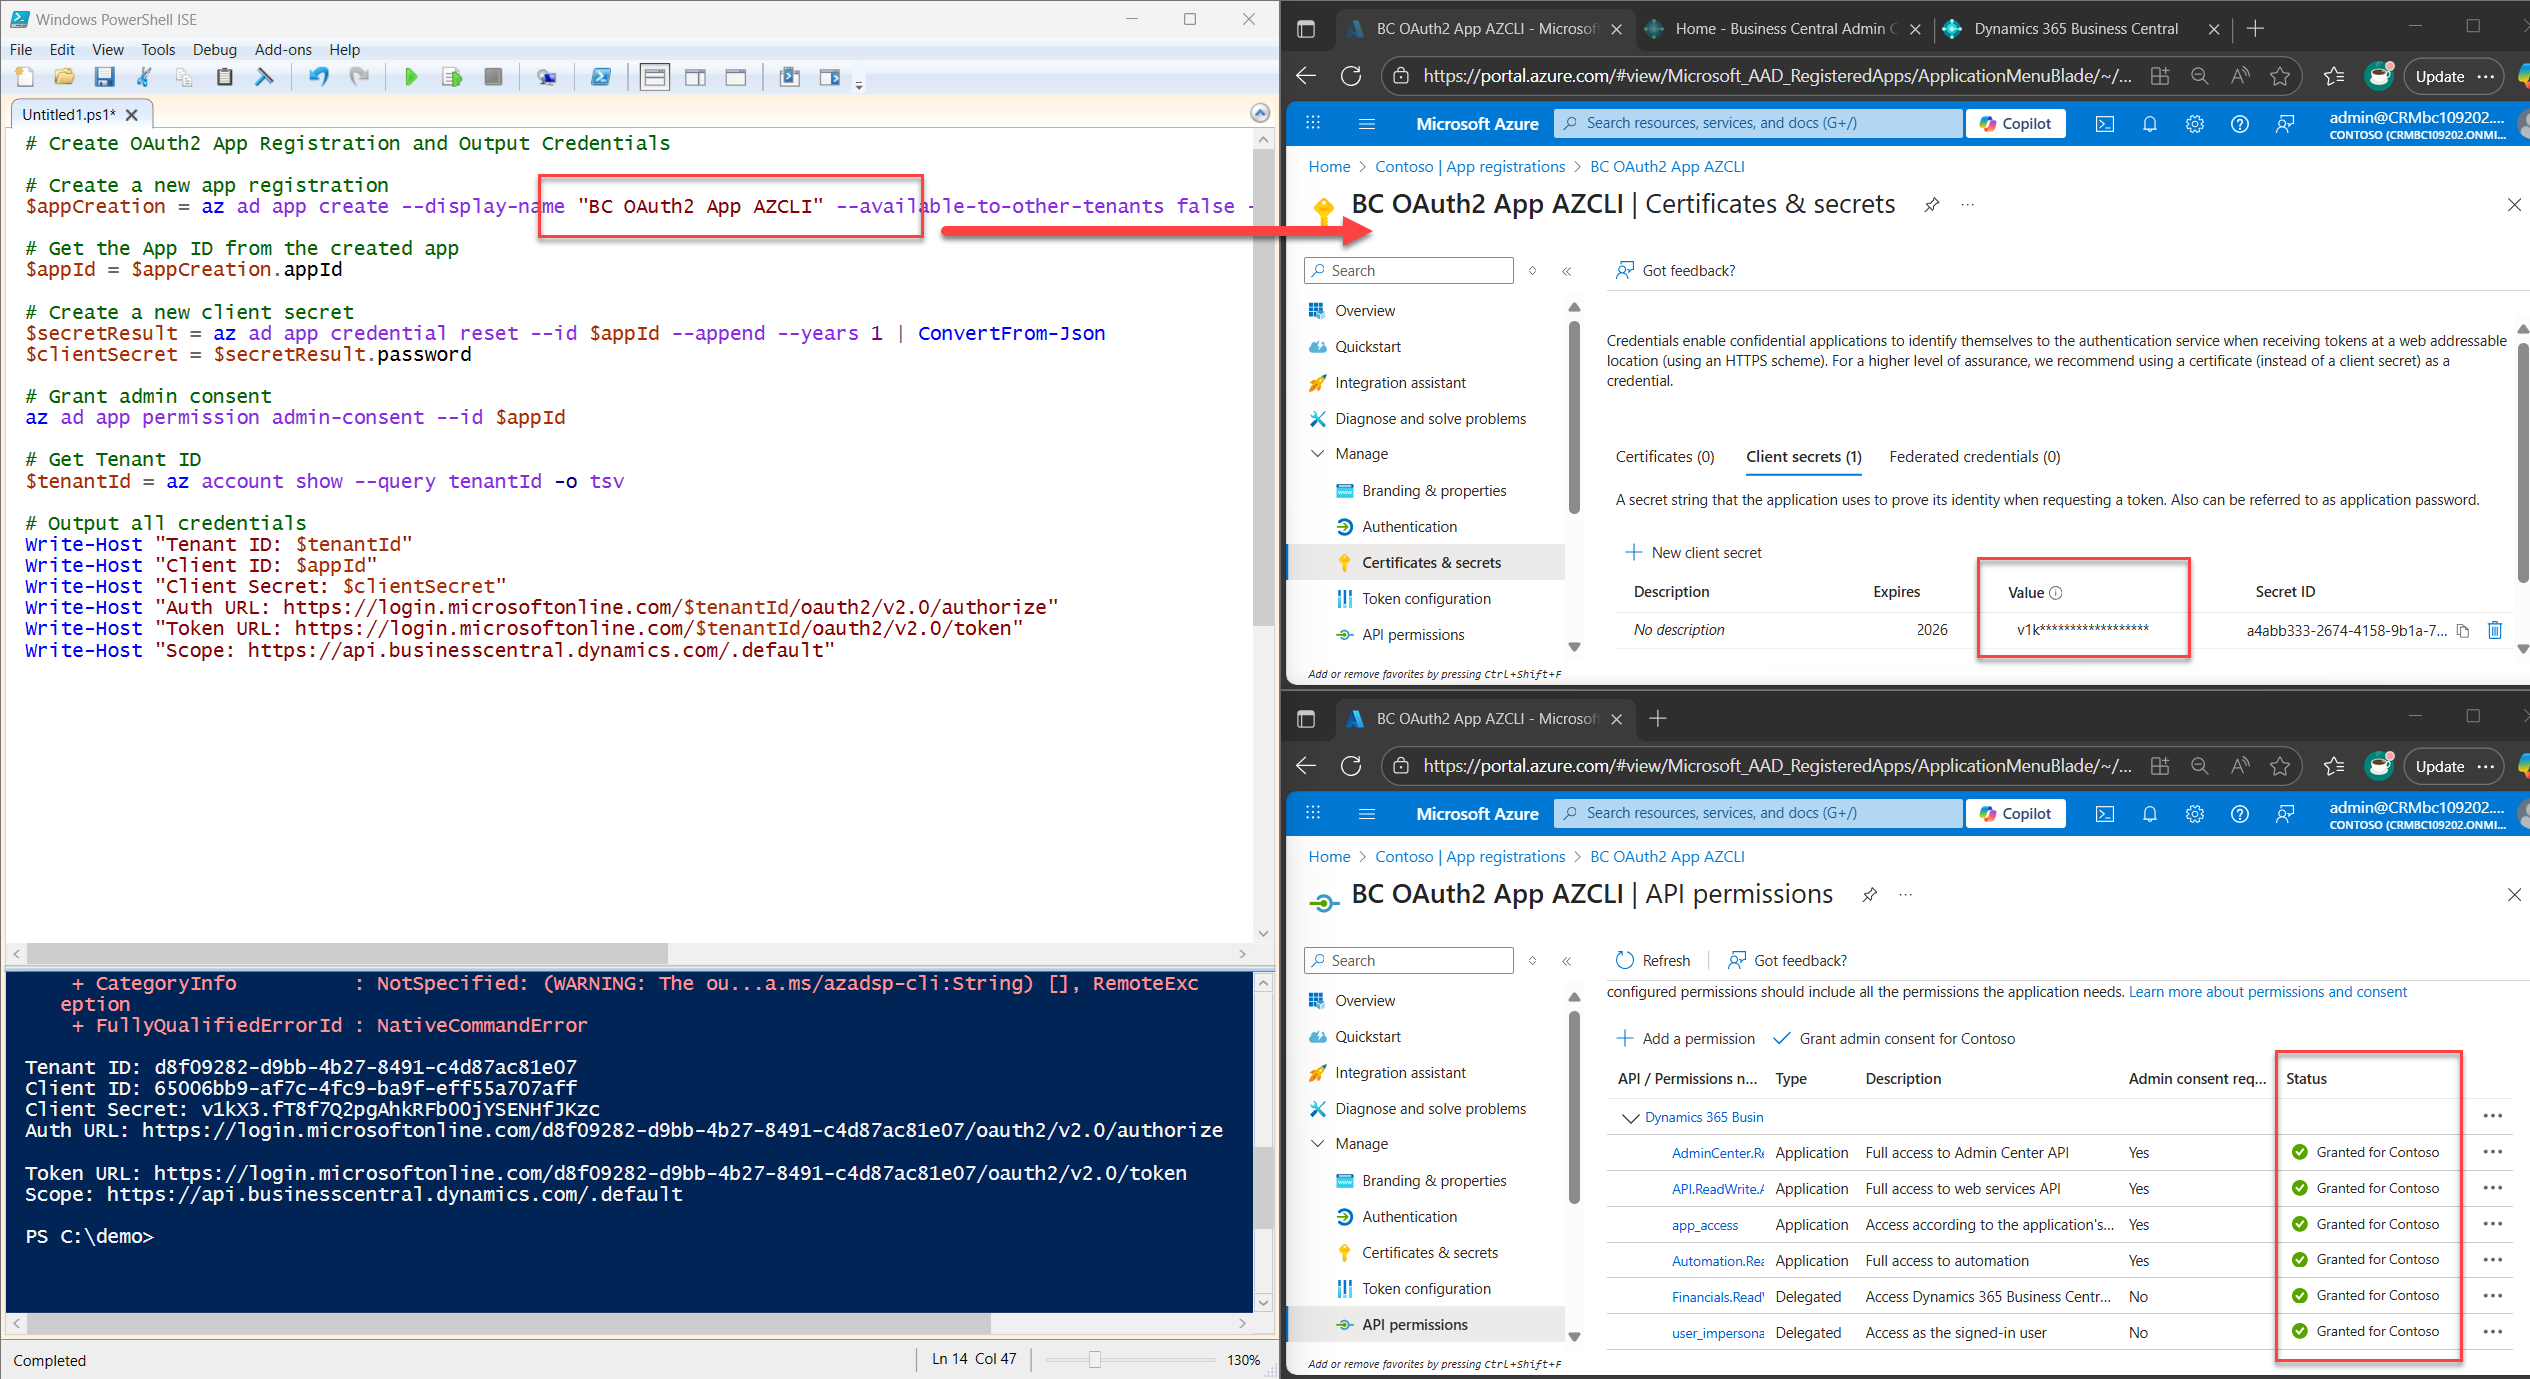
Run a Single Script and Output Credentials for Postman
Assuming you’re already logged in using az login, here’s the final stretch.
Just copy, paste, and save the script below to your working directory. Run it, and it’ll handle everything, from app registration to secret generation to admin consent. And bam bam boom! you’ve got an OAuth2 setup ready for Postman.
# Create OAuth2 App Registration and Output Credentials

# Create a new app registration
$appCreation = az ad app create --display-name "BC OAuth2 App AZCLI" --available-to-other-tenants false --required-resource-accesses permissions.json | ConvertFrom-Json

# Get the App ID from the created app
$appId = $appCreation.appId

# Create a new client secret
$secretResult = az ad app credential reset --id $appId --append --years 1 | ConvertFrom-Json
$clientSecret = $secretResult.password

# Grant admin consent
az ad app permission admin-consent --id $appId

# Get Tenant ID
$tenantId = az account show --query tenantId -o tsv

# Output all credentials
Write-Host "Tenant ID: $tenantId"
Write-Host "Client ID: $appId"
Write-Host "Client Secret: $clientSecret"
Write-Host "Auth URL: https://login.microsoftonline.com/$tenantId/oauth2/v2.0/authorize"
Write-Host "Token URL: https://login.microsoftonline.com/$tenantId/oauth2/v2.0/token"
Write-Host "Scope: https://api.businesscentral.dynamics.com/.default"
That’s a wrap, my friends.
You can now test this setup in Postman using OAuth2. If you need help with that, check out Part 2: Learn How to Configure Entra, Set Up Postman, and Validate OAuth2 Token Flow of this series, I’ve walked through it there.
Best Practices (That I Personally Tested)
Here are a few things I’ve learned the hard way—and pressure-tested across multiple tenants:
- Pin your Azure CLI version to one that supports az ad app create e.g. 2.27.2
- Document your permissions.json with exact GUIDs and permission types
- Rotate secrets annually and use --append to avoid overwriting existing ones
- Test app registration in a sandbox tenant before rolling out to production
- Output credentials cleanly using --query and -o tsv for Postman or automation pipelines
- Store secrets securely, never commit them to Git or share in plaintext
Common Issues
Here are a few bumps you might hit and how to smooth them out
Pro Tip
If you're working on a multiple tenants or sandboxes, wrap this in entirely on a PowerShell. Parameterize the app name, tenant ID, and secret label so you can reuse it across environments with minimal effort.
TL;DR – What’s Next
You’ve just automated Entra app registration using Azure CLI, complete with Business Central permissions, client secret generation, and admin consent.
By pinning a compatible CLI version and defining your permissions.json, you’ve removed the manual setup and made the process repeatable.
Coming in Part 5: We’ll automate token retrieval using PowerShell, no Postman required. You’ll learn how to script token acquisition using Invoke-RestMethod, validate scopes, and prep for headless integration with Business Central APIs.
Support for the Community
If you’ve run into issues with CLI versions, permission GUIDs, or consent flows, feel free to comment or raise a GitHub issue. I’ll keep this series updated as Microsoft evolves the tooling. If you’ve found a better way to script this, I’d love to hear it.
♻️ Repost to support the Microsoft Dynamics 365 Community and follow Jeffrey Bulanadi for technical insights above and beyond Business Central, AL development, and scalable integration architecture.
Demo Repository
Want to see how it all fits together?
I’ve shared a GitHub sample that includes the CLI script, permissions file, and setup notes. 👉 OAuth2 Setup and Automation – Part 4 on GitHub
✨ Part 5 is now live: Learn how headless token retrieval works and validate tokens using PowerShell. View blog
Helpful References
How to install the Azure CLI | Microsoft Learn
Microsoft Customer Digital Experience (CDX)
Microsoft Demo eXperiences
az ad app | Microsoft Learn
Business Central API Access – Microsoft Docs
Join the Conversation
Share your thoughts, ask questions, or discuss this article with the community. All comments are moderated to ensure quality discussions.
No comments yet
Be the first to start the conversation!
0 Comments
Leave a Comment