


D365 Business Central: OAuth2 Setup and Automation – Part 3
Yo! This is my third installment of this OAuth2 Setup and Automation deep dive HAHAHAHAHA, I never imagined I'd write a blog that clocks in at 20 minutes lol, But here we are.
Anyways, If you’re reading this, I’ll assume you’ve already gone through the first two parts. If not, of course you can grab them below:
- Part 1: Register Your Entra App, Assign Business Central Permissions, and Prepare for OAuth2 Token Testing
- Part 2: Configure Entra, Set Up Postman, and Validate OAuth2 Token Flow
After manually testing OAuth2 in Part 2, I needed a way to make my Postman collection reusable, without relying on manual token refresh or external environments.
Clicking “Get New Access Token” worked, but it didn’t scale. I wanted every request to run automatically. No clicks. No copy/paste. No setup friction.
This guide documents how I automated token retrieval using Postman’s scripting engine, at the collection level only. No environments. No external dependencies. Just a clean, self-contained setup.
What You’ll Walk Away With
To keep things exciting, here’s a high level overview of what this blog is all about (and yes, I’m soooooooooooooooooo pumped writing this):
- Defining collection-level variables
- Writing a pre-request script to retrieve the token
- Assigning the token to access_token
- Using the token in request headers
- Validating the setup with a real Business Central API call
- Structuring the collection for repeatable use
- Handling token expiry and refresh logic
- Debugging and fallback strategies
Sounds like another deep dive, right? So what are we waiting for?
Grab your favorite snorkel, and maybe bring some extra oxygen. We’re diving again, but this time we’re adding a twist: we’re going beyond AL and into the world of JavaScript.
Overview: What Postman Scripts Are (and Why They Matter)
The Textbook Take
Postman scripts are small blocks of JavaScript that run inside Postman to automate tasks, manipulate request data, and validate responses. They enhance API workflows by adding logic before or after a request is sent.
There are two types of scripts:
At the collection level, these scripts apply to every request in the collection, unless you override them at the folder or request level.
What This Means in Practice
Think of Postman scripts like little helpers that run before or after each API call:
- Pre-request script: Like prepping ingredients before cooking. You might grab a token, set a timestamp, or prepare headers.
- Test script: Like checking the dish after cooking. You taste it, check if it’s hot enough, and maybe save the result for later.
When you write these scripts at the collection level, it’s like setting rules for the whole kitchen. Every dish (API request) follows the same prep and check routine, unless you say otherwise.
A Step by Step Guide: Collection Level Token Automation
1. Prepare Our Postman Collection
Open the Postman Collection you created earlier. (See Part 2: Configure Entra, Set Up Postman, and Validate OAuth2 Token Flow if you missed this setup.)
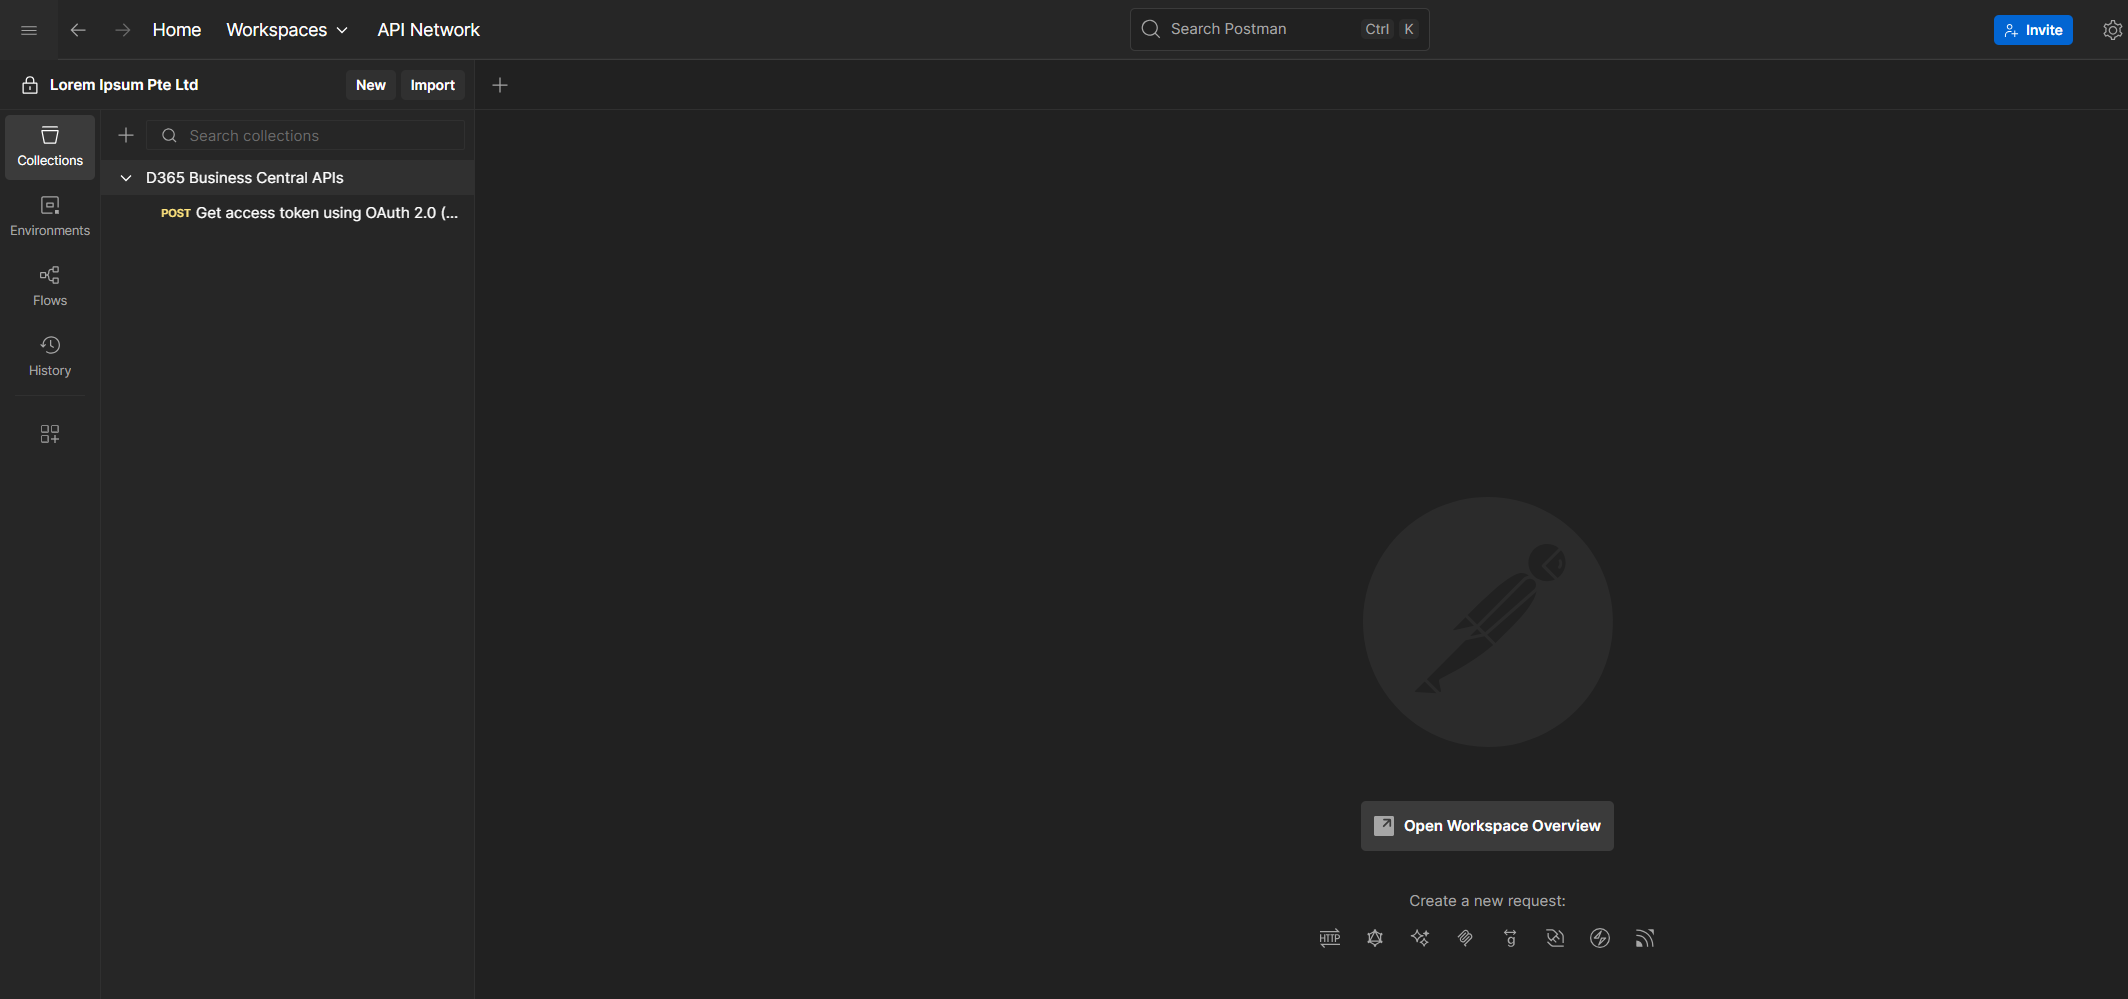
Select the Collection to open its panel. You’ll see five tabs: Overview, Auth, Scripts, Variables, and Runs.
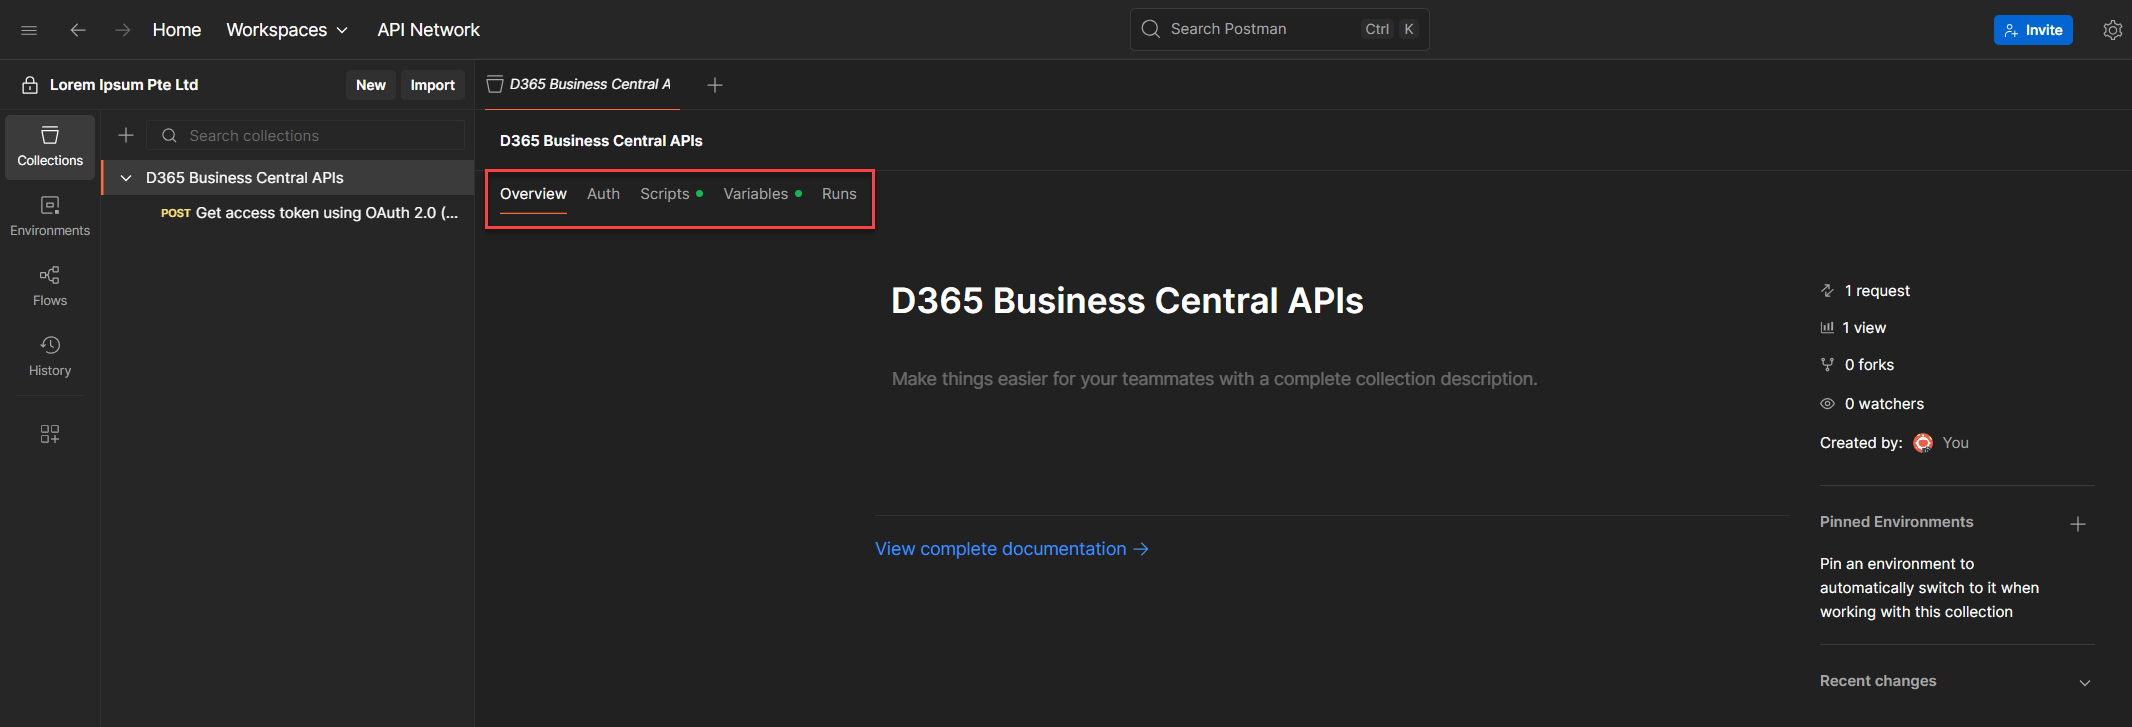
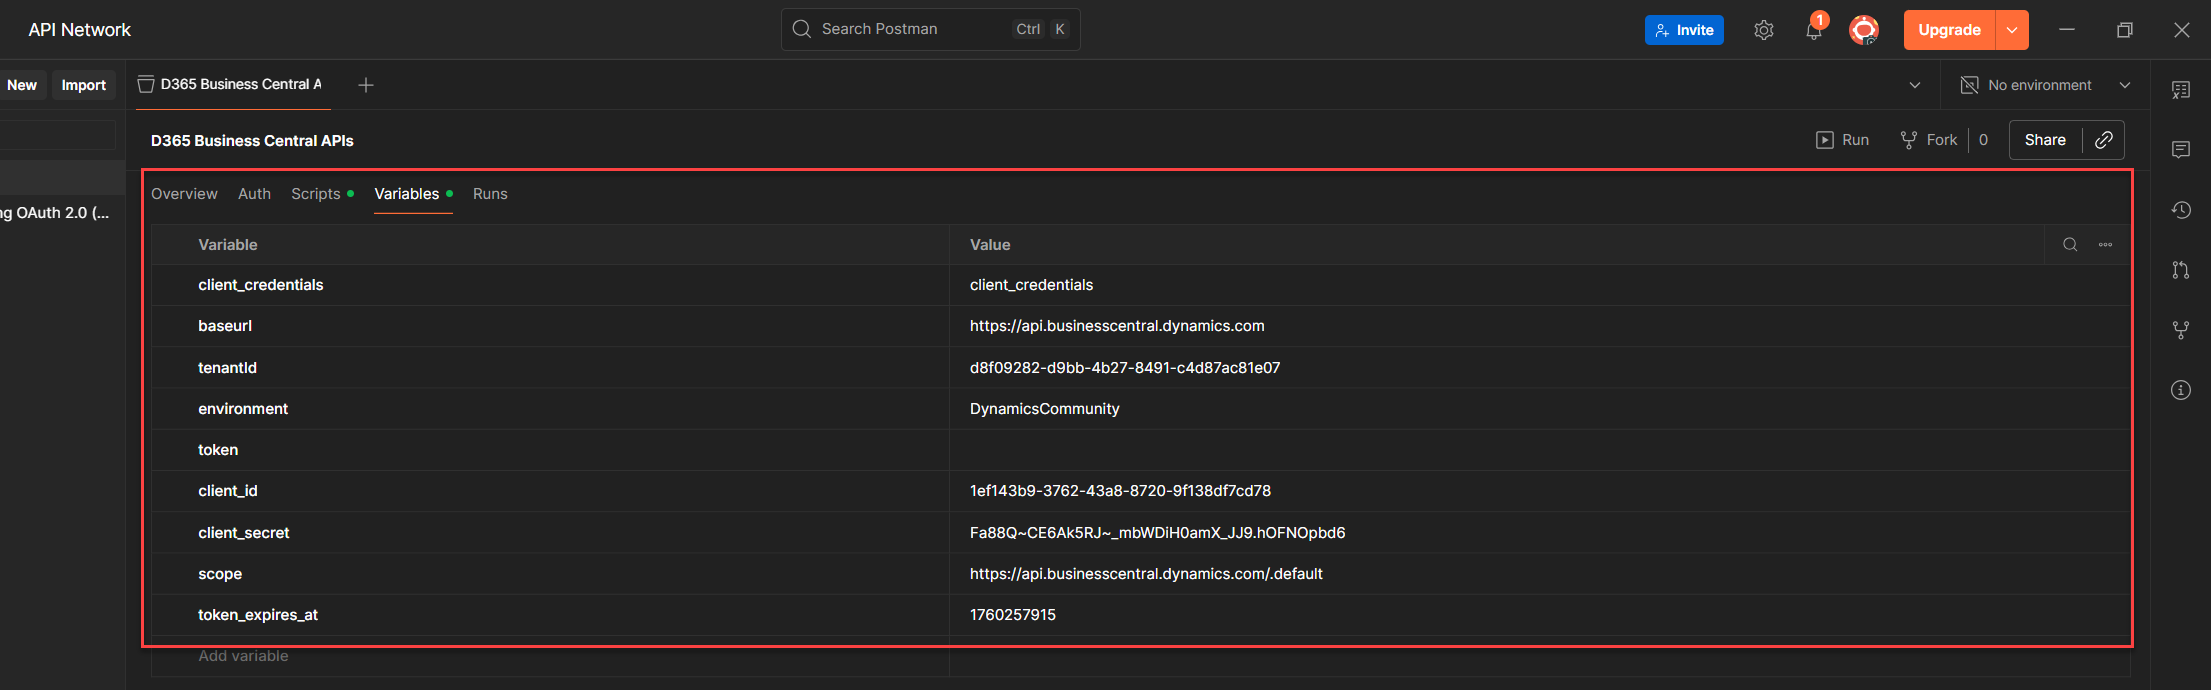
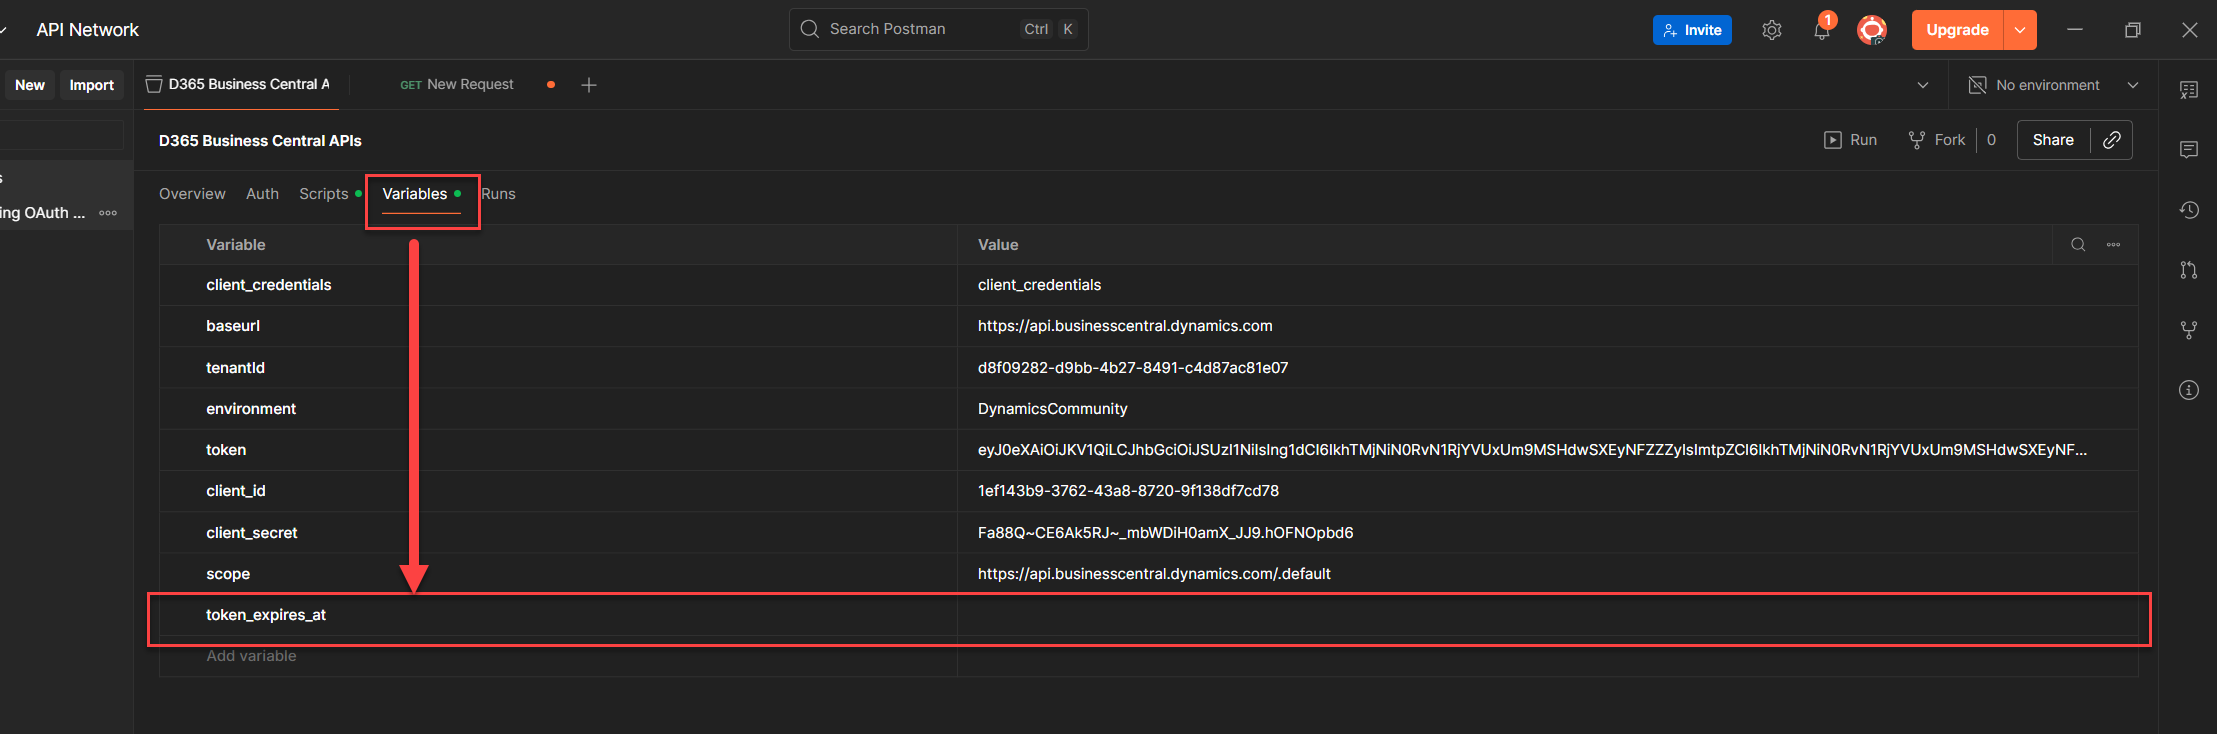
2. Define Collection Variables
Go to Variables tab, and this will allow you to define Variables and Value and the following:
Use Current Value for secrets. Do not sync to Postman Cloud.
3. Add a Pre-request Script to the Collection
Go to the Scripts tab of the Collection
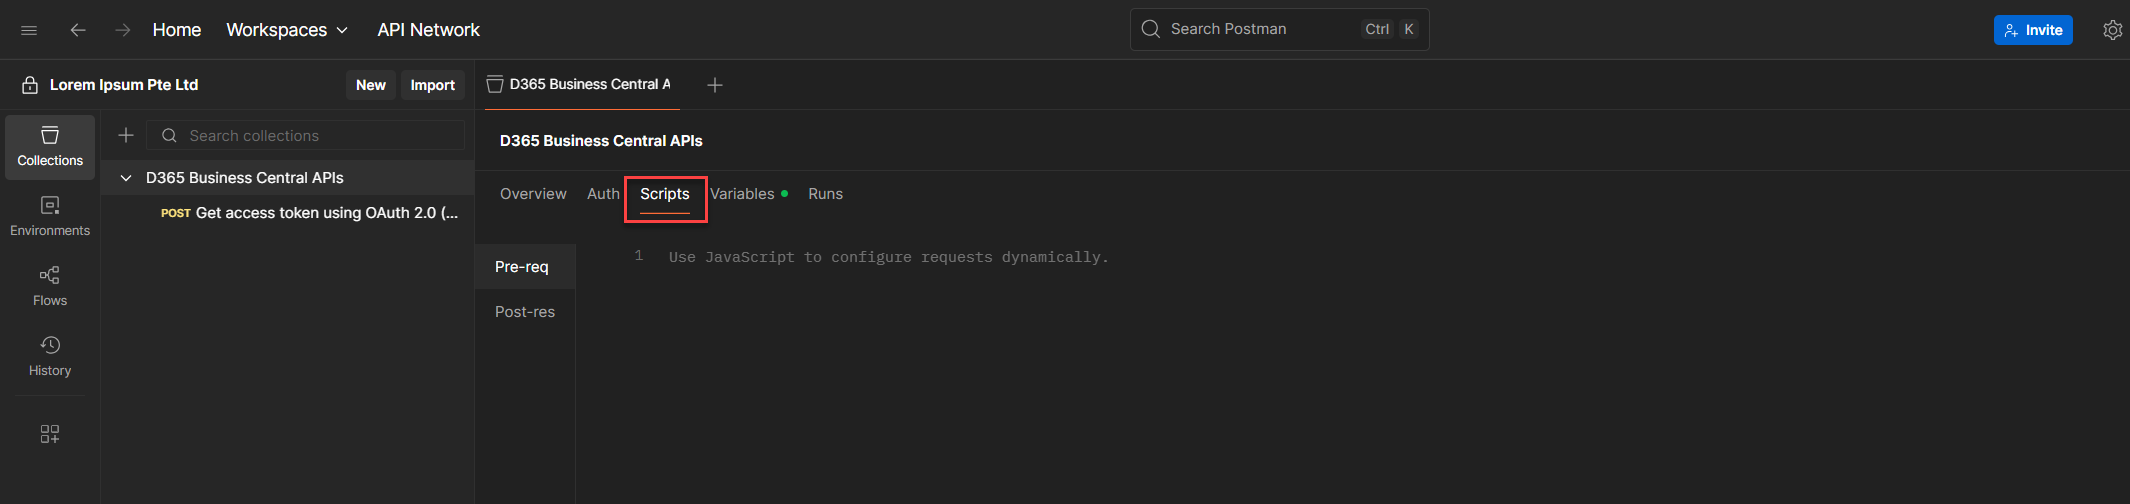
Choose Pre-req (Pre-request Script) and paste the following:
  pm.sendRequest({
      url: `https://login.microsoftonline.com/${pm.collectionVariables.get("tenantId")}/oauth2/v2.0/token`,
      method: 'POST',
      header: {
          'Content-Type': 'application/x-www-form-urlencoded'
      },
      body: {
          mode: 'urlencoded',
          urlencoded: [
              { key: 'grant_type', value: 'client_credentials' },
              { key: 'client_id', value: pm.collectionVariables.get("client_id") },
              { key: 'client_secret', value: pm.collectionVariables.get("client_secret") },
              { key: 'scope', value: 'https://api.businesscentral.dynamics.com/.default' }
          ]
      }
  }, function (err, res) {
      if (!err) {
          const json = res.json();
          pm.collectionVariables.set("token", json.access_token);
      } else {
          console.log("Token request failed", err);
      }
  });
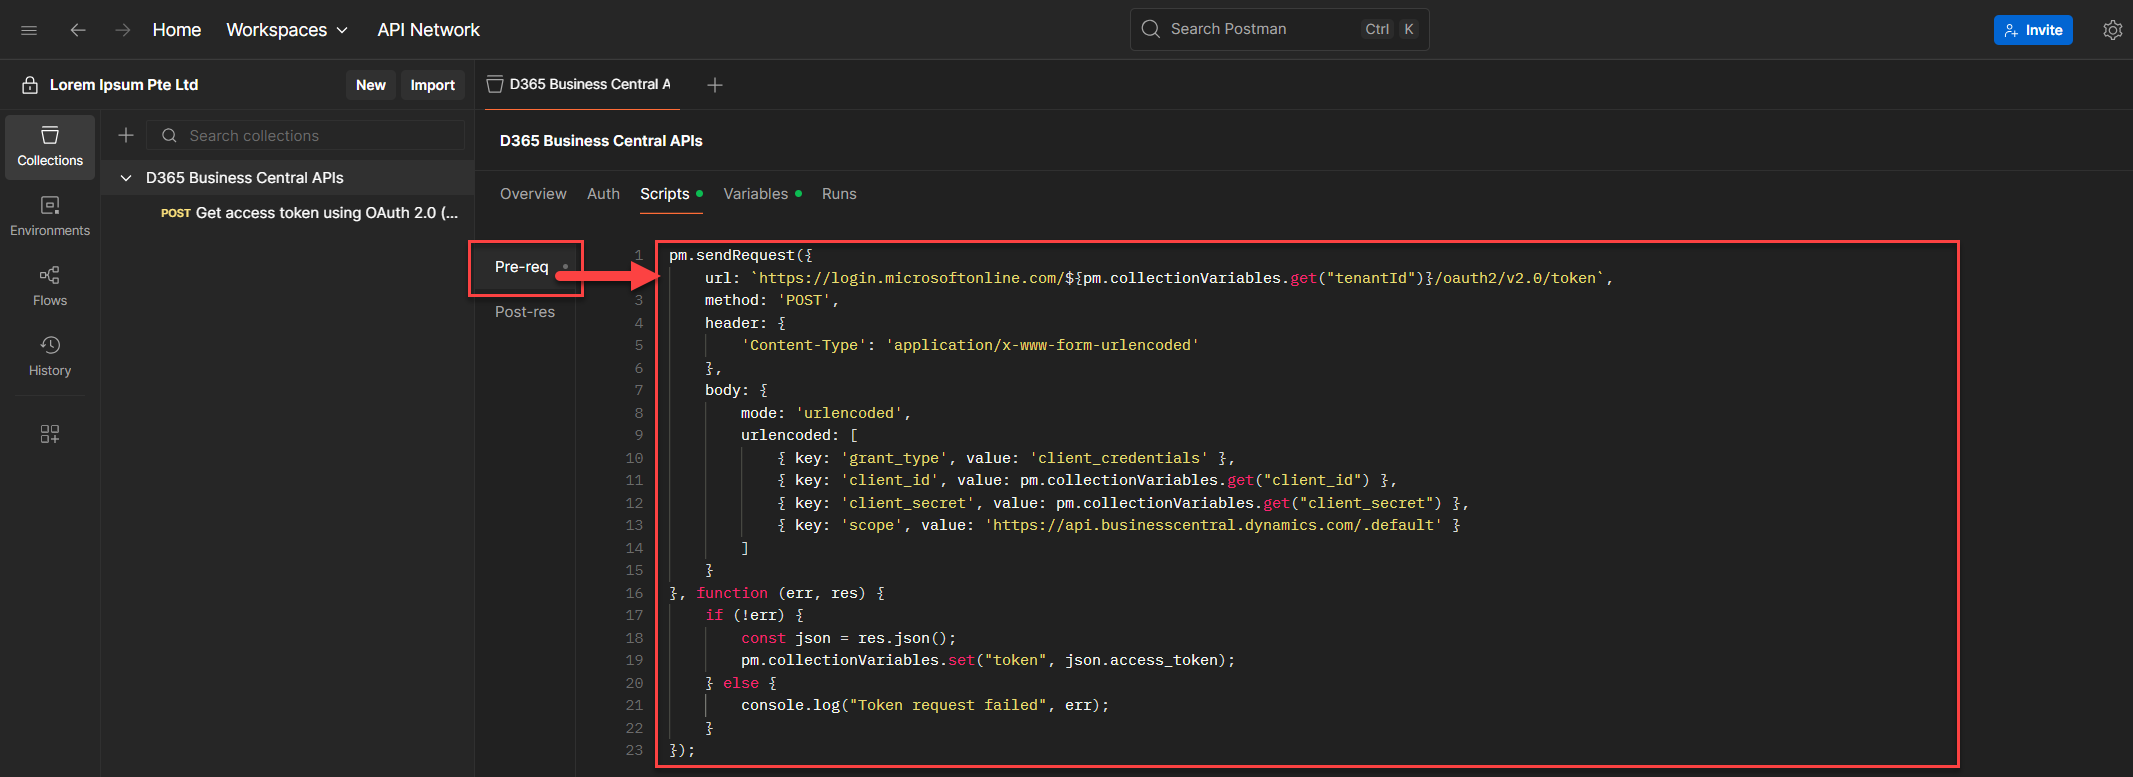
This script runs before every request in the collection. It fetches a fresh access_token and stores it in the token variable.
What This Script Does (Layman's Breakdown, Because I love making things not so boooooooooooooooooring)
This script automates the OAuth2 token request for Microsoft Business Central using the client credentials flow. It runs inside Postman (typically as a collection level pre-request script) and does the following:
Script Breakdown: Developer Edition (Well high-level, Come on! HAHAHAHAHA)
pm stands for Postman, Yes. pm is the global object Postman exposes in its scripting sandbox. It gives you access to Postman’s runtime API: variables, request/response data, environment controls, etc.
collectionVariables as a module. Think of pm.collectionVariables as a scoped container, like a codeunit in AL or a service class in other ecosystems. It holds methods (get, set, etc.) that let you interact with variables tied to the collection level, not the environment or global scope.
- pm.collectionVariables.get("key") → pulls values scoped to the collection
- pm.collectionVariables.set("key") → stores the token for reuse
- x-www-form-urlencoded is required by Microsoft’s token endpoint
- client_credentials flow is used for application level access
- .default scope maps to Business Central APIs
4. Use the Token in Request Headers
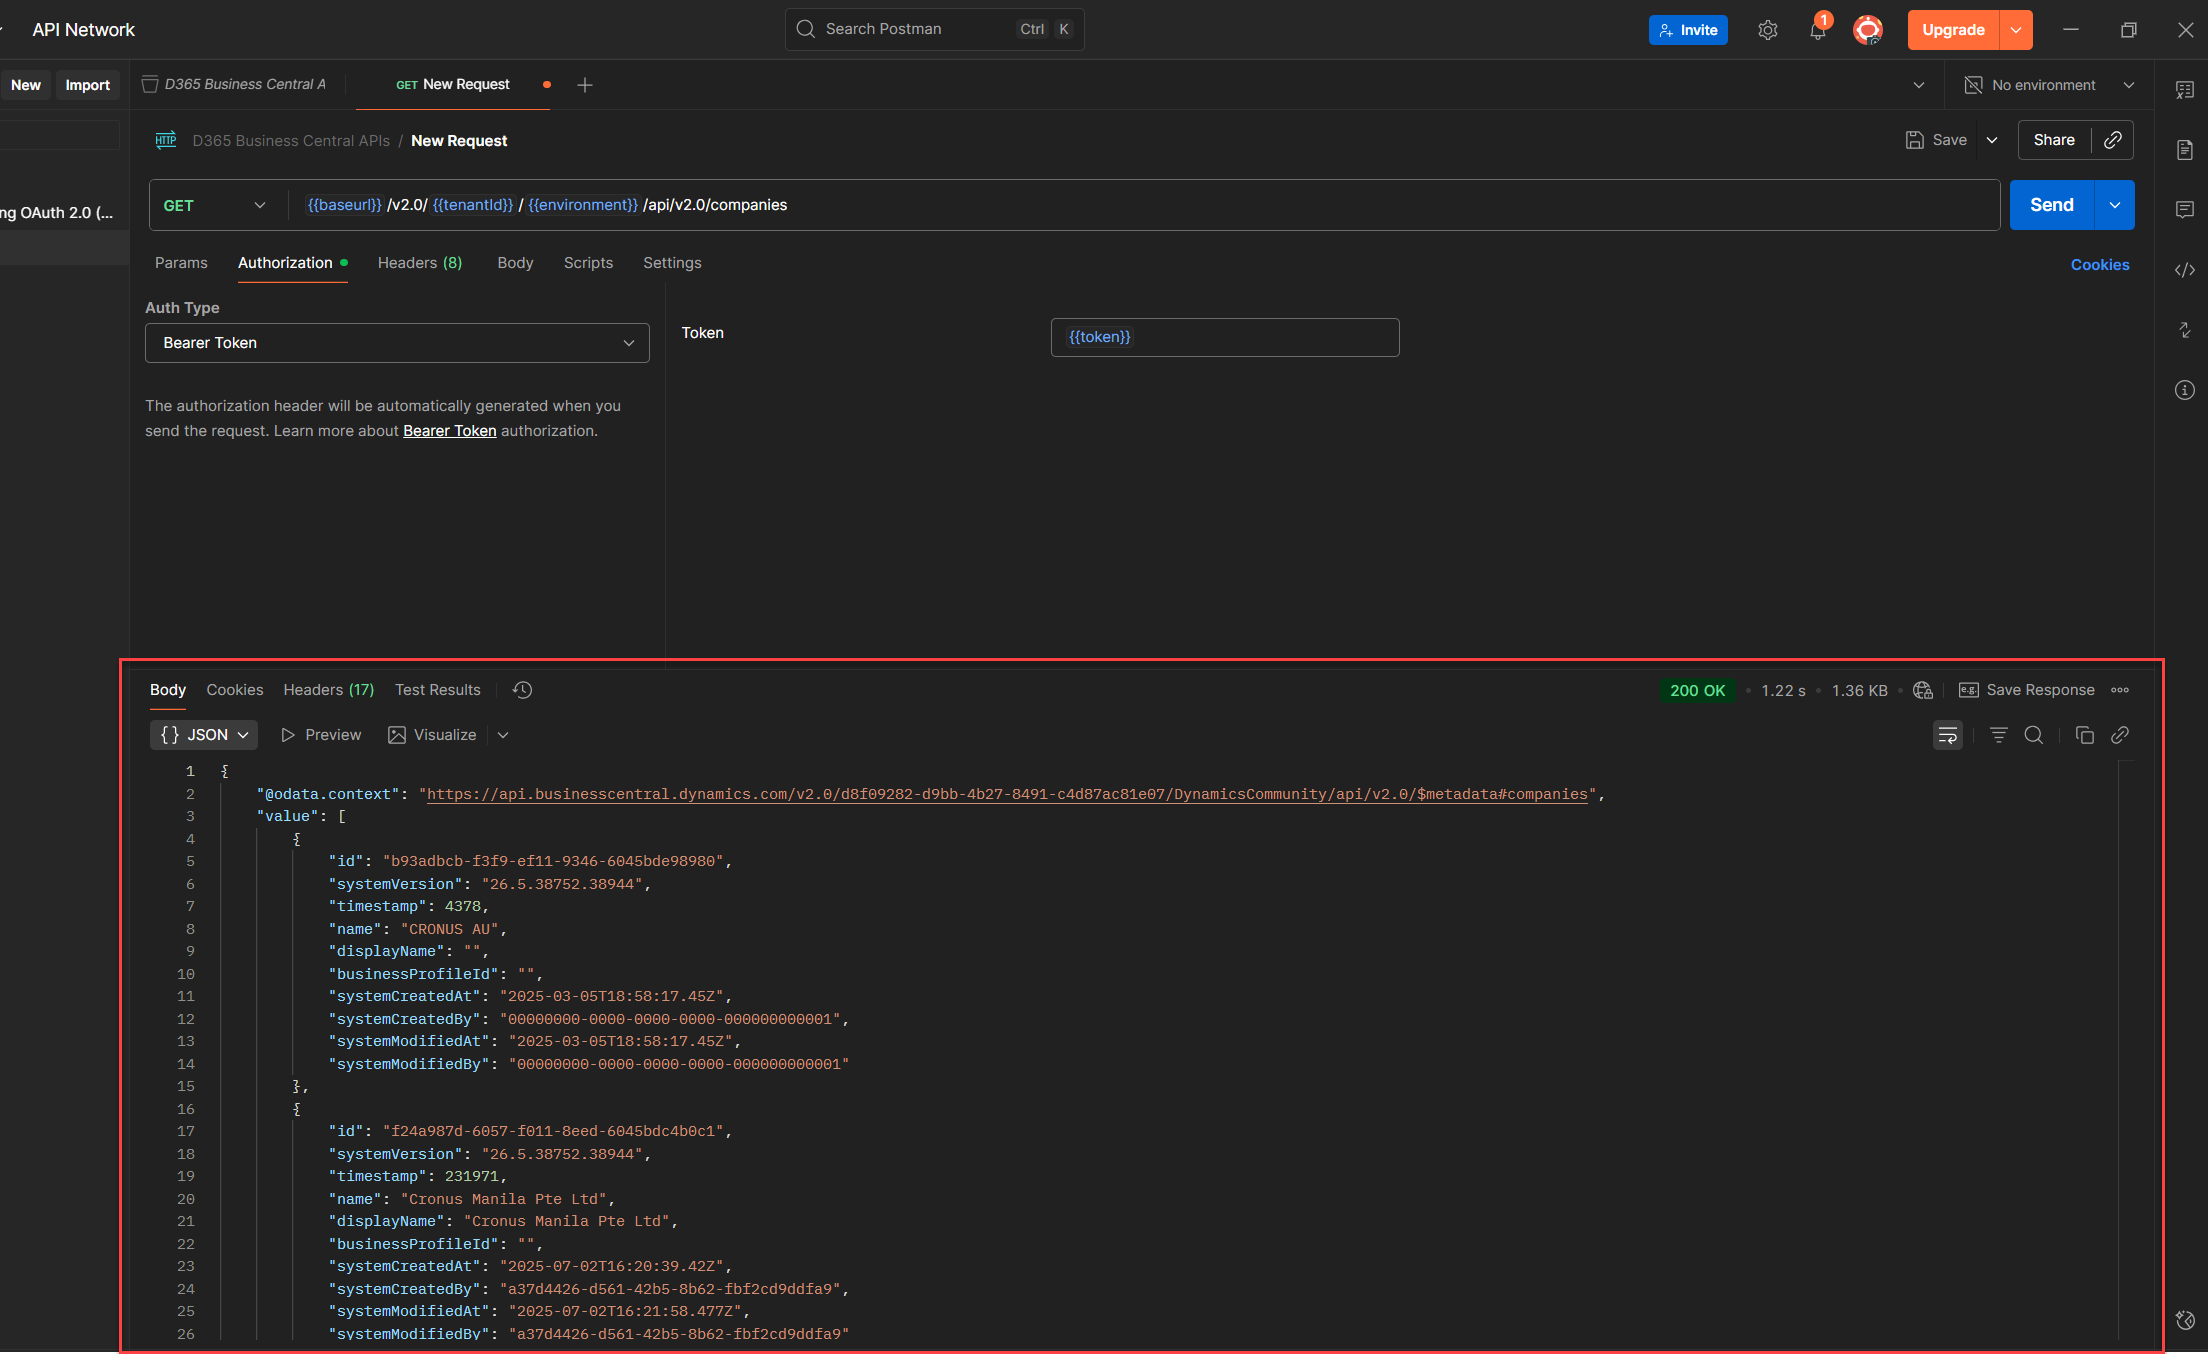
Alright, Let’s test what we’ve built so far. We’ll call the Companies endpoint to list the companies in your Business Central environment, just to prove the token works and the setup holds. e.g. GET /companies
4.1. Environment
Make sure you’re inside the Postman Collection we’ve been working on. If you’re not, no worries, just jump back to Part 2: Configure Entra, Set Up Postman, and Validate OAuth2 Token Flow and get it set up.
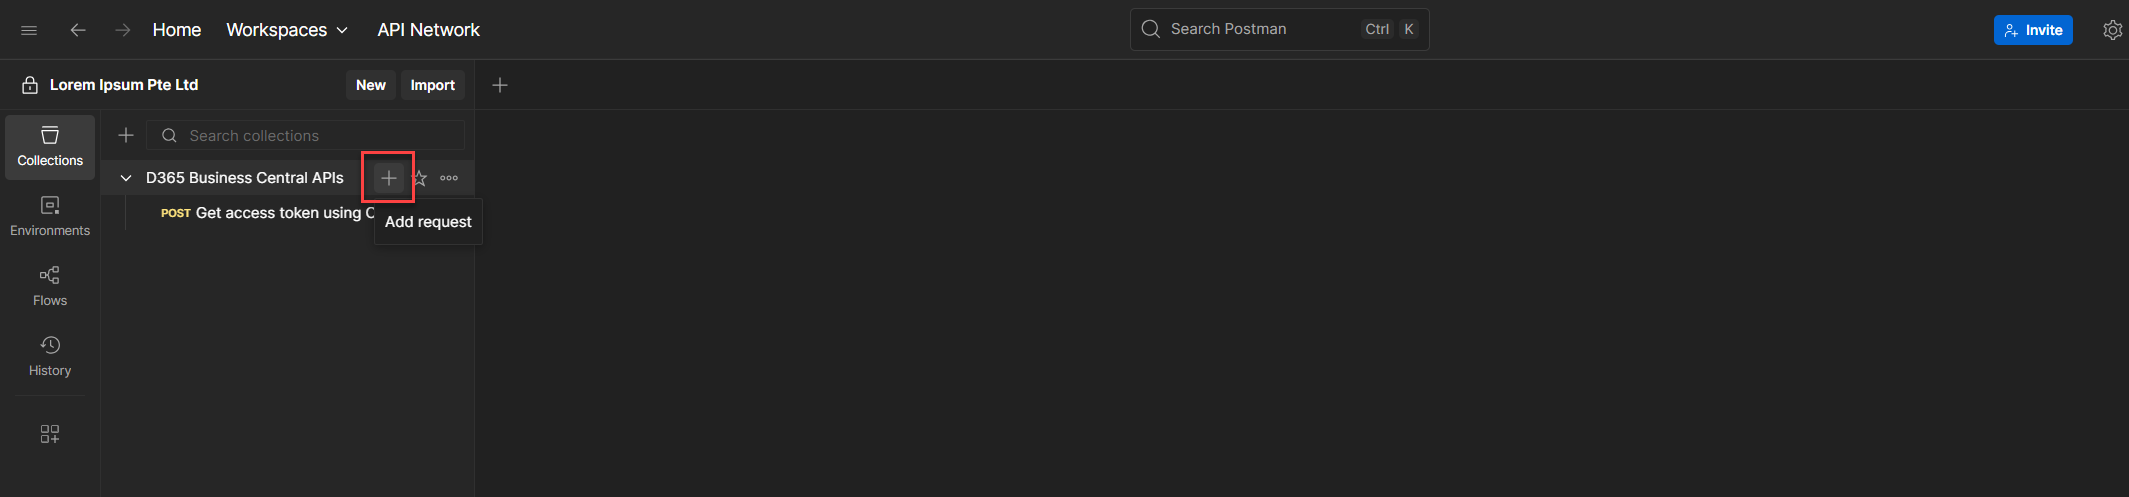
4.2. Adding a Request
Click the plus icon (hovering over it will show Add Request).
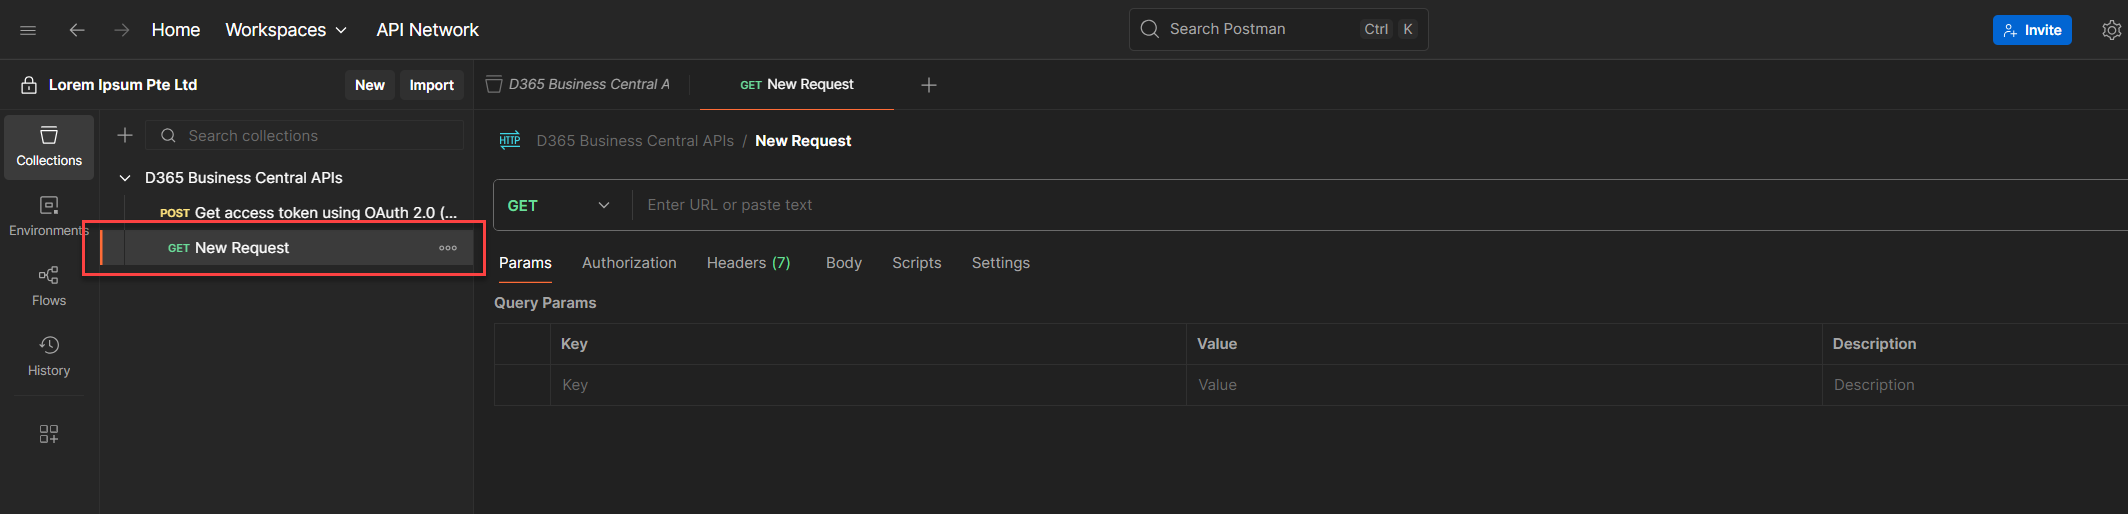
4.3. Method and URL
By clicking so, will create a new HTTP Request with a GET method as a default (we covered this in Part 2 so i won't explain it in here in detailed)
At the URL field, paste this: (Note: Double curly braces)
{baseurl}/v2.0/{tenantId}/{environment}/api/v2.0/companies
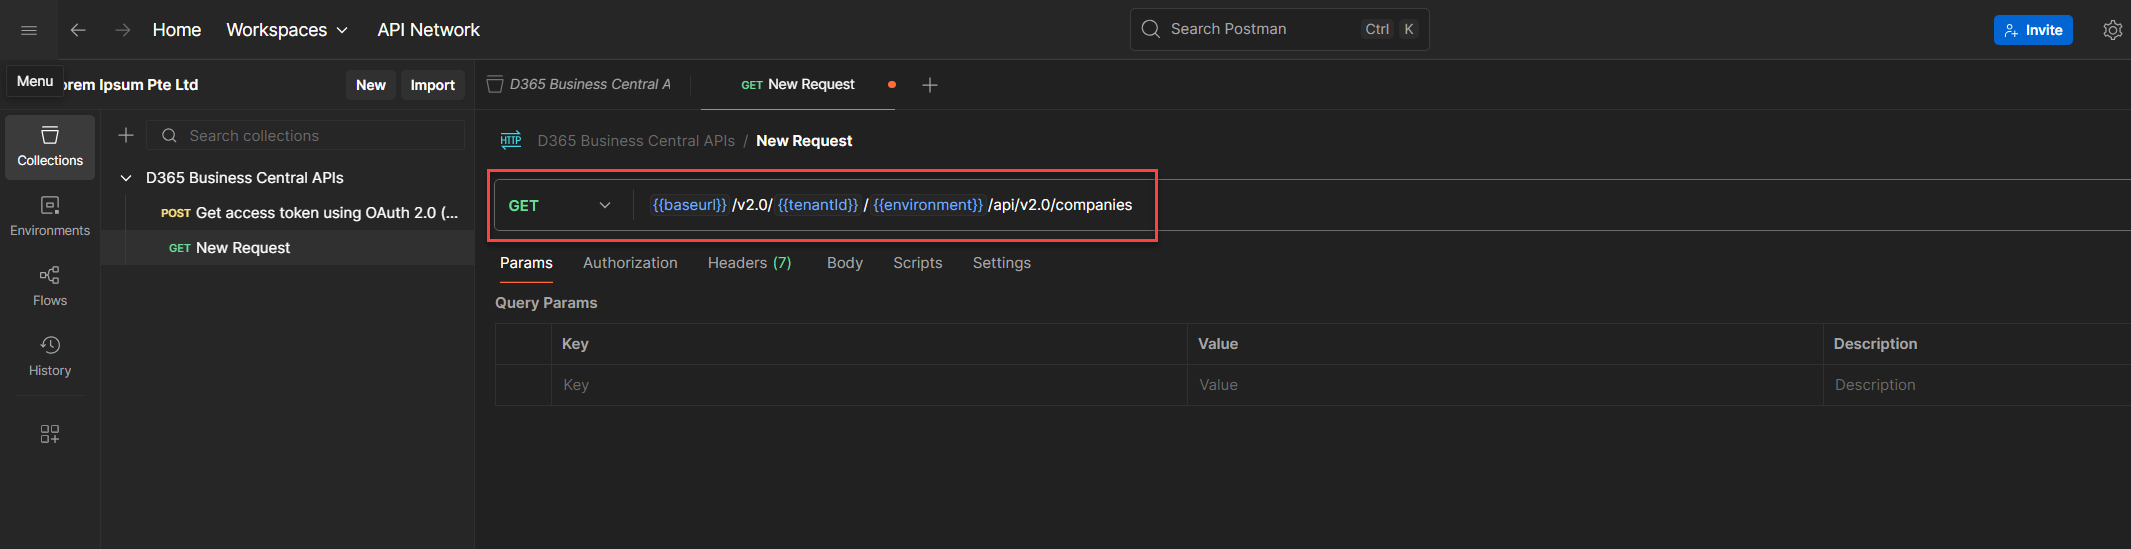
We stored baseurl and environment earlier, so you don’t need to hardcode anything. This endpoint lists the companies in your BC environment.
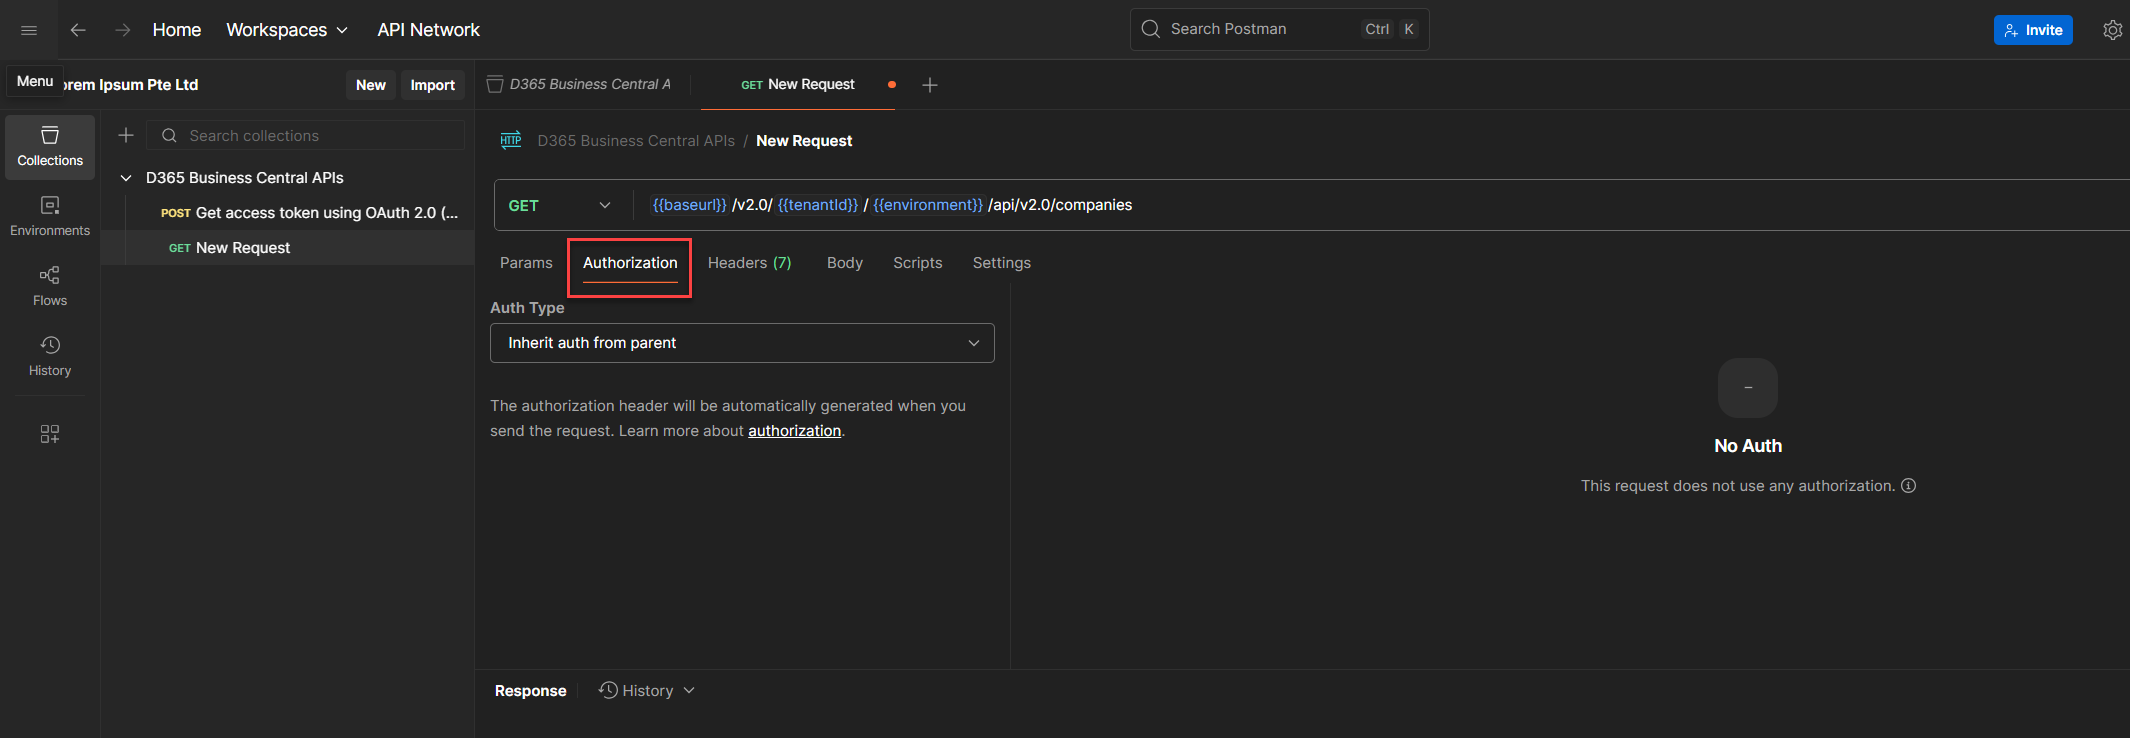
4.4. Set Authorization
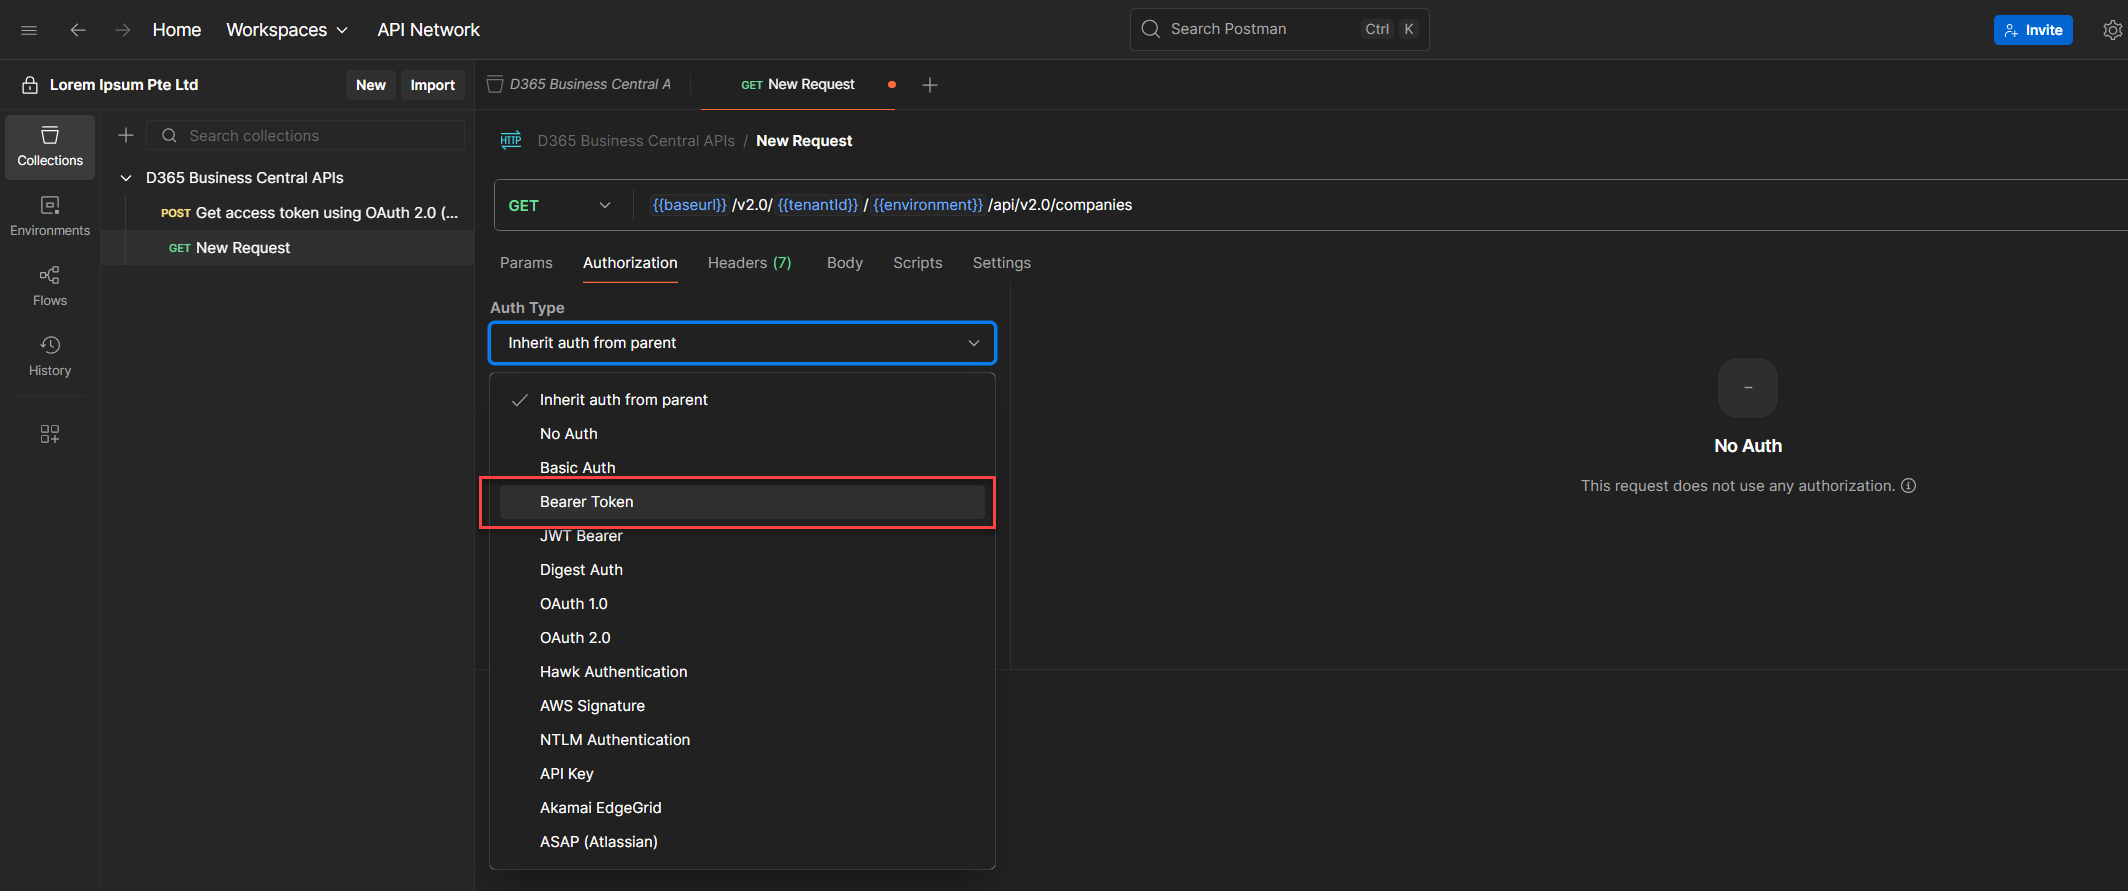
Go to the Authorizations Tab.
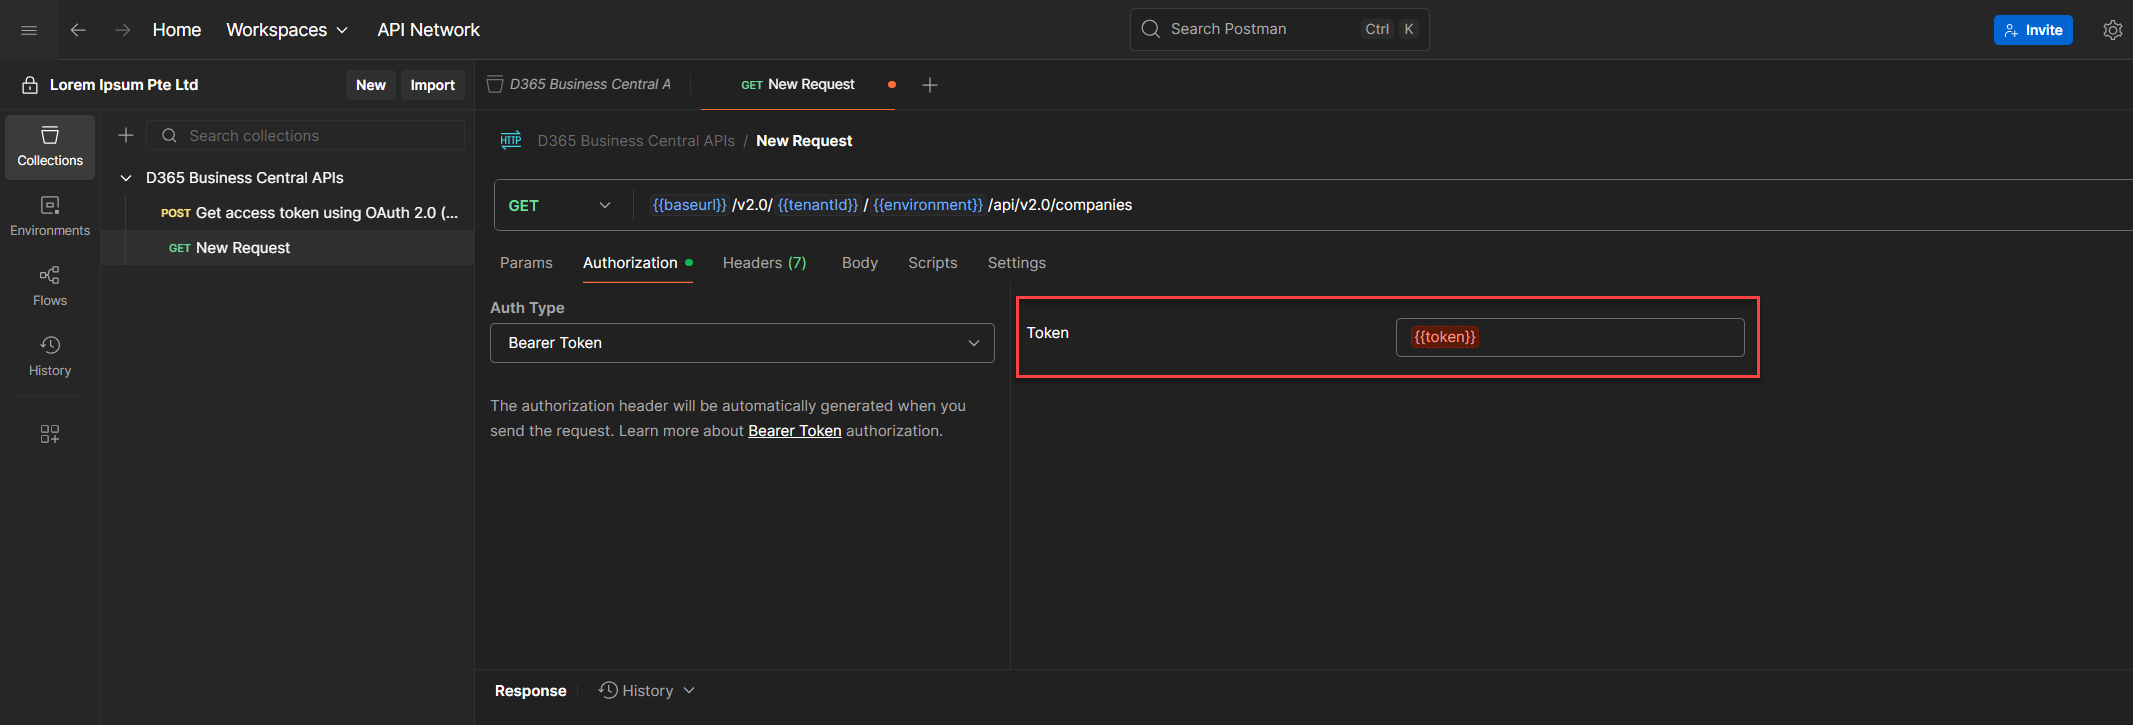
Drop down the Auth Type field until you see Bearer Token, then click it.
In the Token field, type: (Note: Double curly braces)
{token}
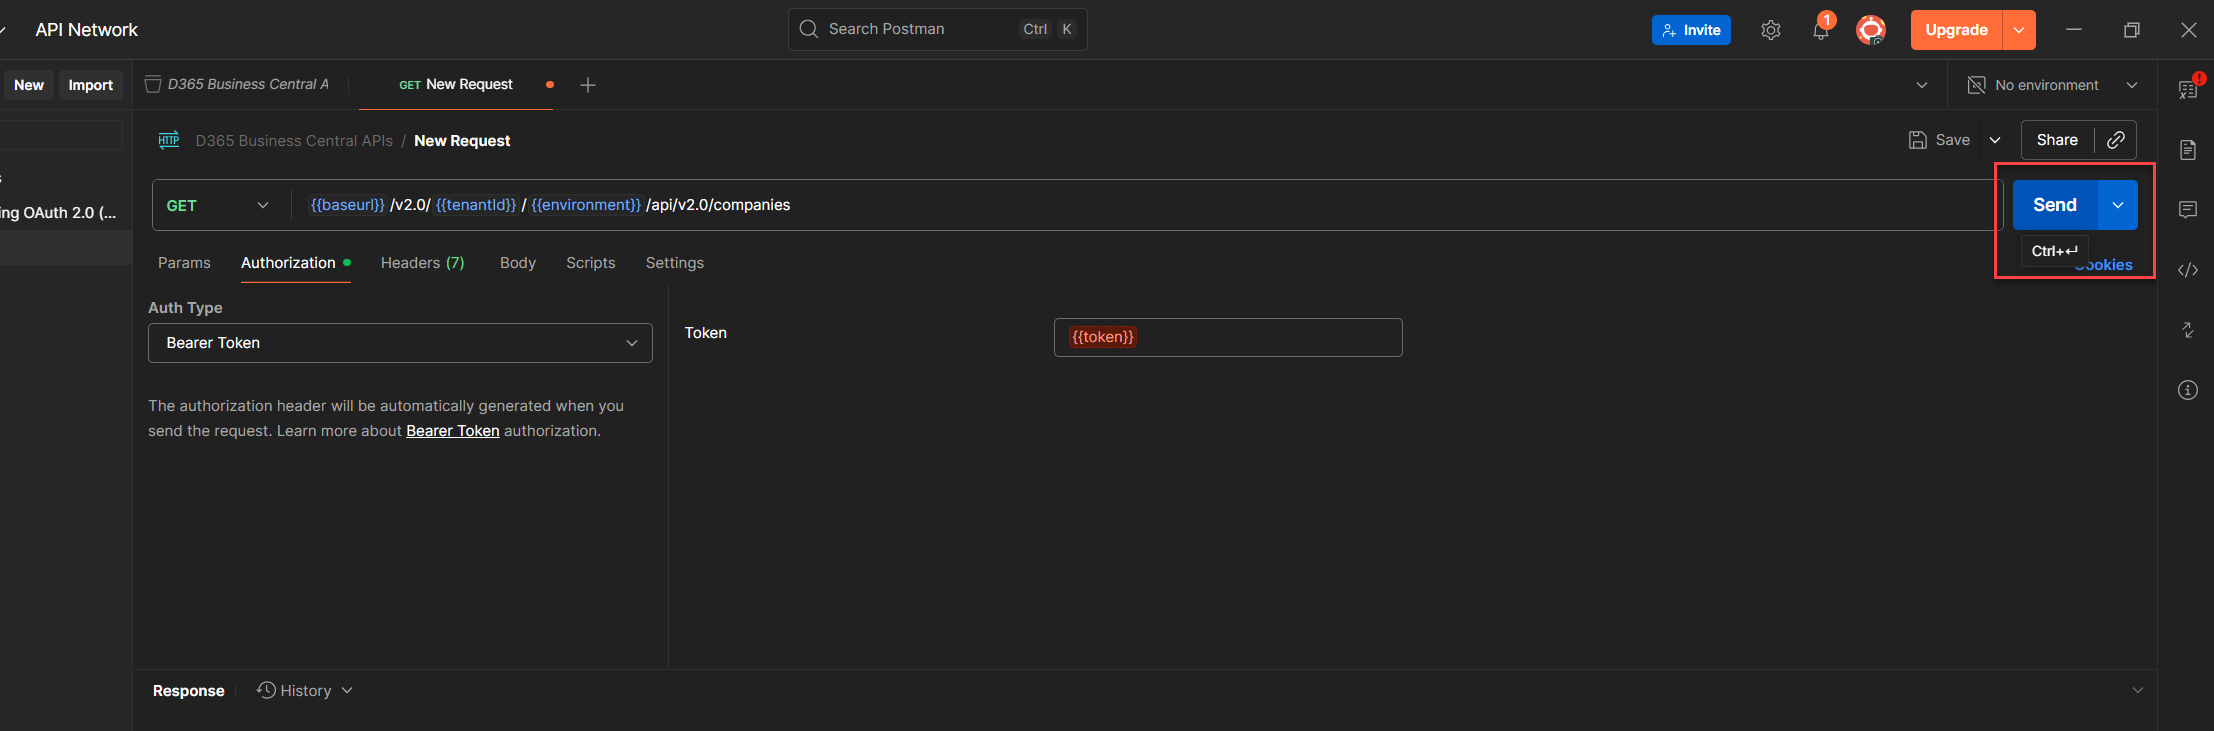
4.5. Send the Request
Once done, Click Send to test
If everything’s wired up, you’ll get a response with your company data and we're done done done! (I caught you singing again lol HAHAHAHAHA)
Token Expiry and Refresh Strategy
No need to manually call the token endpoint every time it expires, our pre-request script handles that. But Yo, here’s the thing: we don’t want to hit the token API on every request either. We only want to call it when the token has actually expired.
So how do we handle that?
Simple. We tweak our script to check the current time against the token’s expiry timestamp. If it’s expired (or missing), we fetch a new one. Otherwise, we skip the call and save time and Yo, Steps are pretty ez to follow:
1. Add a New Variable
Create a new collection variable: token_expires_at, this will store the token’s expiry timestamp. (See the earlier guide for how to add collection variables.)
2. Modify the Pre-request Script for Smarter Token Handling
We’ll update our original script to check the current time against the token’s expiry timestamp. This way, we only call the Get Token v2 endpoint when the token has actually expired, saving time and avoiding unnecessary requests.
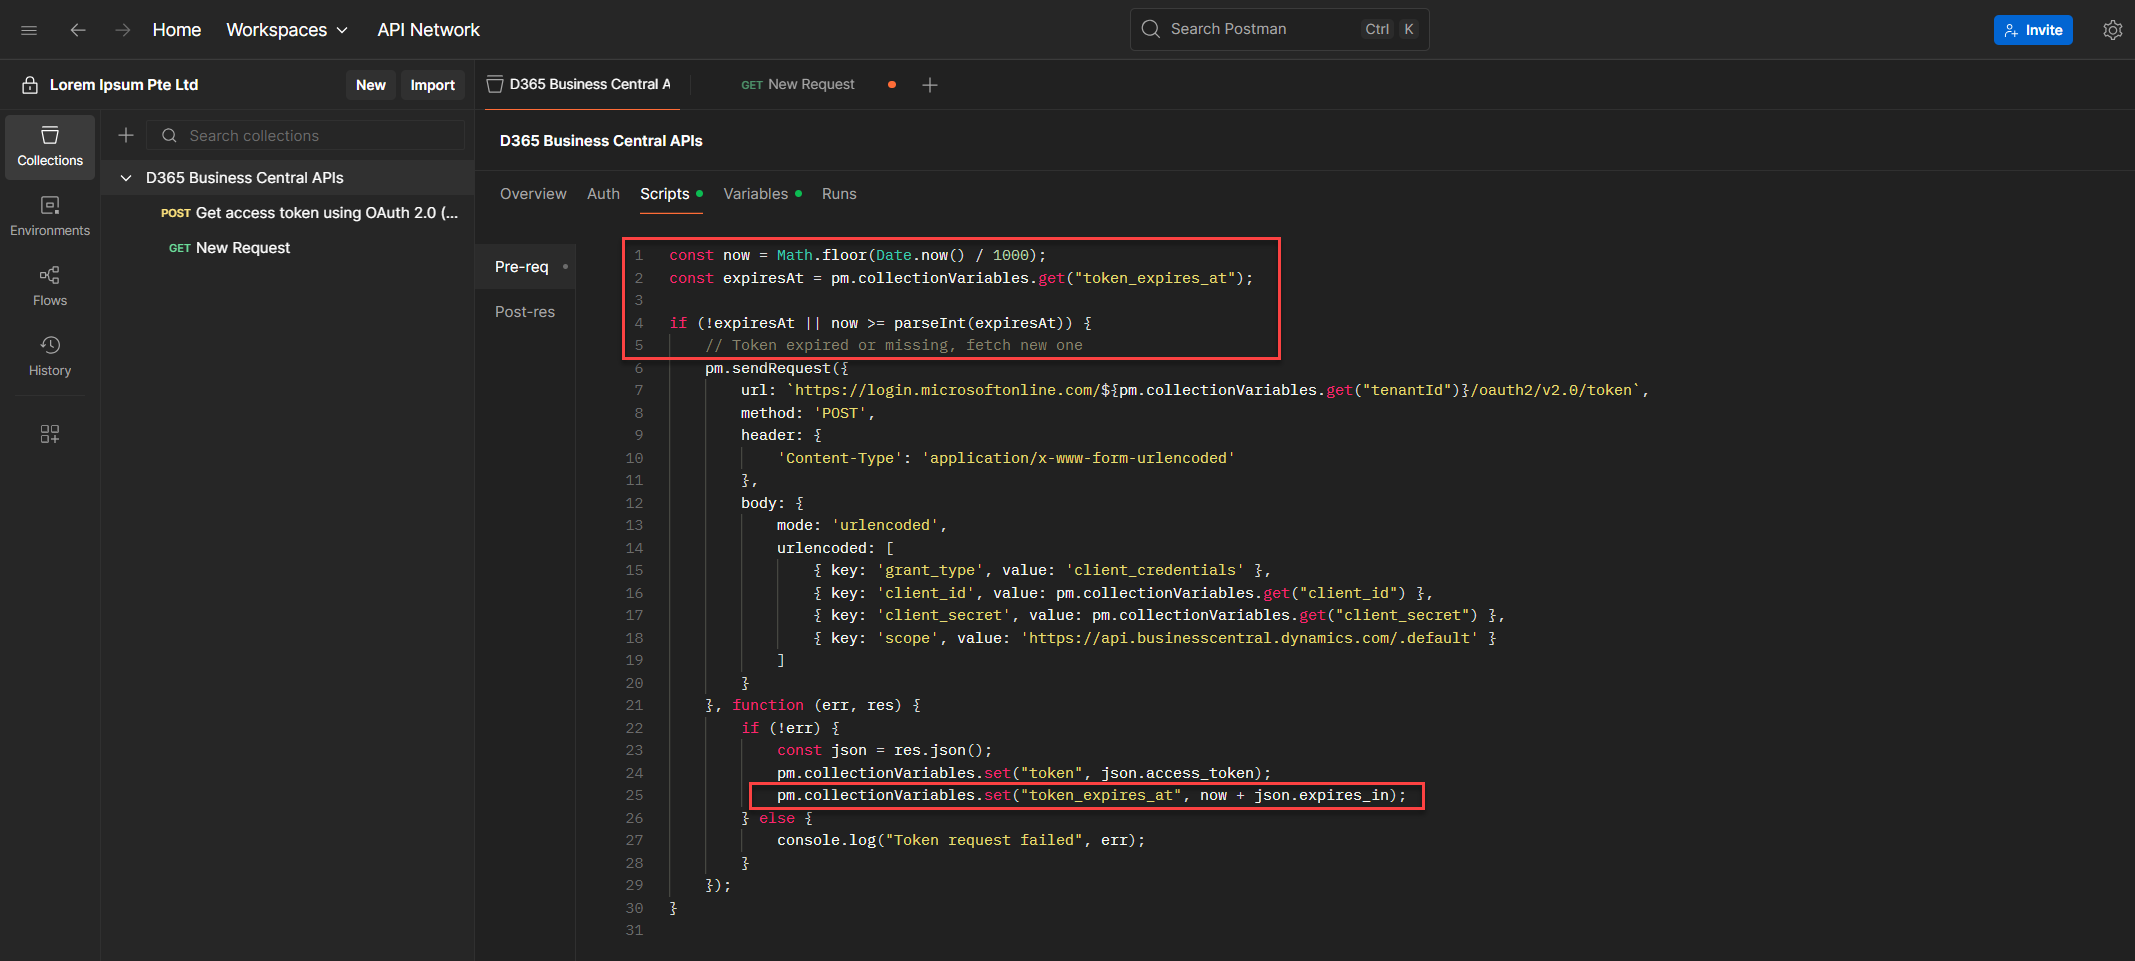
  const now = Math.floor(Date.now() / 1000);
  const expiresAt = pm.collectionVariables.get("token_expires_at");

  if (!expiresAt || now >= parseInt(expiresAt)) {
      // Token expired or missing, fetch new one
      pm.sendRequest({
          url: `https://login.microsoftonline.com/${pm.collectionVariables.get("tenantId")}/oauth2/v2.0/token`,
          method: 'POST',
          header: {
              'Content-Type': 'application/x-www-form-urlencoded'
          },
          body: {
              mode: 'urlencoded',
              urlencoded: [
                  { key: 'grant_type', value: 'client_credentials' },
                  { key: 'client_id', value: pm.collectionVariables.get("client_id") },
                  { key: 'client_secret', value: pm.collectionVariables.get("client_secret") },
                  { key: 'scope', value: 'https://api.businesscentral.dynamics.com/.default' }
              ]
          }
      }, function (err, res) {
          if (!err) {
              const json = res.json();
              pm.collectionVariables.set("token", json.access_token);
              pm.collectionVariables.set("token_expires_at", now + json.expires_in);
          } else {
              console.log("Token request failed", err);
          }
      });
  }
This ensures the token is only refreshed when needed, making your collection faster and more efficient.
Variable Scoping Comparison
Quick tip: choosing the right variable scope in Postman can make or break your automation. Here’s how they stack up:
What Can Go Wrong (and How to Fix It)
Running into issues is normal. Here’s a reference list to help you debug faster:
Pro Tip: Keep It Secure
Keep your setup safe and maintainable with these best practices:
You never want to commit sensitive credentials to version control. Instead, use Current Value in Postman to store secrets locally without syncing them to the cloud. Rotate those secrets regularly to avoid stale access, and whatever you do, don’t hardcode credentials directly into your scripts. It’s tempting, but it’s risky and hard to maintain.
A few small habits here go a long way toward keeping your automation clean, secure, and handoff ready.
TL;DR – What’s Next
You’ve now built a reusable, secure, and scalable Postman collection for token automation. By defining collection-level variables, scripting token acquisition, and implementing expiry-aware refresh logic, you’ve eliminated manual setup and made your flow handoff-ready. This setup is modular, repeatable, and built for real-world integration with Business Central APIs.
Coming in Part 4: We’ll automate the entire Entra app registration process using Azure CLI, from creating the app and assigning permissions to generating secrets and granting admin consent. No portal clicks, no guesswork, just a fully scriptable setup that outputs everything you need for token testing and collection reuse.
Support the Community
♻️ Repost to support the Microsoft Dynamics 365 Community and follow Jeffrey Bulanadi for technical insights above and beyond Business Central, AL development, and scalable integration architecture.
Demo Repository
If you want to see how the expiry aware token flow works in action, I’ve shared a GitHub sample focused entirely on Part 3. It walks through the updated pre-request script, shows how to store and check the token’s expiry timestamp, and demonstrates how to refresh only when needed.
You can explore the setup here: 👉 OAuth2 Setup and Automation Part 3 on GitHub
✨ Part 4 is live: Learn How to Automate Entra App Registration Using Azure CLI View blog
Helpful References
Access tokens in the Microsoft identity platform - Microsoft identity platform | Microsoft Learn
Process data and script workflows using Postman JavaScript objects | Postman Docs
Join the Conversation
Share your thoughts, ask questions, or discuss this article with the community. All comments are moderated to ensure quality discussions.
No comments yet
Be the first to start the conversation!
0 Comments
Leave a Comment